
I put this blog up and then sat back and realized I have four years worth of stuff just hanging out waiting to be shared. So, since I wasn’t sure of the best way to start, I’m just going to dive in with our most recent birthday party and work backwards on parties and Halloween stuff for the past few years.
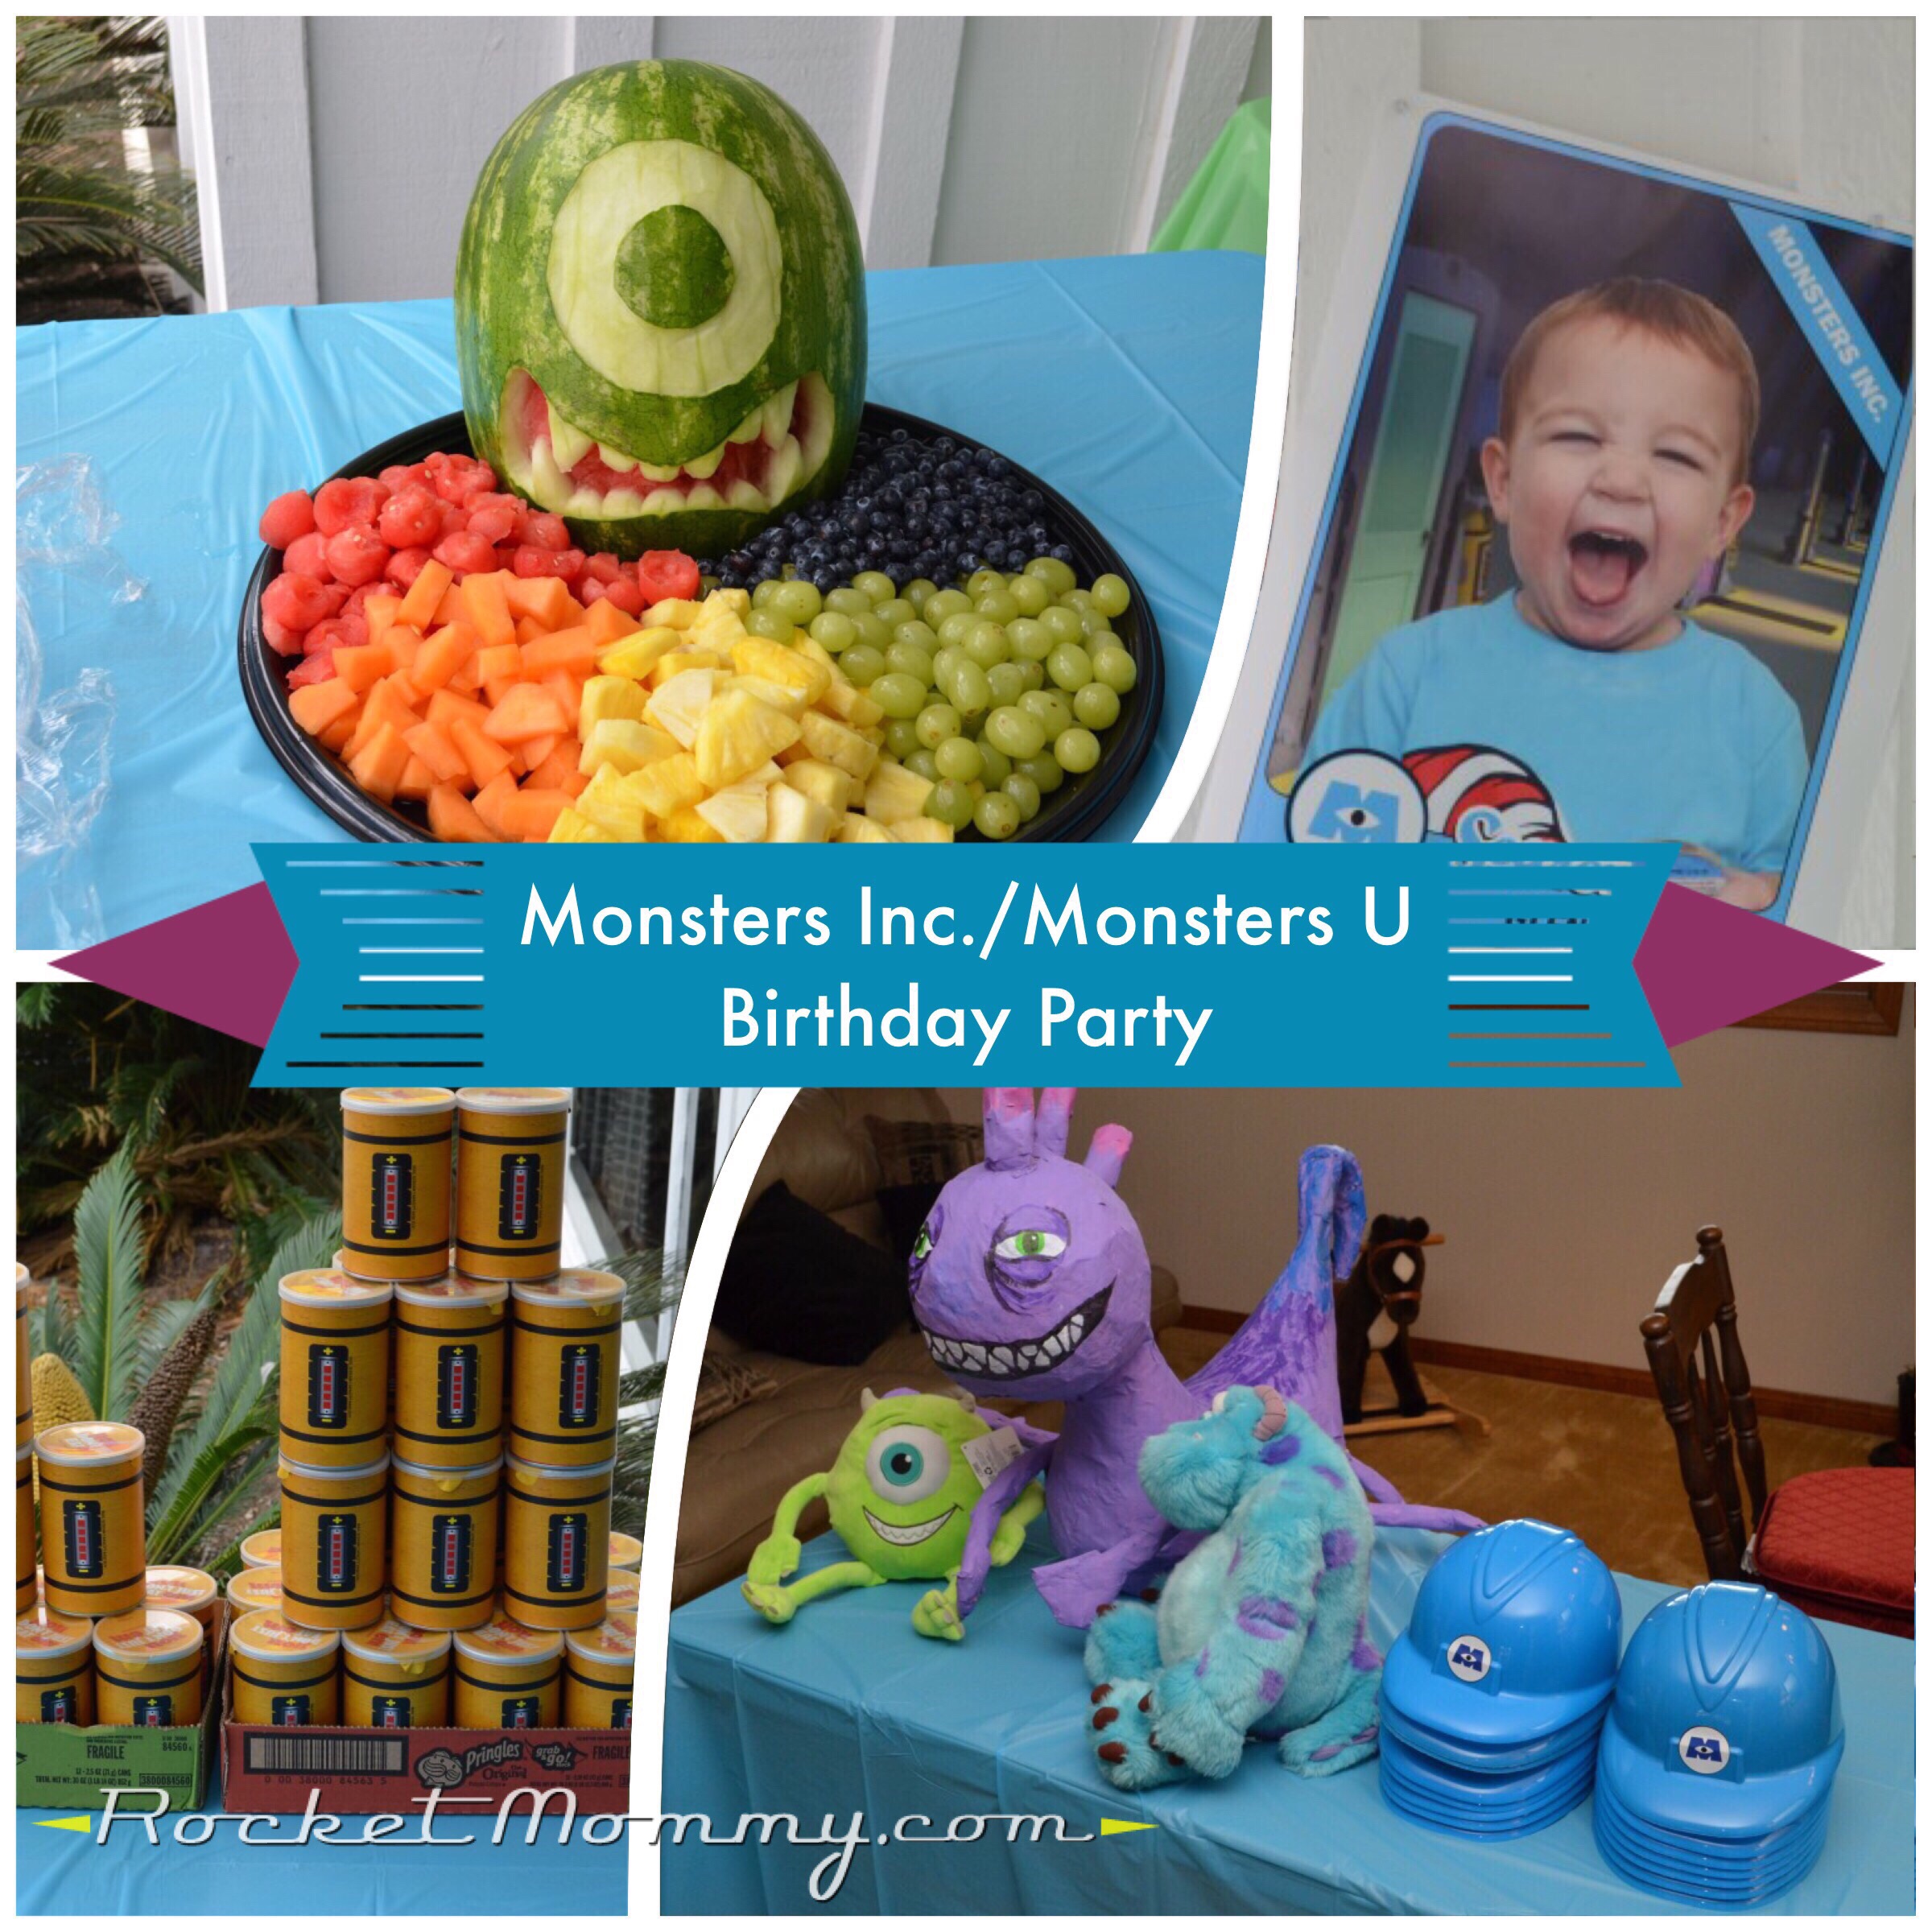
All three kids are a bit Pixar obsessed, and for a few months, Monsters Inc and Monsters University reigned supreme in our movie collection. I thought it would make a fun theme for a combination 4th and 2nd birthday party. The only trouble was that I had made a promise to my husband that we were only going to do a “big” birthday party every other year, and since the first birthday is a huge deal, that meant we’d only have “big” parties on the odd years and the evens would more low-key.
Well…what can I say? I tried to keep our guest list lower than usual so it wouldn’t be a “big” party, but when you’re celebrating three birthdays at once, it’s almost impossible to keep things small without leaving some good friends and family out. And at ages four and two, the kids are aware of what a birthday is and are excited about parties and cake, and realistically we only have a precious few years where we can do big fun parties at home before they’re embarrassed of us and just want to go to the movies with their friends. So I tried to scale back – I sent an electronic invitation through Punchbowl instead of designing stationery, and I didn’t go nuts with decor, but it still ended up being a crafty extravaganza, and it was a ton of fun and I’m not even sorry :D.
Here’s the pinboard I created in preparation for this party.
And here’s a rundown of some of the things we did to make our party special.
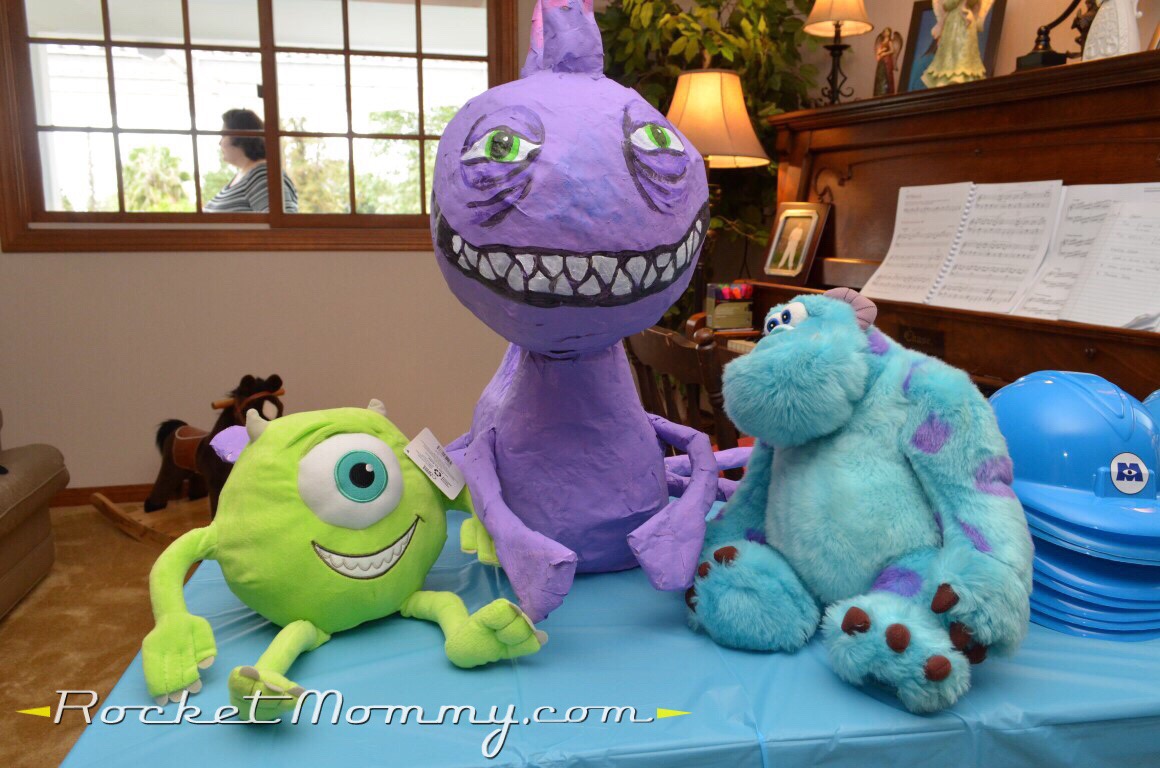
DIY Randall Piñata
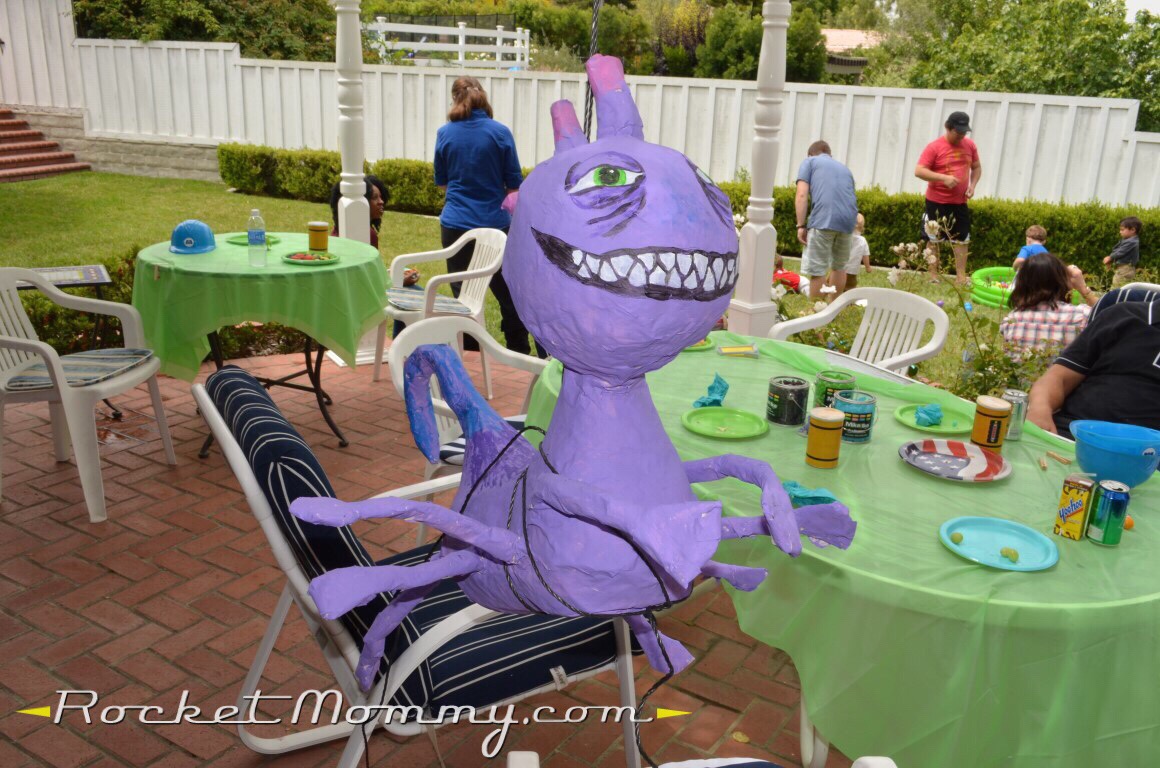
I’ve never really understood piñatas. Most of the time, you get a piñata that’s in the shape of your beloved main character, the one your child loves so much that you planned an entire party around them. And then you hand the kids sticks and let them beat that character until their body gives out and their candy guts are all over the floor. Doesn’t this seem kind of, I don’t know, barbaric? Or traumatic? Why can’t you ever find a piñata of the villain instead? Well, if you’re so inclined, you can make one yourself!
I followed instructions from Piñata Boy to mix up my papier mâché paste, and I built the body and head using some latex balloons and cardstock. The legs, tail, and horns were newsprint that I rolled up and taped with masking tape. This project takes a LOT of masking tape. I think I went through two whole rolls trying to keep everything in place before I started the papier mâché.
The whole project took about a week because each layer needs to dry at least overnight, and everything has to be completely dry before you paint. I only did two layers of papier mâché on everything, and I was SHOCKED by how strong it was and how difficult it was for the kids to break. I also liked that it functioned as decor for the entrance for the beginning of the party.
Mike Wazowski Oreos
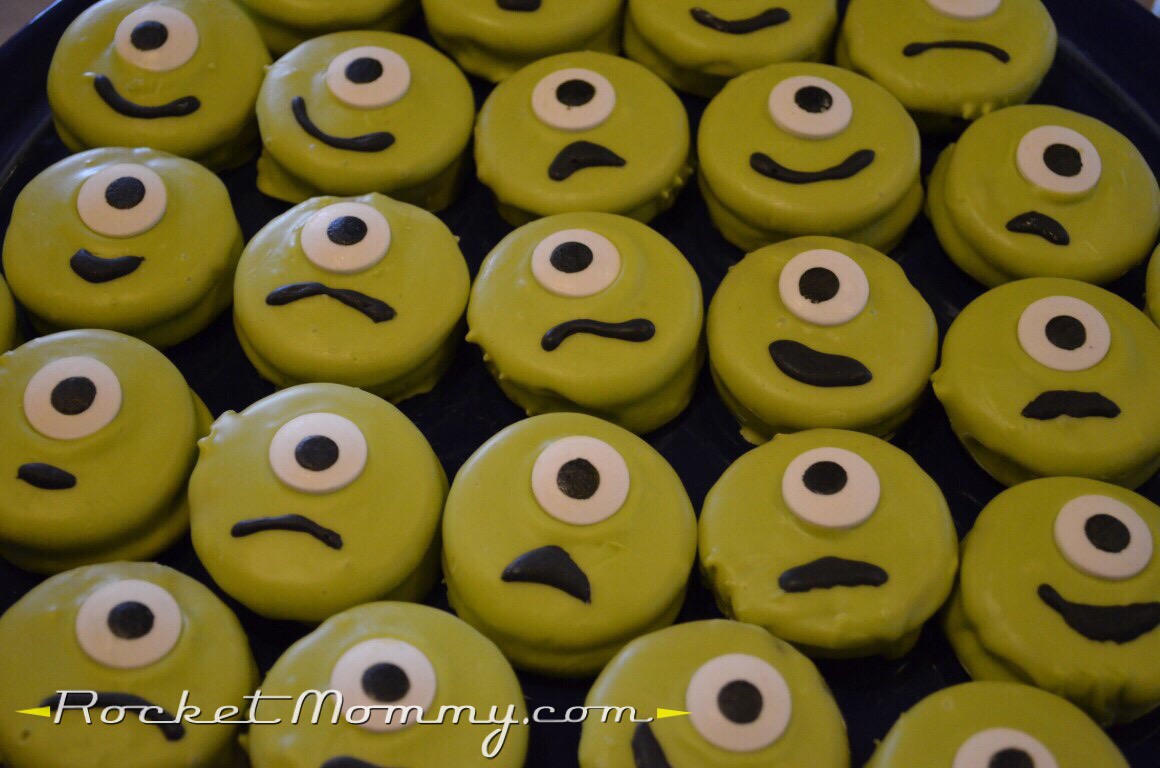
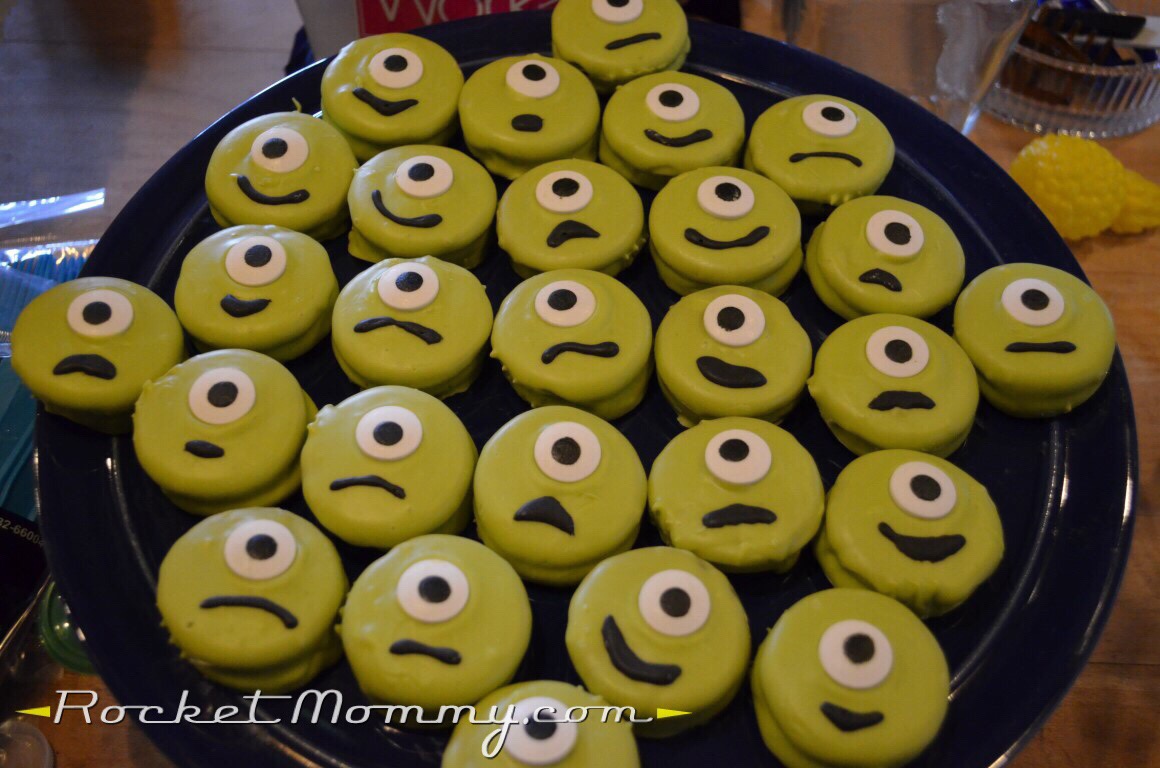
If you want a DIY project that will give you some serious bang for your buck, try some decorated dipped Oreos for your next party. Seriously, these could hardly be any easier. You buy the Wilton colored candy wafer things (I know, they’re all full of trans-fat grossness, but they work really well!), follow the directions on the package to melt them in the microwave, plop an Oreo in, flip it over with a fork, lift it out, shake it gently from side to side to let the coating smooth itself out, and put it on a sheet of parchment to dry. These were particularly easy because Wilton sells the candy eyeball decorations and they’re a pretty good size for this project. I mixed up a very small batch of royal icing to draw the mouths, but you could just as easily buy the can of cookie decorating icing if that’s too daunting.
Mike Wazowski Carved Watermelon
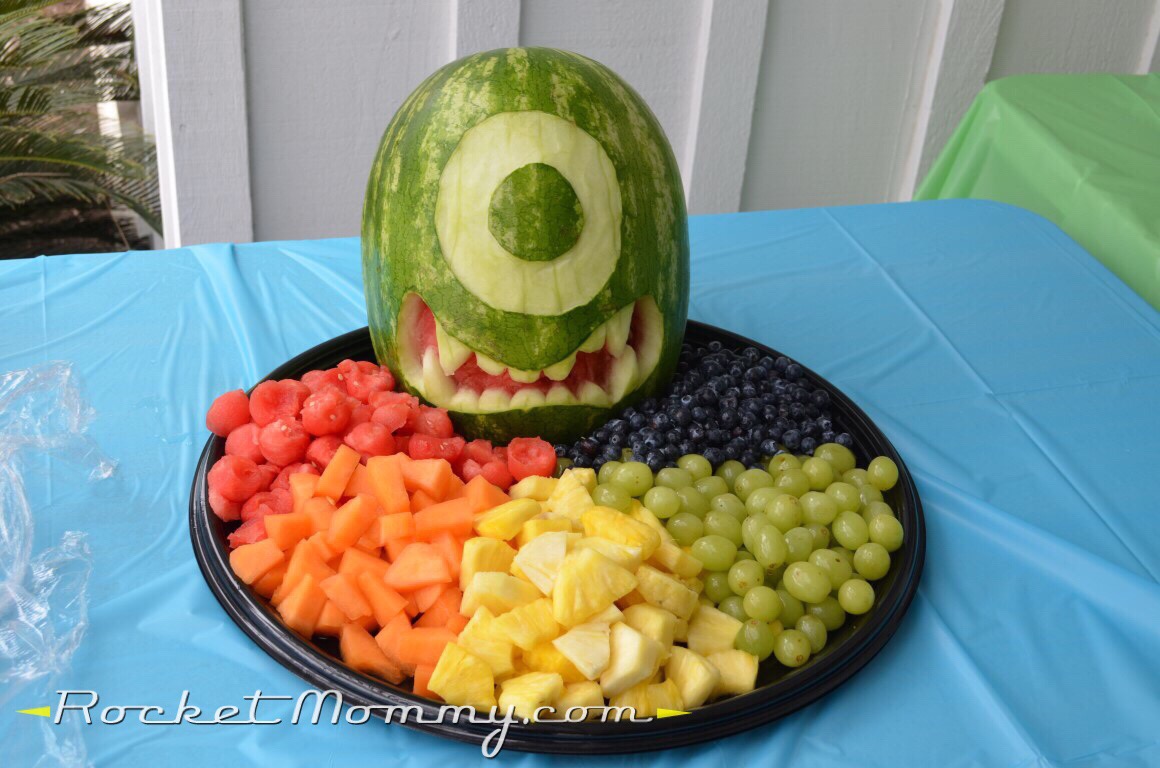
If you can carve a pumpkin at Halloween, you can carve a watermelon! It’s the same overall concept (in fact, it’s a little easier because the skin is thinner). I chopped off the bottom so I could get the melon out with a melon baller to use in the fruit display, drew the face the way I wanted it, and then used a small paring knife to peel away the outer skin for the white parts of the design and dug deeper through the rind to show the pink for the mouth.
Pringles dressed up as “scream canisters”
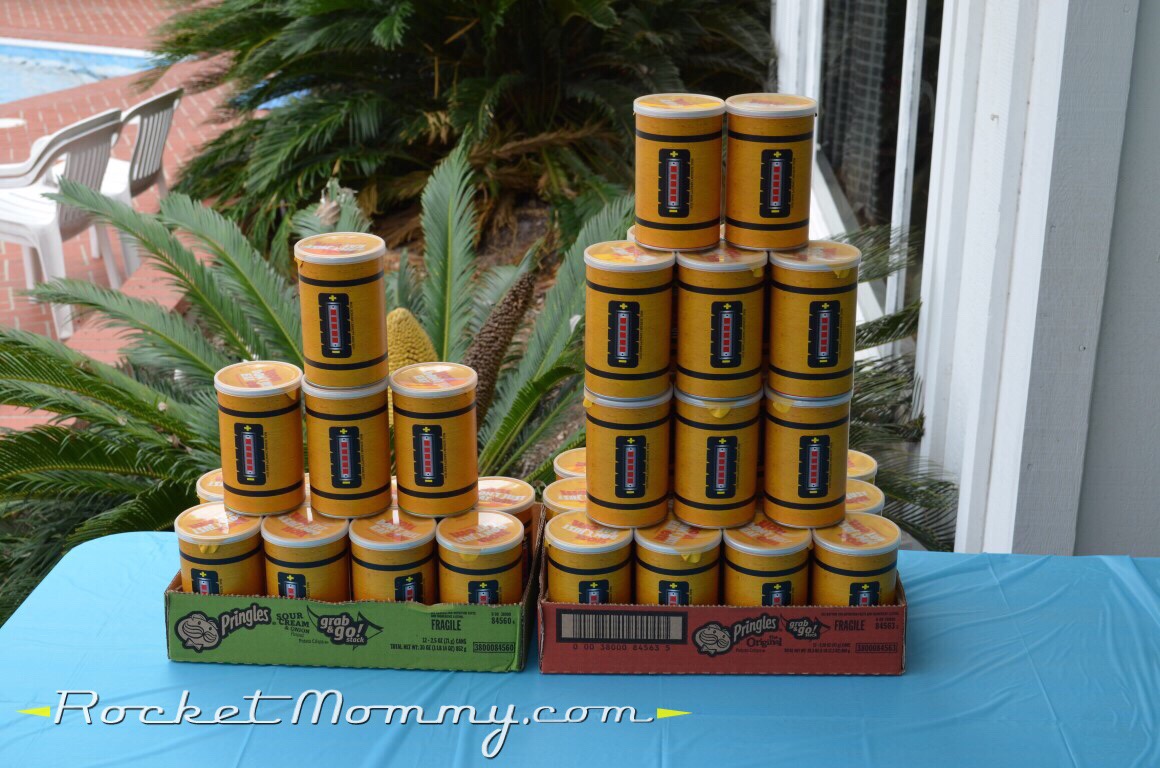
I saw this done with full-size Pringles cans to use as favor containers while I was frantically pinning ideas for this party, and I thought it would be a cute way to offer chips at the party. The warehouse clubs have these convenience-store-sized small cans of Pringles, and I created a printable wrap for them, cut it down, and just taped it around the cans. If I remember the next time I get to the computer, I’ll upload the wrap here for anyone who might need it.
CLICK HERE for the printable wrap for the Pringles scream canisters! Thank you to reader Valerie for reminding me to upload this!
Customizing a Grocery Store Cake
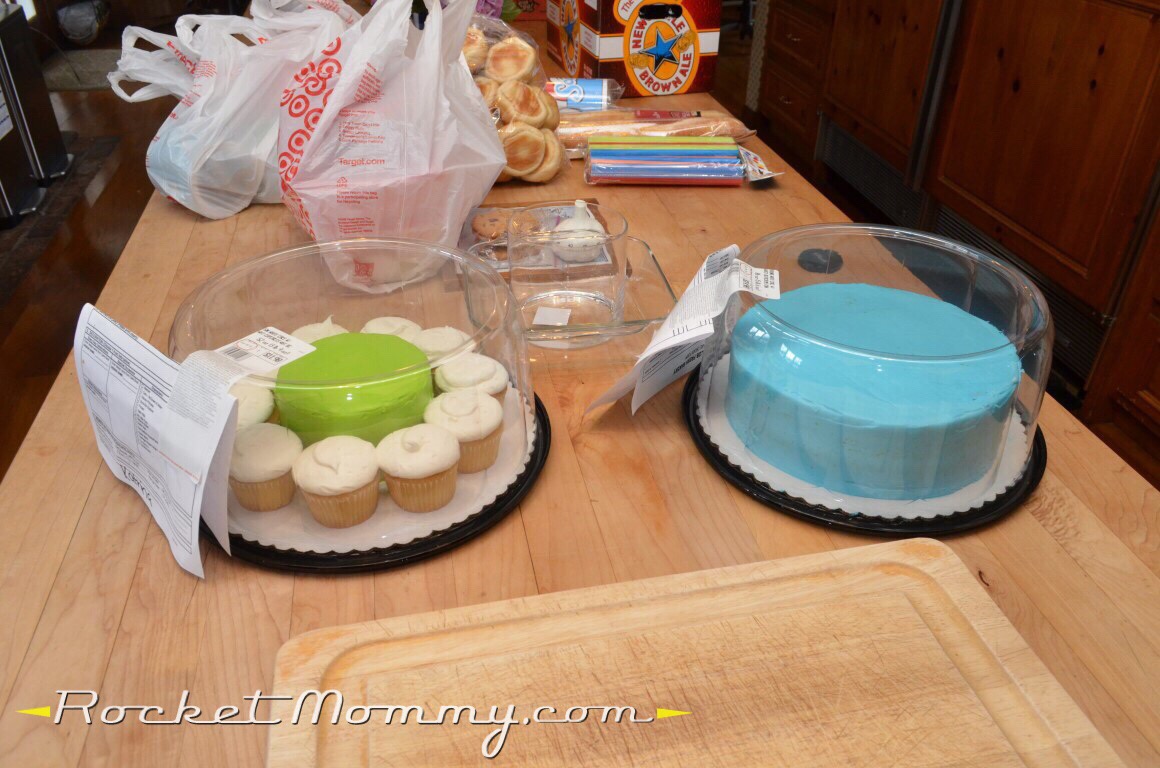
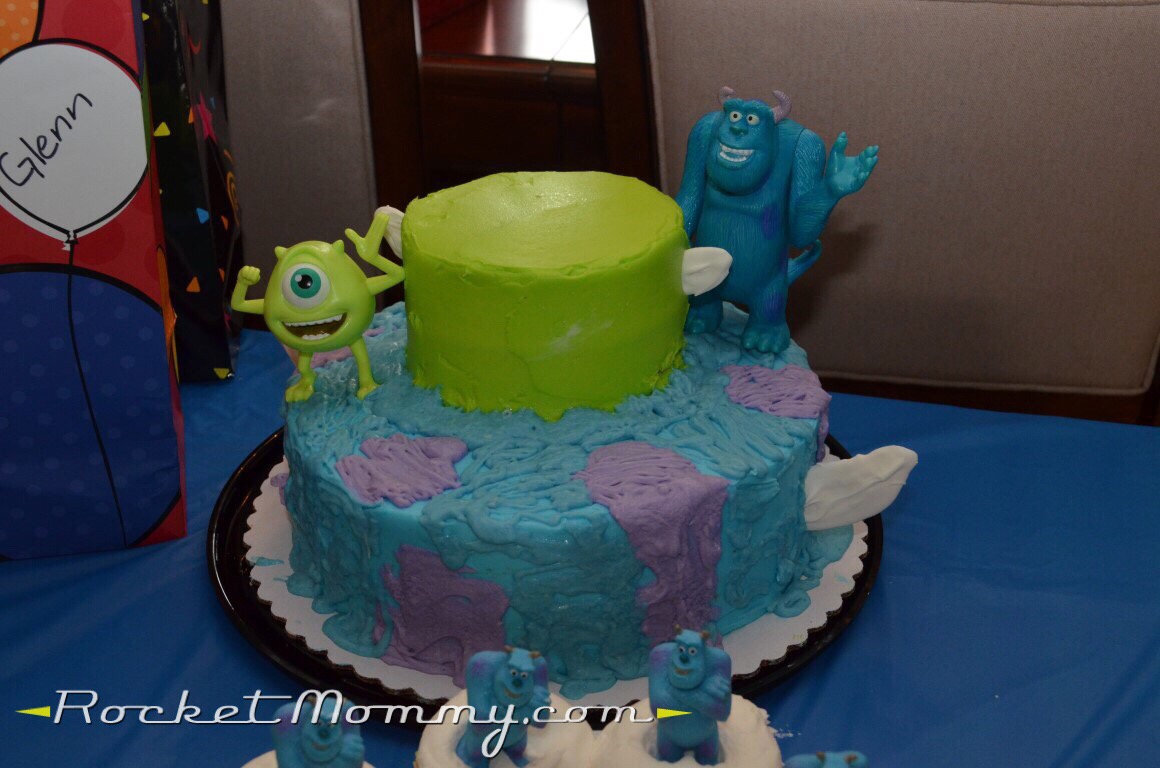
Pinterest is full of gorgeous birthday cakes, and while I love the look of a multi-tiered cake with fancy decorations, I can’t justify the crazy cost for something like that when a Sam’s Club cake tastes as good (or sometimes better!). Sam’s sells a two-tiered cake, but they required more advance notice than I was able to give them, and it turned out it was significantly cheaper to do a partial DIY. I ordered their small round cake frosted in blue and got the combo 5″ round cake with 10 cupcakes (round cake frosted green, cupcakes plain white). The lady at the bakery told me I’d need some supports in the lower layer if I wanted to stack them, so I bought some very wide drinking straws and cut them to the right size. I removed the cupcakes and set them aside, then carefully cut the cardboard circle that the little green cake was sitting on until it was sticking out only about 1/4″-1/2″. I pushed the drinking straw pieces into the blue cake, carefully put the green cake (cardboard and all) down on top, and then used homemade buttercream frosting to make the blue cake look “shaggy” like Sully’s blue and purple fur. Word of advice: if it’s hot, don’t bother attempting to make your own – mine was a melty mess, as you can see in the photos. I wish I’d just bought white frosting and tinted it to match. Live and learn.
The horns that I stick into each layer were made from extra white candy coating that I had just used for another project – I just dribbled some out in a horn shape on parchment paper and let it dry.
Monsters Inc Helmets
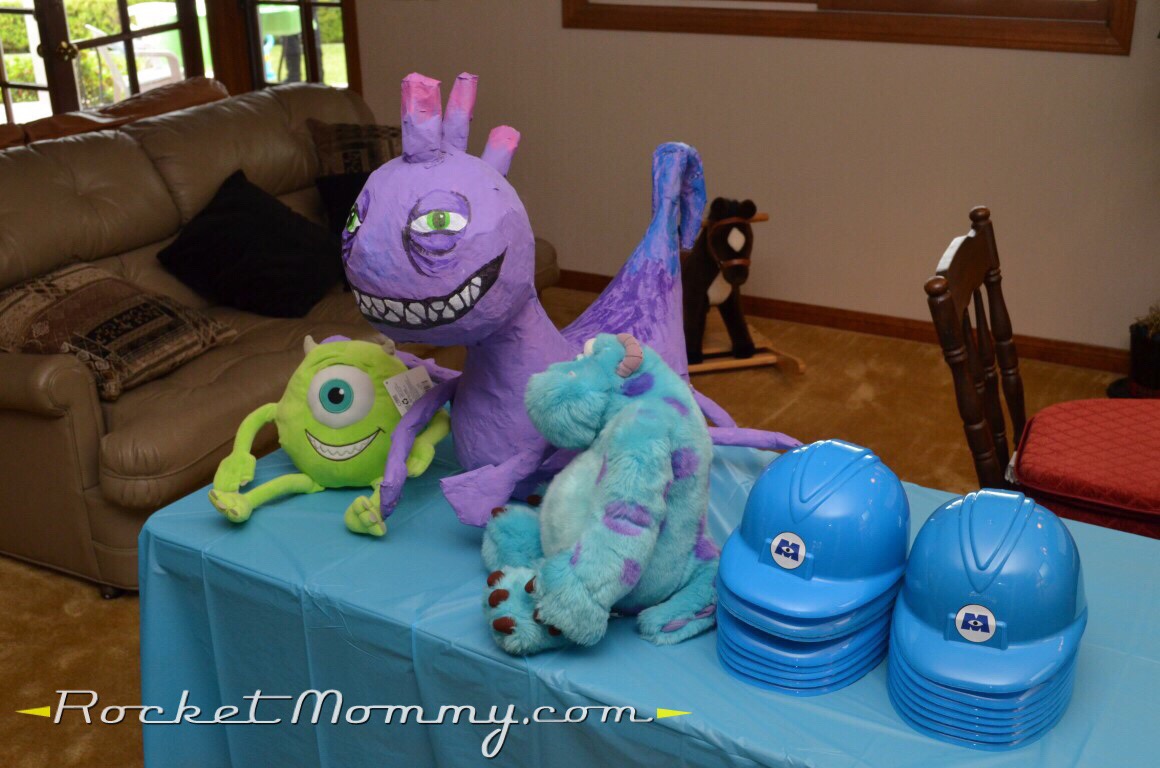
These were given to each kid who attended in lieu of a goody bag full of random trinkets. I am very anti-goody bag (sorry, friends, I swear YOUR goody bag was an exception and none of it got thrown away the first night!) so I try to give one interesting toy for each kid as a favor instead. These awesome blue construction helmets came from a lovely and dangerous store we have in SoCal called Daiso. Daiso is a Japanese discount store where almost everything is $1.50, and everything is fascinating and adorable and before you know it you’ve spent $50 on stationery and gift bags and chopstick rests. They have these hard hats in red, yellow, and blue, but you can’t order any one specific color because the store gets an assortment from the factory. I visited all three stores in our area about once a week for a month to collect this many blue hats, and then I printed and cut the stickers to put on them.
“Scare Card” Posters
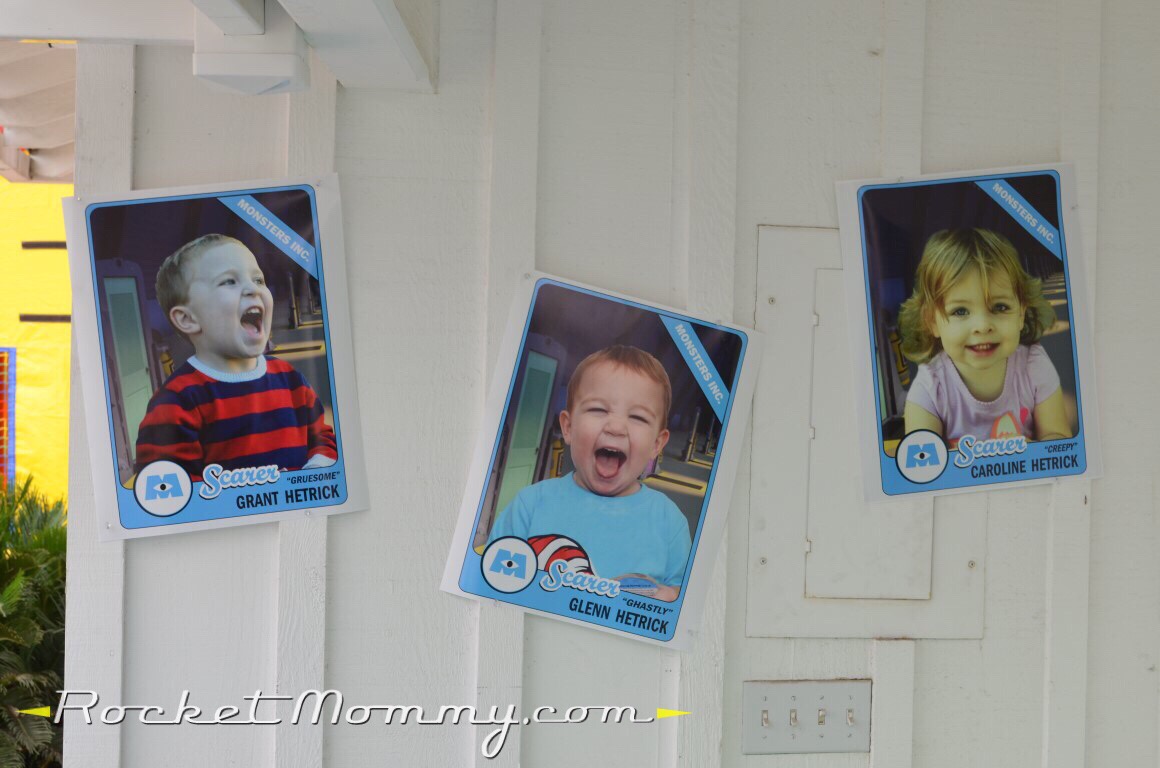
If you’ve watched Monsters University all the way to the credits, you’ll know what these are supposed to be. Scare cards! My kids thought these were so cool. I found a picture of one of the cards from the credits, recreated the design in Illustrator, combined a “scare floor” background with pictures of my kids making their best “scare faces,” and had them printed poster-size at Sam’s. Initially, I wanted to set this up as a photo booth activity, but I scrapped it (because, after all, this wasn’t supposed to be a “big” party, wink wink) and just did these instead.
Bonus Detail – Mike and Sully Juice!
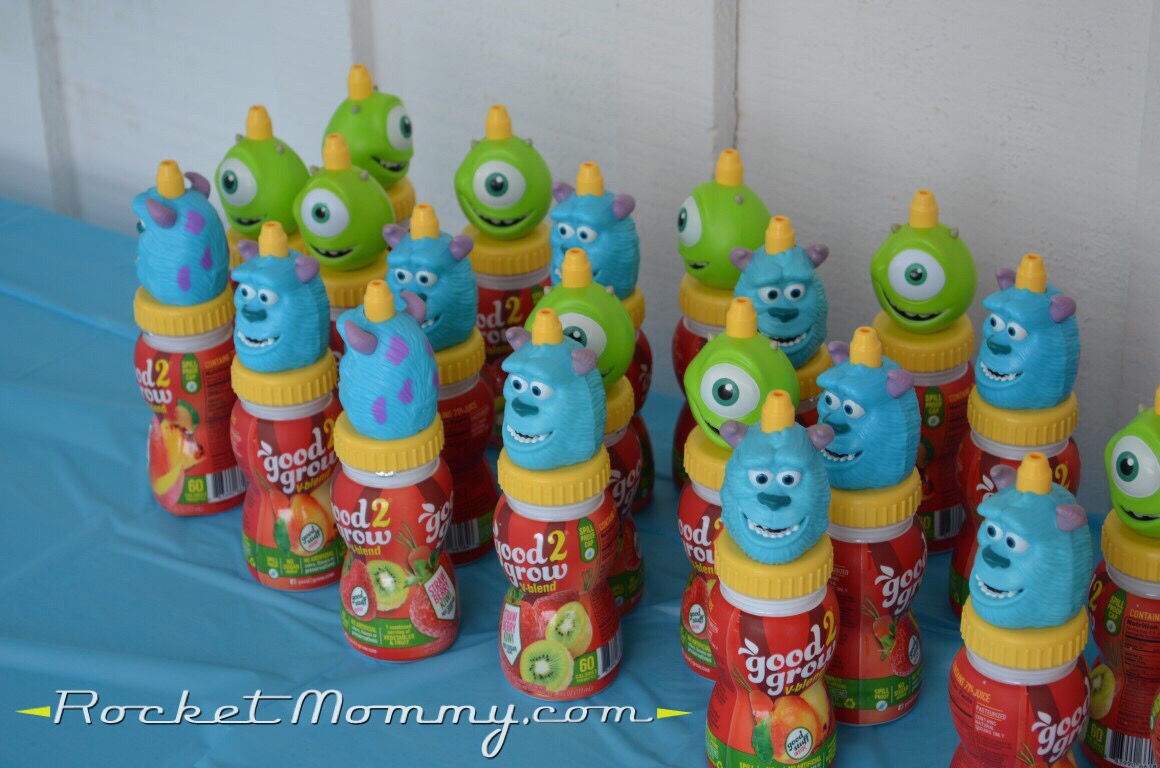
How’s this for a lucky dollar store find?! I was browsing there for something else and happened upon these. I think I literally jumped up and down in the aisle. And $1 each is a great price for the ones with the character heads – you can buy refills for them for about 50 cents each, so they’re something else the kids can take home with them.
Overall, this was a really fun party to put together. We didn’t do anything particularly special for the food, just pizza and chicken nuggets to go with the fruit and chips, and we rented a bounce house to keep the kids entertained. And next year, when the kids turn 5 and 3? Then we can have a BIG party! 😉