
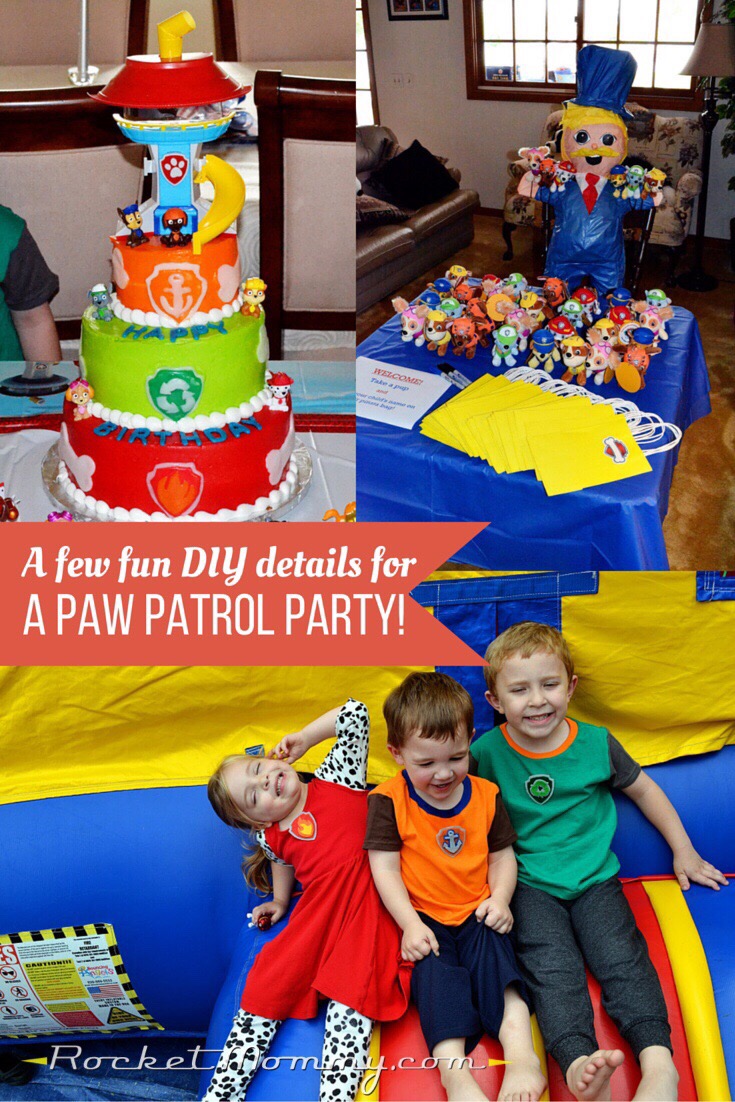
I’ve got a huge backlog of fun stuff that needs to go up on the blog, but June was a heck of a busy month for this family – three birthdays, a big birthday party, Father’s Day, end-of-year MOMS Club events, ear tube surgery, preschool graduation, AND an exciting visit from the out-of-town grandparents – so bear with me, I’ll be playing catch-up for a while. But while it’s all still fresh in my mind, I wanted to go ahead and share our big birthday party recap for the year!
This was G’s fifth birthday and g and C’s third, and they all agreed on a Paw Patrol theme. I’ll be totally honest, I wasn’t super thrilled with this choice – as much as they love Paw Patrol, I didn’t feel like it gave me very many opportunities for all the crazy DIY that I love to do for our parties. But as the plans started to come together, I found a few areas where I could have some fun, and I kept the rest of it pretty low-key.
And before I get going here, I need to give a huge shout-out to my husband, my mother, and especially my father-in-law for making this post possible, since I made the rookie mistake of getting too busy with setting things up and COMPLETELY FORGOT TO TAKE PICTURES! Thank goodness everyone else was on the ball and able to help out! Rocket Daddy covered the cake in great detail, and my mom and FIL both got great shots of the kids in their outfits and of the piñata. Whew!
Pup Pad Invitations
Designing invitations is still my favorite thing, so even though a printed invite isn’t super common these days, I really wanted to make one this time around. I drew Ryder’s Pup Pad in Illustrator and set the front of the invite up so that the kids’ pictures were included in the circle with the Paw Patrol pups.
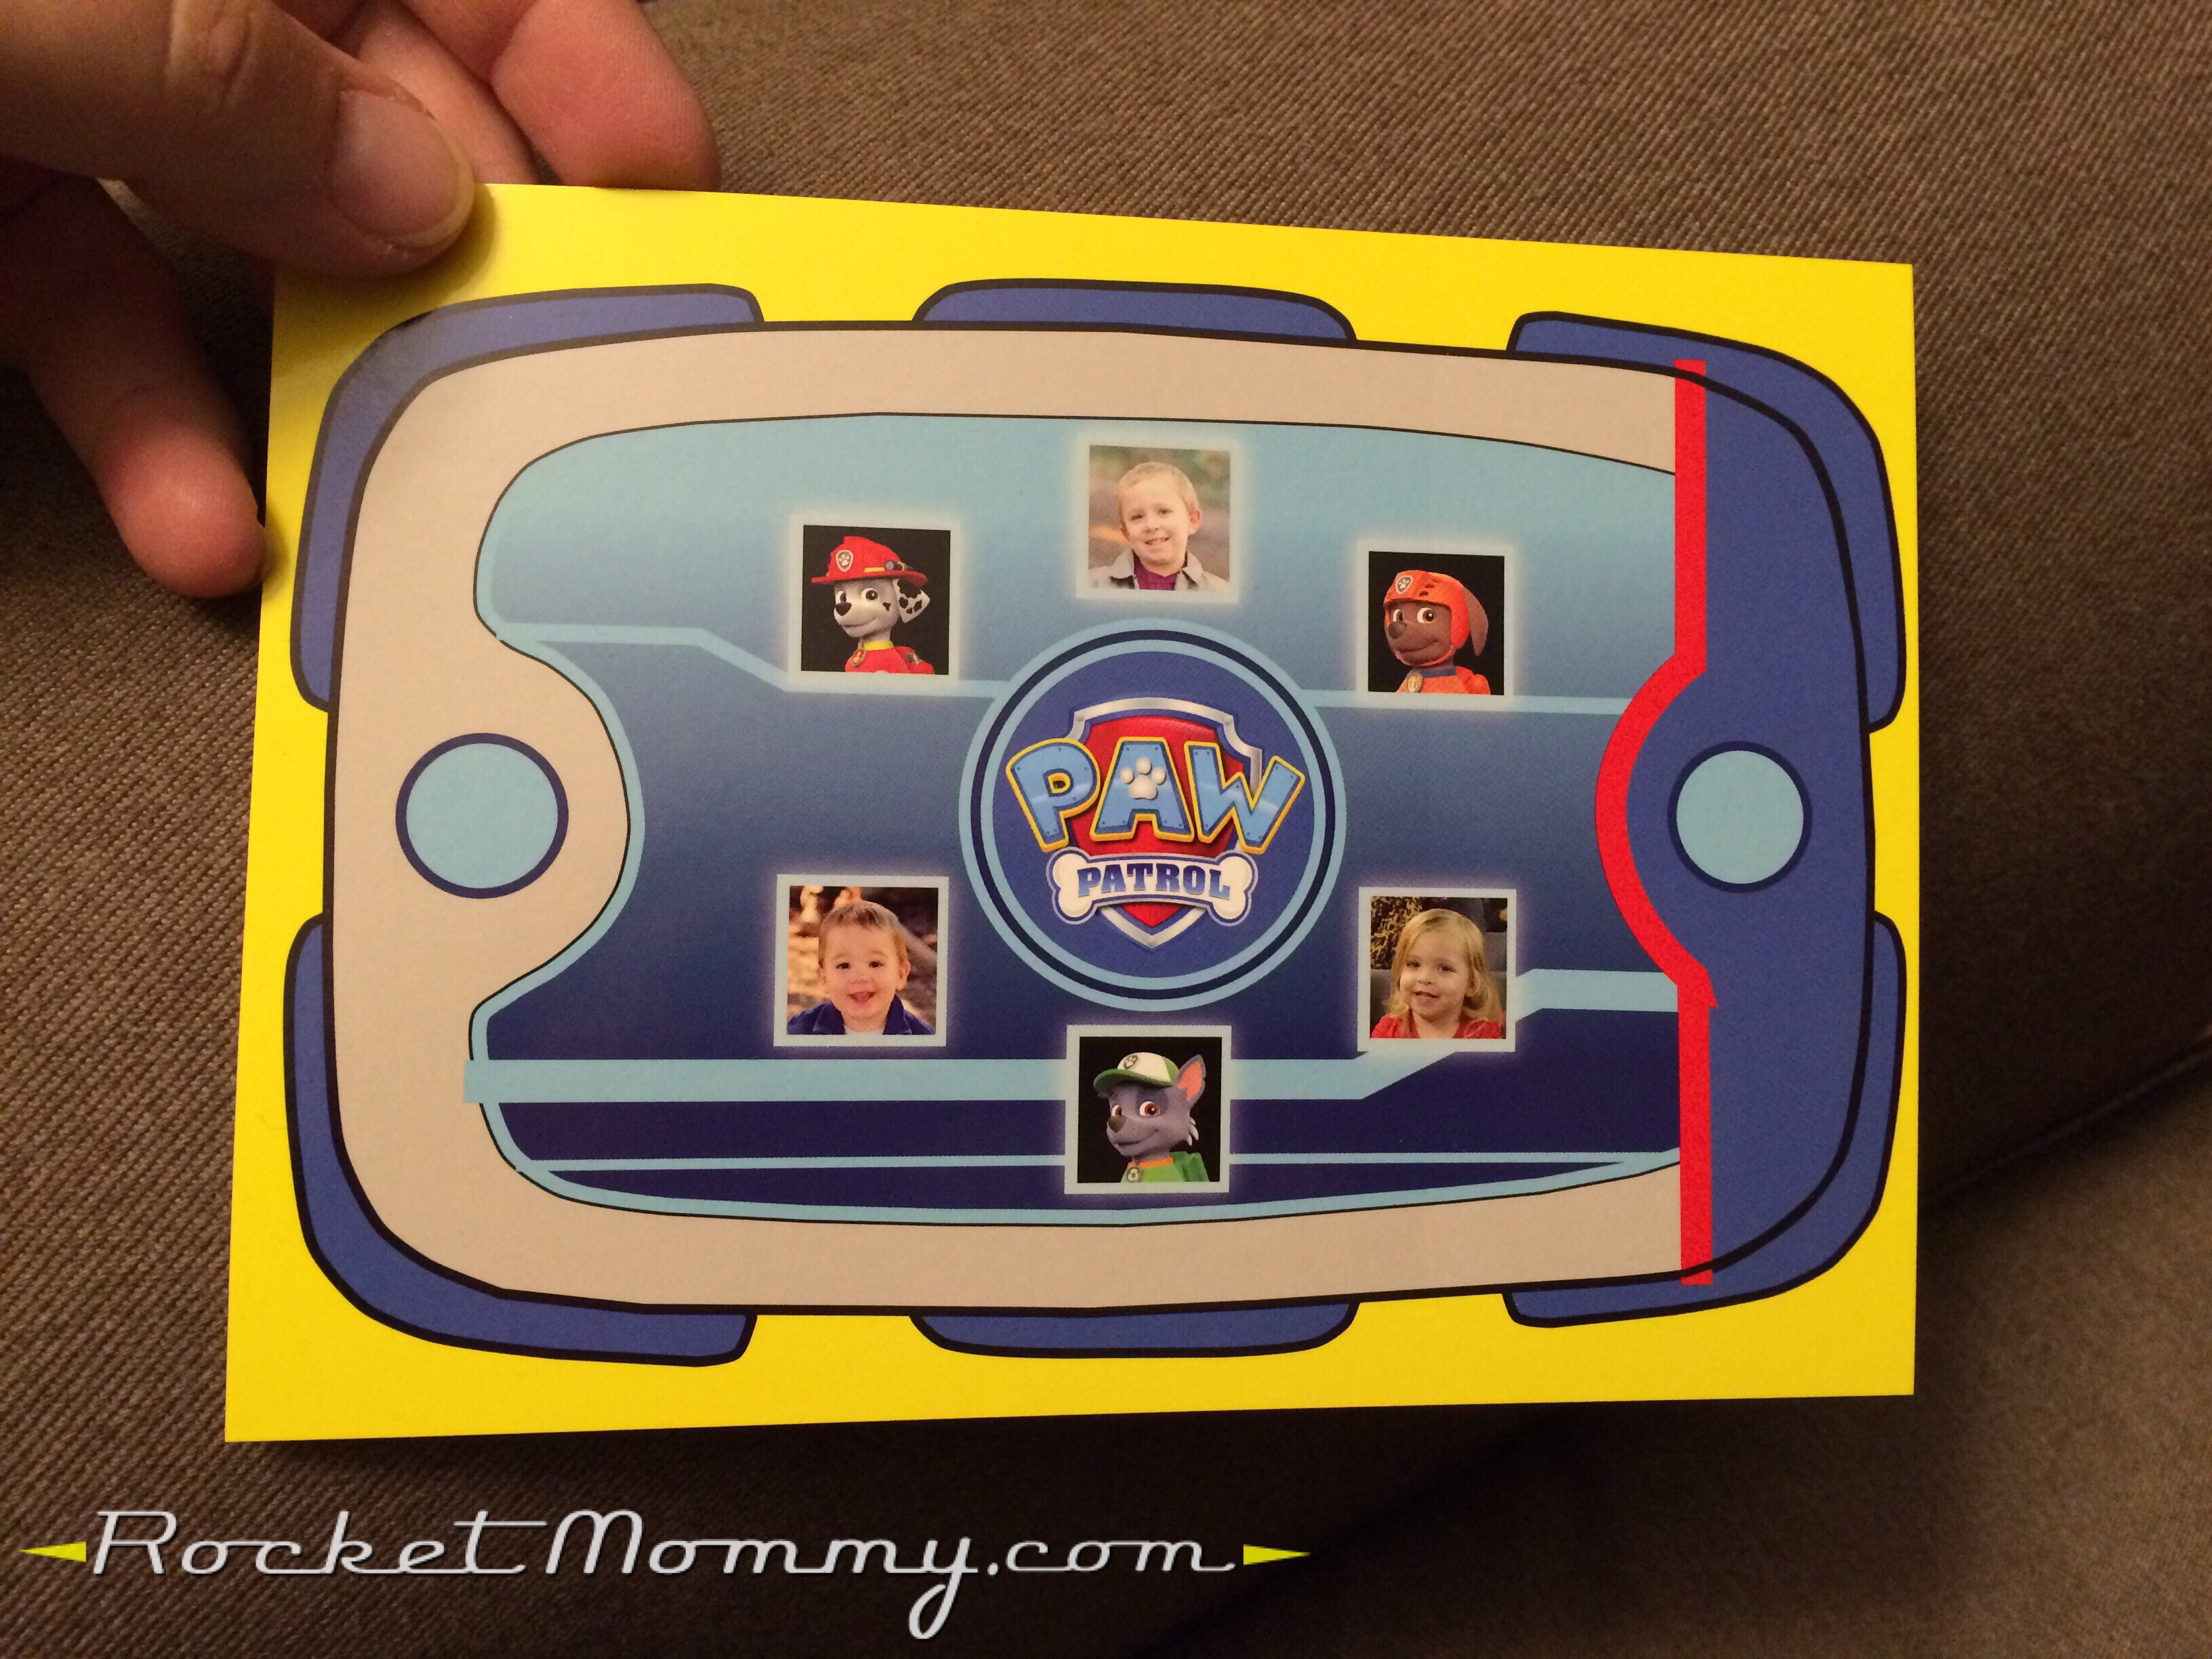
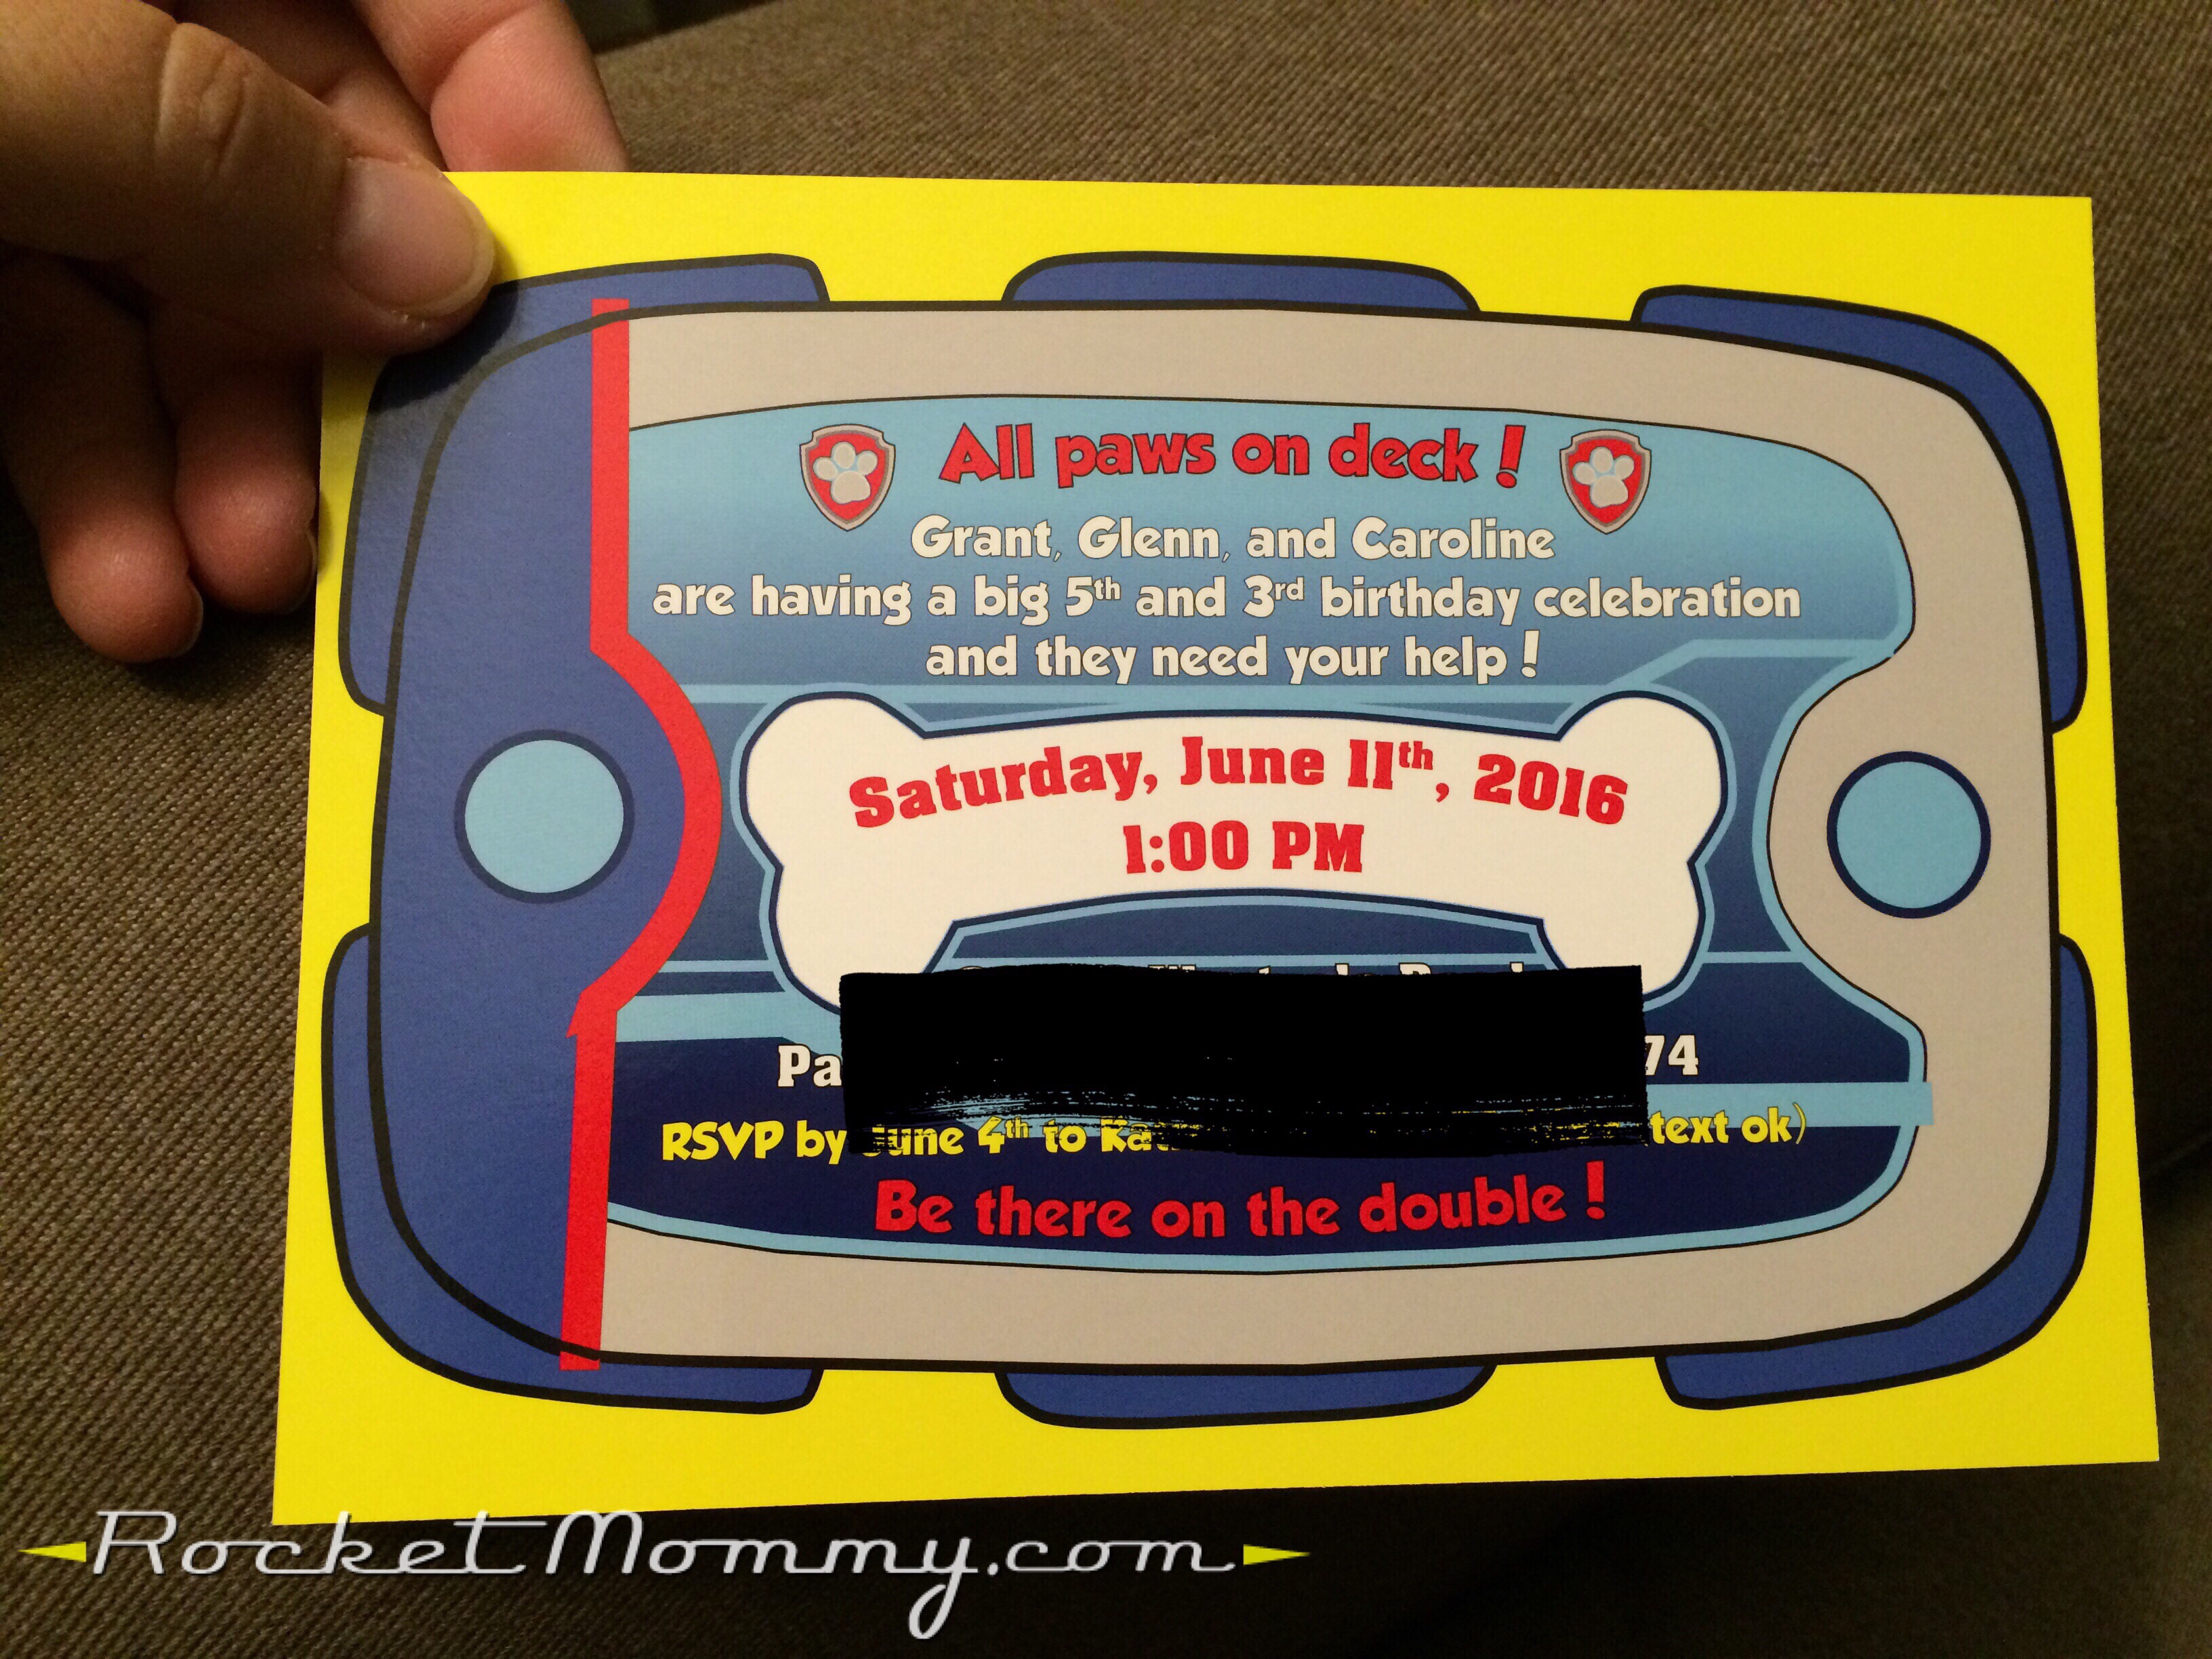
The back used the same Pup Pad illustration as a background, and it had all of the pertinent party information.
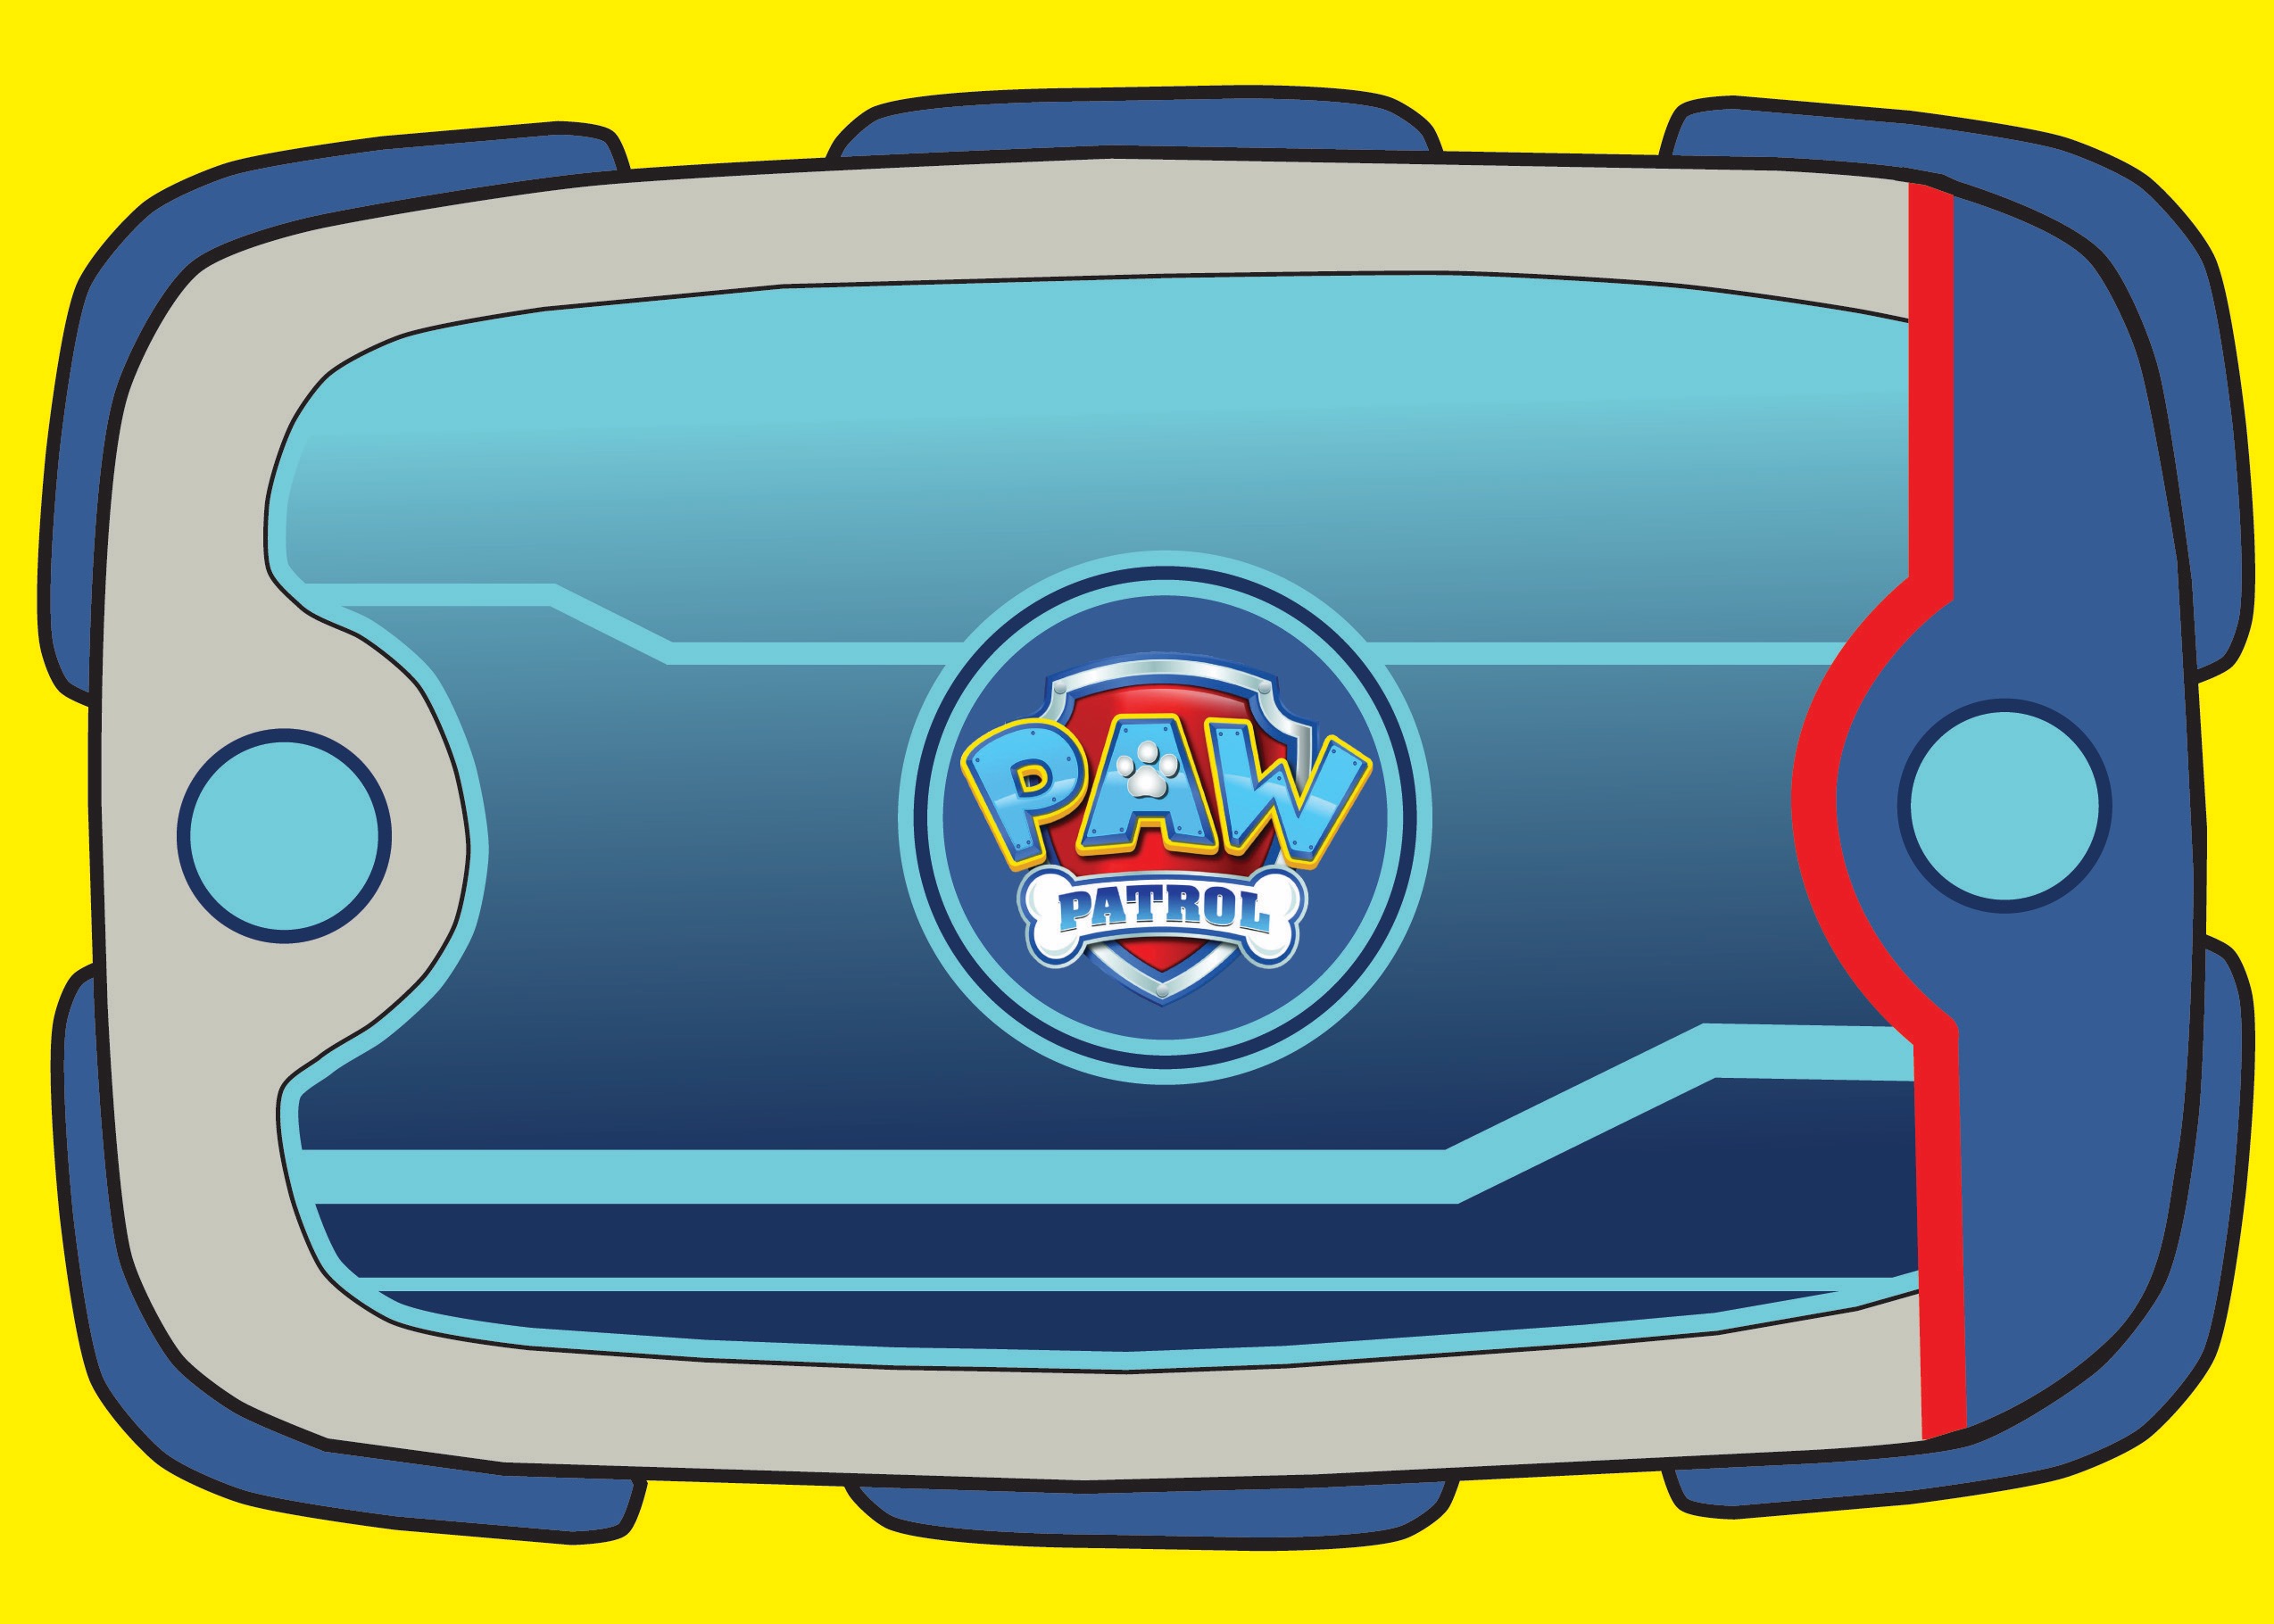
In case any other Paw Patrol party planners can get some use out of it, here is the pup pad illustration I made in .JPG form – feel free to use it and add your own information to it with whatever editing software you have. It’s sized at 5″x7″, and it could easily be a single-sided invite that you print as a photo. My kids stole all of the extra printed invitations and used them as toy pup pads for weeks, so it might be worth printing a couple of these just to play with!
Click on the images below to view them at full resolution, then right-click to save them to your computer.
Front:
Back:
Paw Patrol Themed Outfits
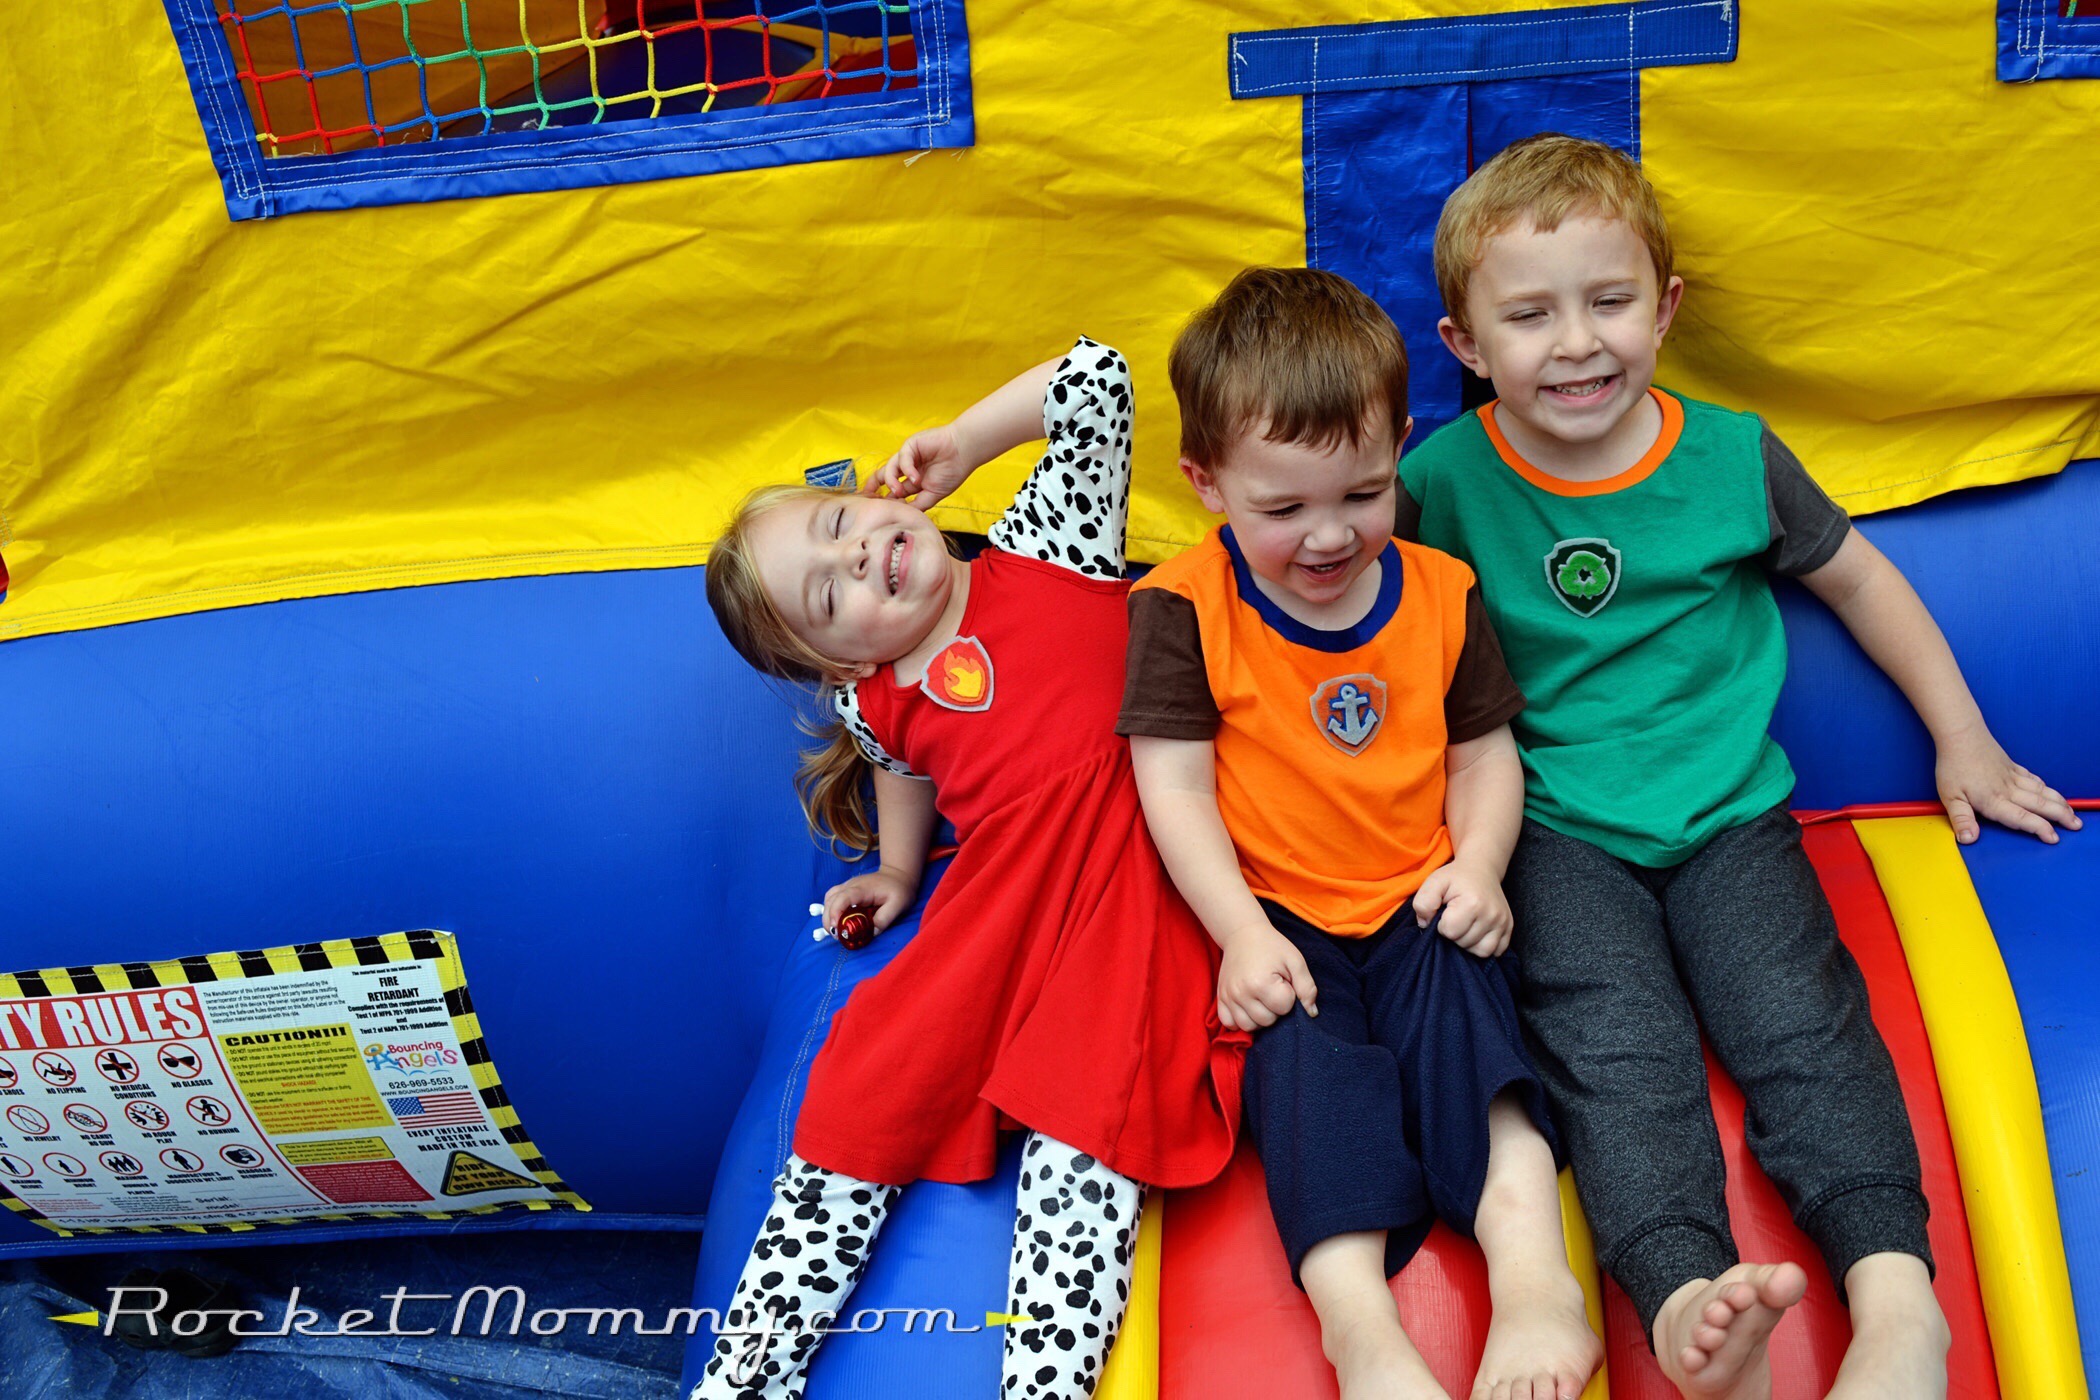
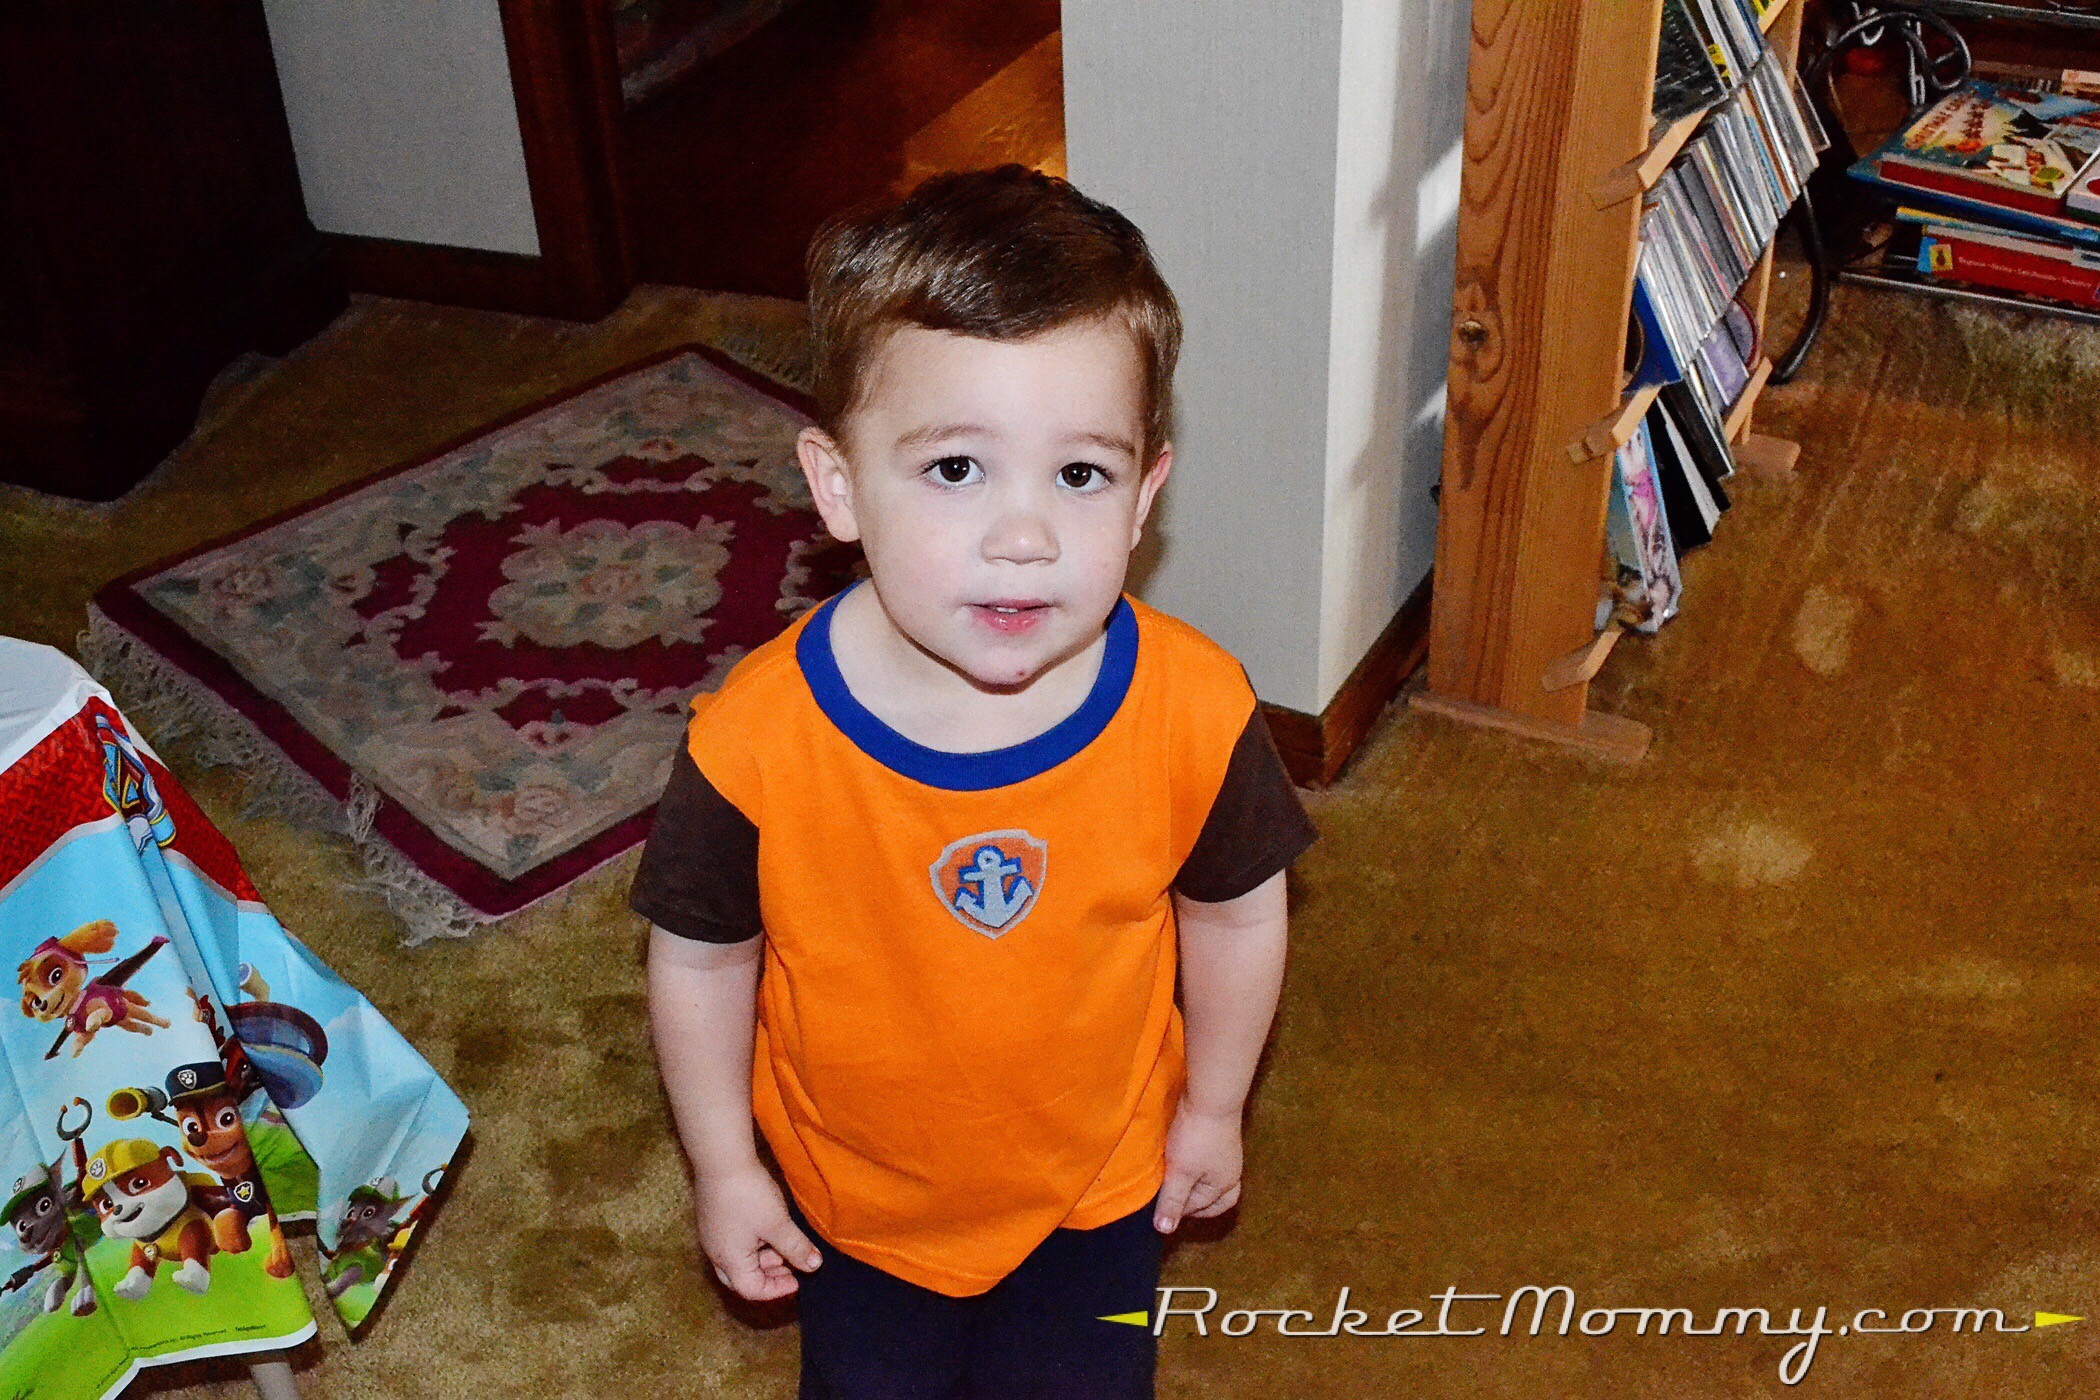
Historically, we’ve had hot-as-blazes weather for our mid-June parties, so when I put these outfits together for the kids, I wanted to keep them light enough for them to wear comfortably. It would have been easier (and more authentic, really) to layer a vest on top of a shirt to make them look like their favorite Paw Patrol pups, but who wants to wear two shirts when they’re sweating in a bounce house all day? Instead, for the boys, I used five very cheap T-shirts (orange, blue, and brown for Zuma and gray and green for Rocky), took them apart, and Frankensteined the pieces back together with my serger. I considered making the shirts from scratch, but it was actually cheaper to just buy the shirts and piece them together than it was to buy the fabric!
I searched for some stretchy Dalmatian print fabric to use for C’s Marshall outfit, but I came up empty. Then I turned to EBay and found some pieces from a vintage Gymboree line that were perfect! The red dress was a lucky find at our local children’s resale shop, so I didn’t have to make that from scratch either. I cut the sleeves off of the Gymboree Dalmatian turtleneck and sewed them to the armholes of the dress, and the leggings were perfect just as they came.
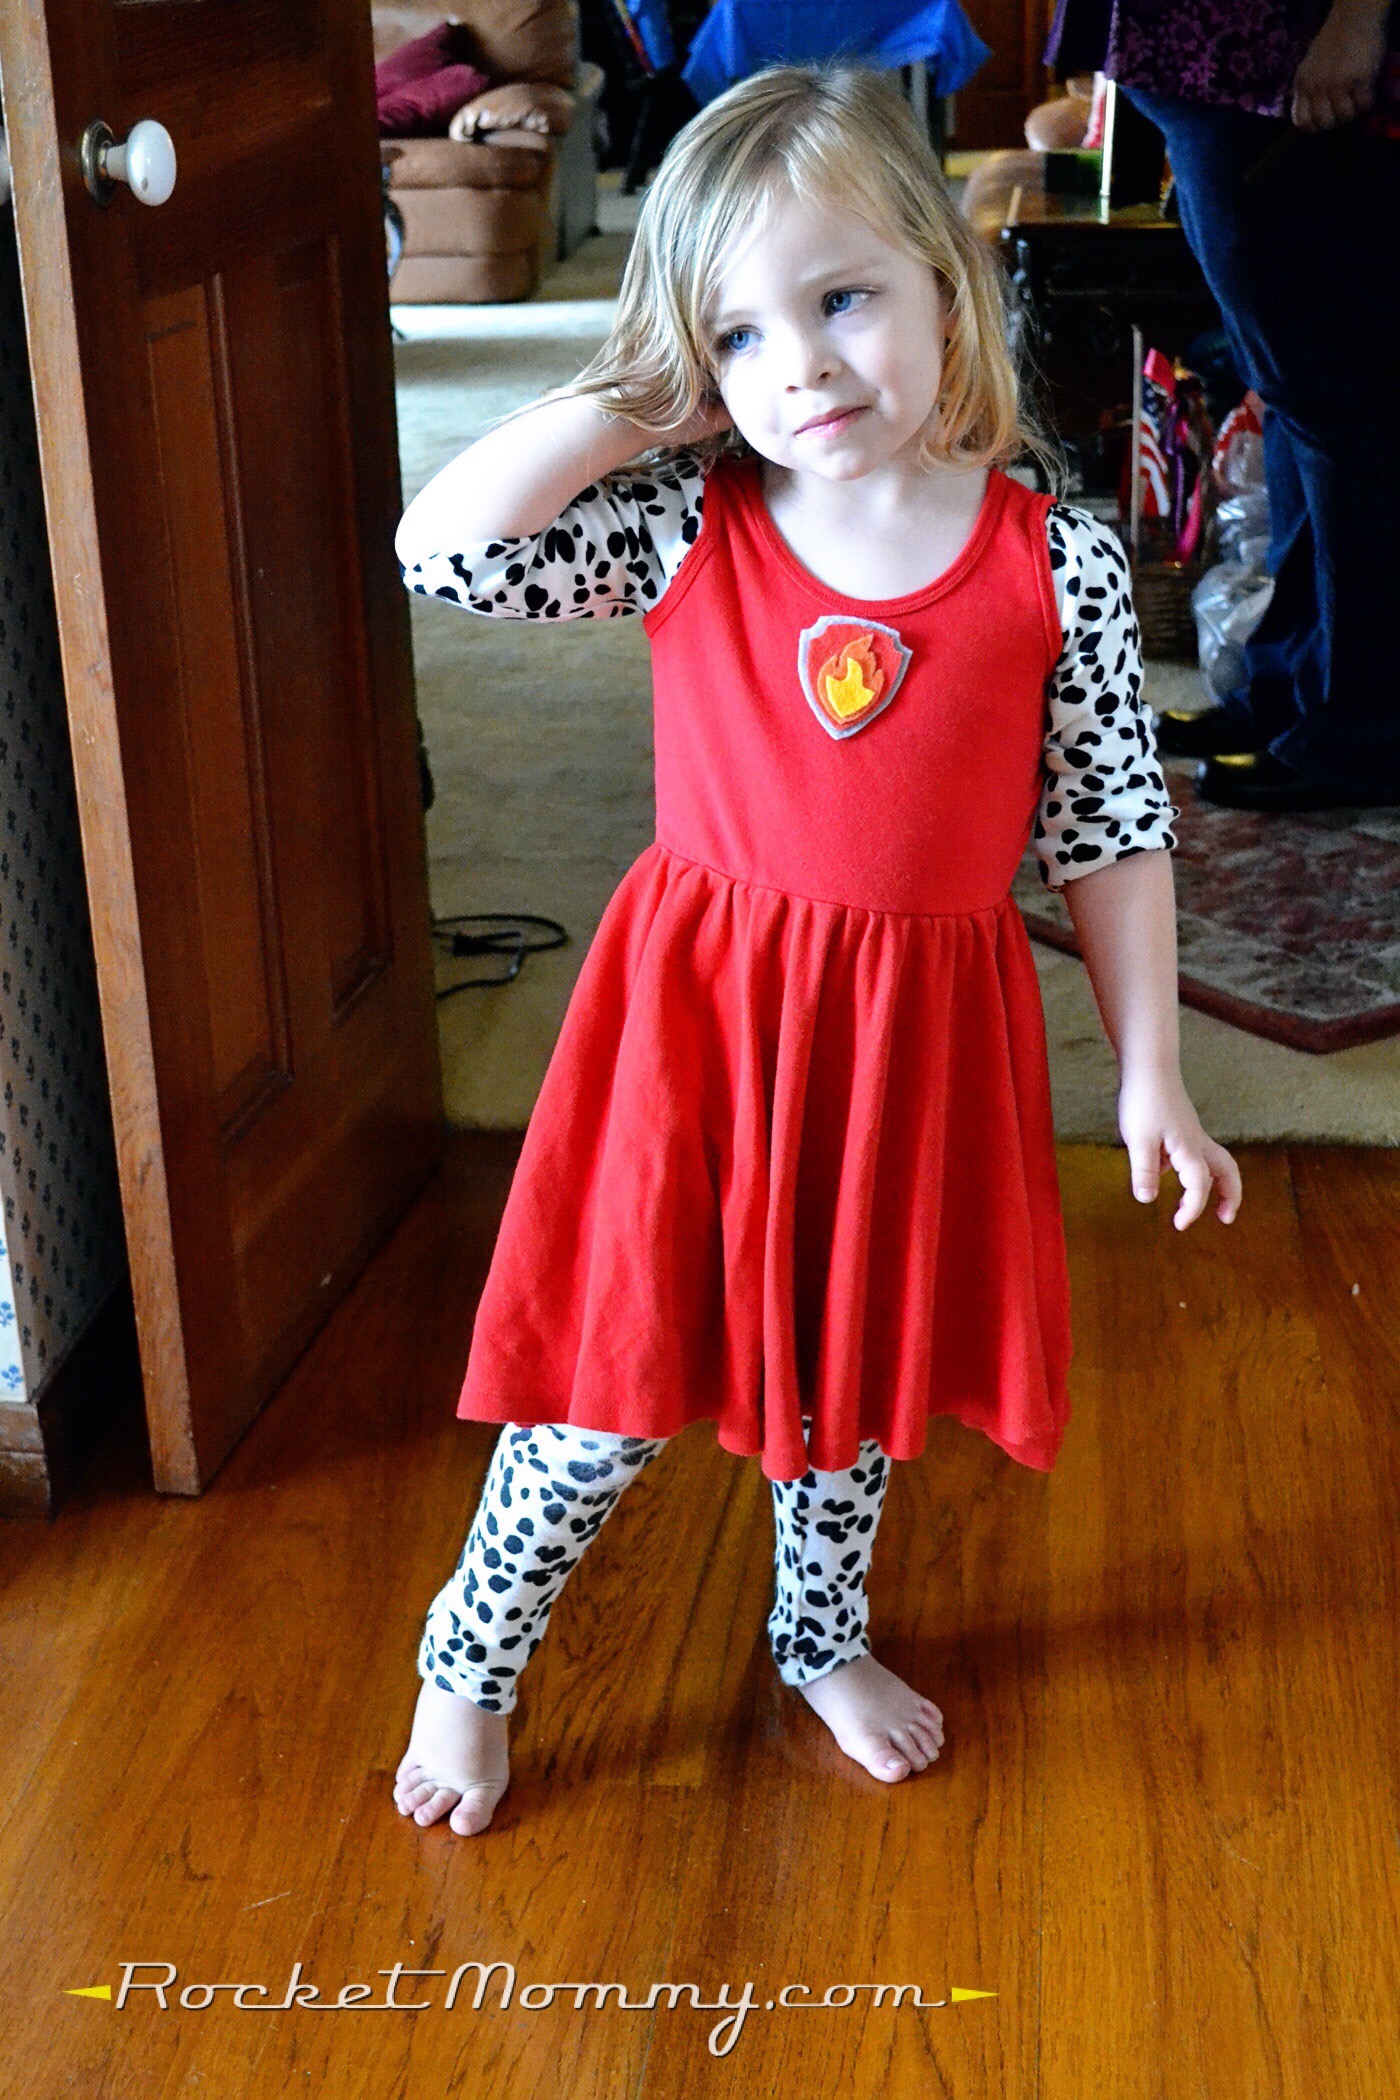
The badges were cut out of various colors of felt, hot glued, and attached to a pin back so they could easily be removed for washing (or, you know, for wearing the item again even after they decide they’re no longer Paw Patrol fans, haha).
Mayor Humdinger Piñata
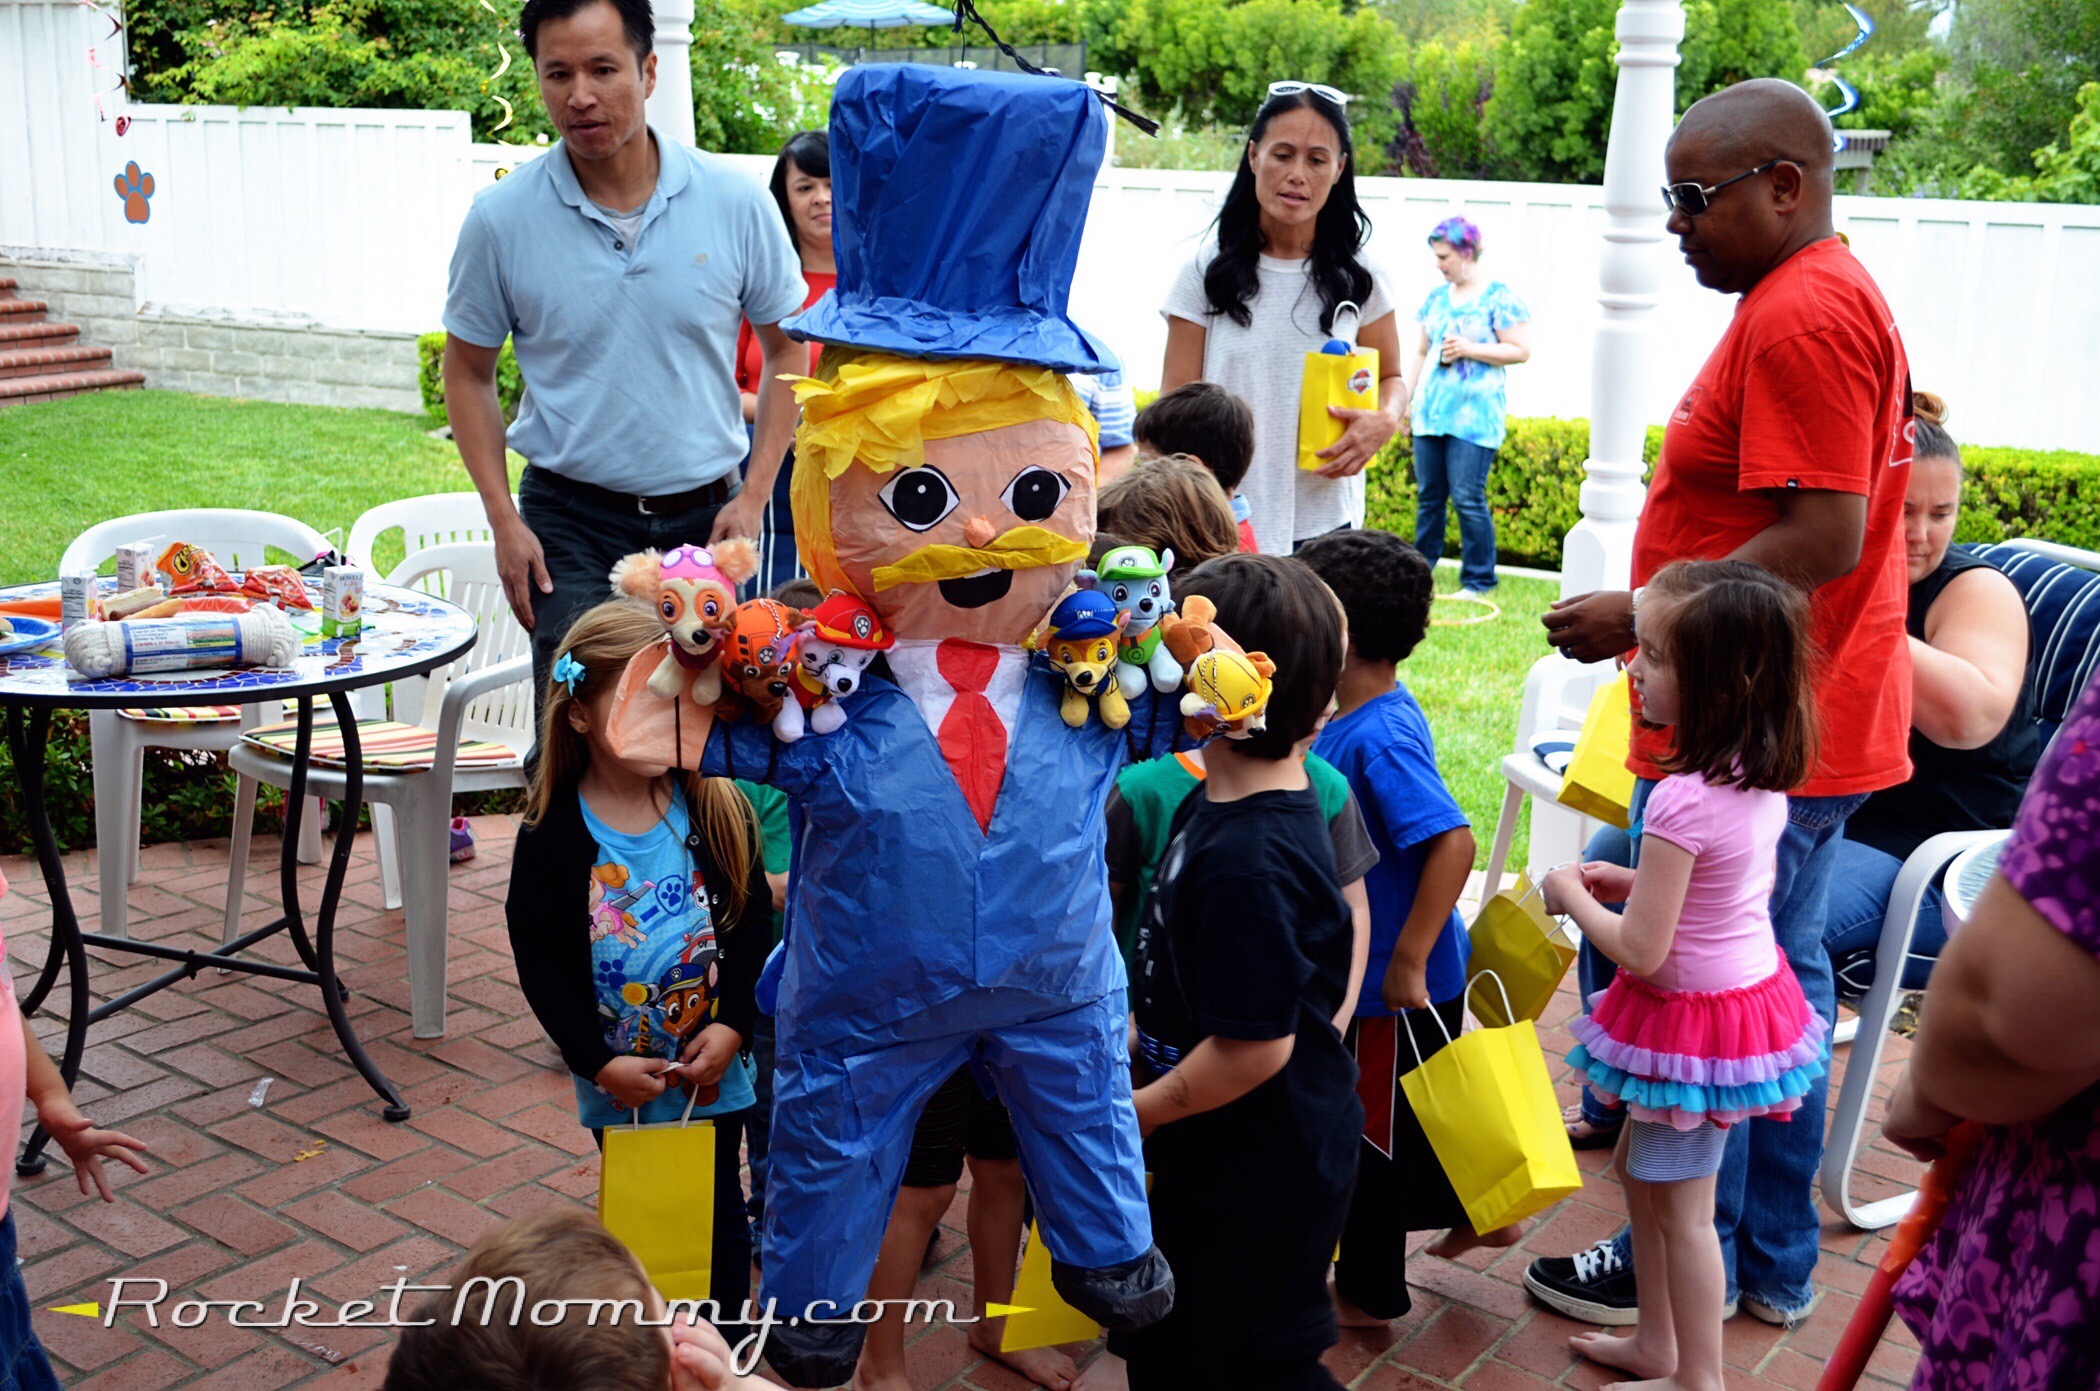
If you’ve checked out my older party posts, you already know that I have kind of a weird hangup about piñatas. There are plenty of Paw Patrol piñatas commercially available, but they’re all Marshall or Chase – and why would you want to beat the stuffing out of one of your favorite characters?! So, since my DIY villain piñata was so successful last year, I wanted to do the same this time around.
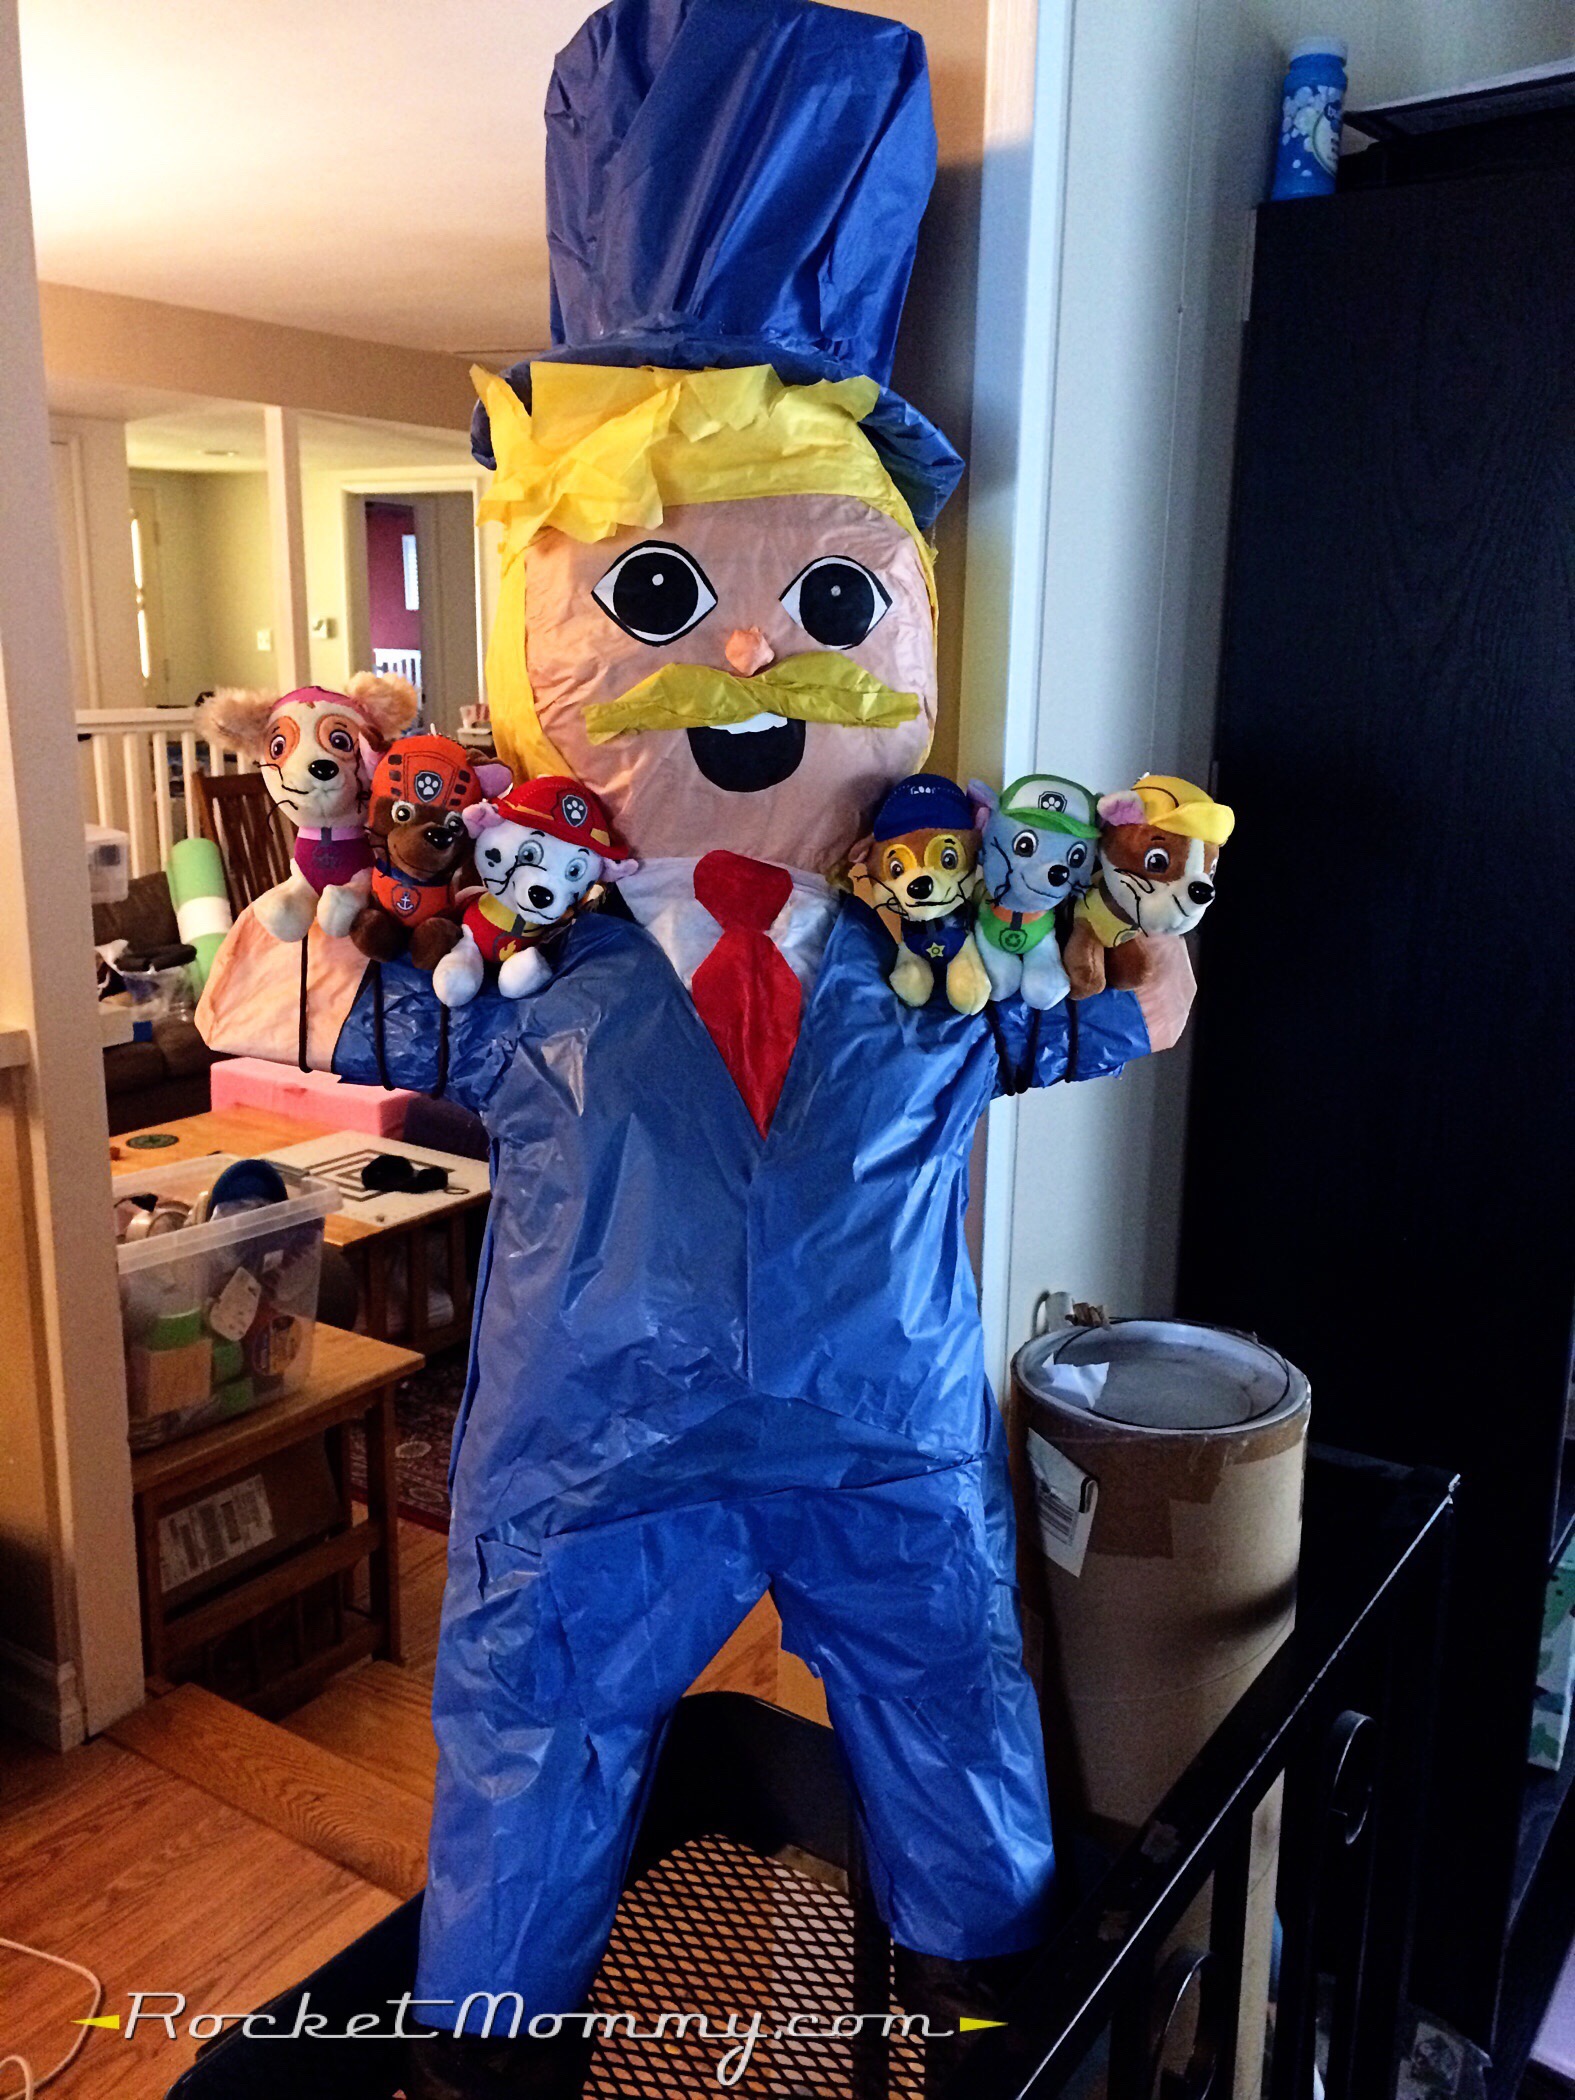
The only problem with this plan? Paw Patrol doesn’t have a truly villainous character. Mayor Humdinger is about as close as you can get to a “bad guy” on this show. And while I was trying to figure out the logistics of building him in piñata form, I happened upon an article that talked about all the piñata shops in downtown Los Angeles that were selling Donald Trump piñatas, and I thought I might be able to make that work (with a few minor adjustments!). After all, Mayor Humdinger is a blond dude in a suit, so I’d be more than halfway there!
It took a little bit of searching through a whole block of shops, but I ended up with this amazing creation. Best part? It cost TEN DOLLARS. Ten dollars, can you believe that?! Such a bargain!
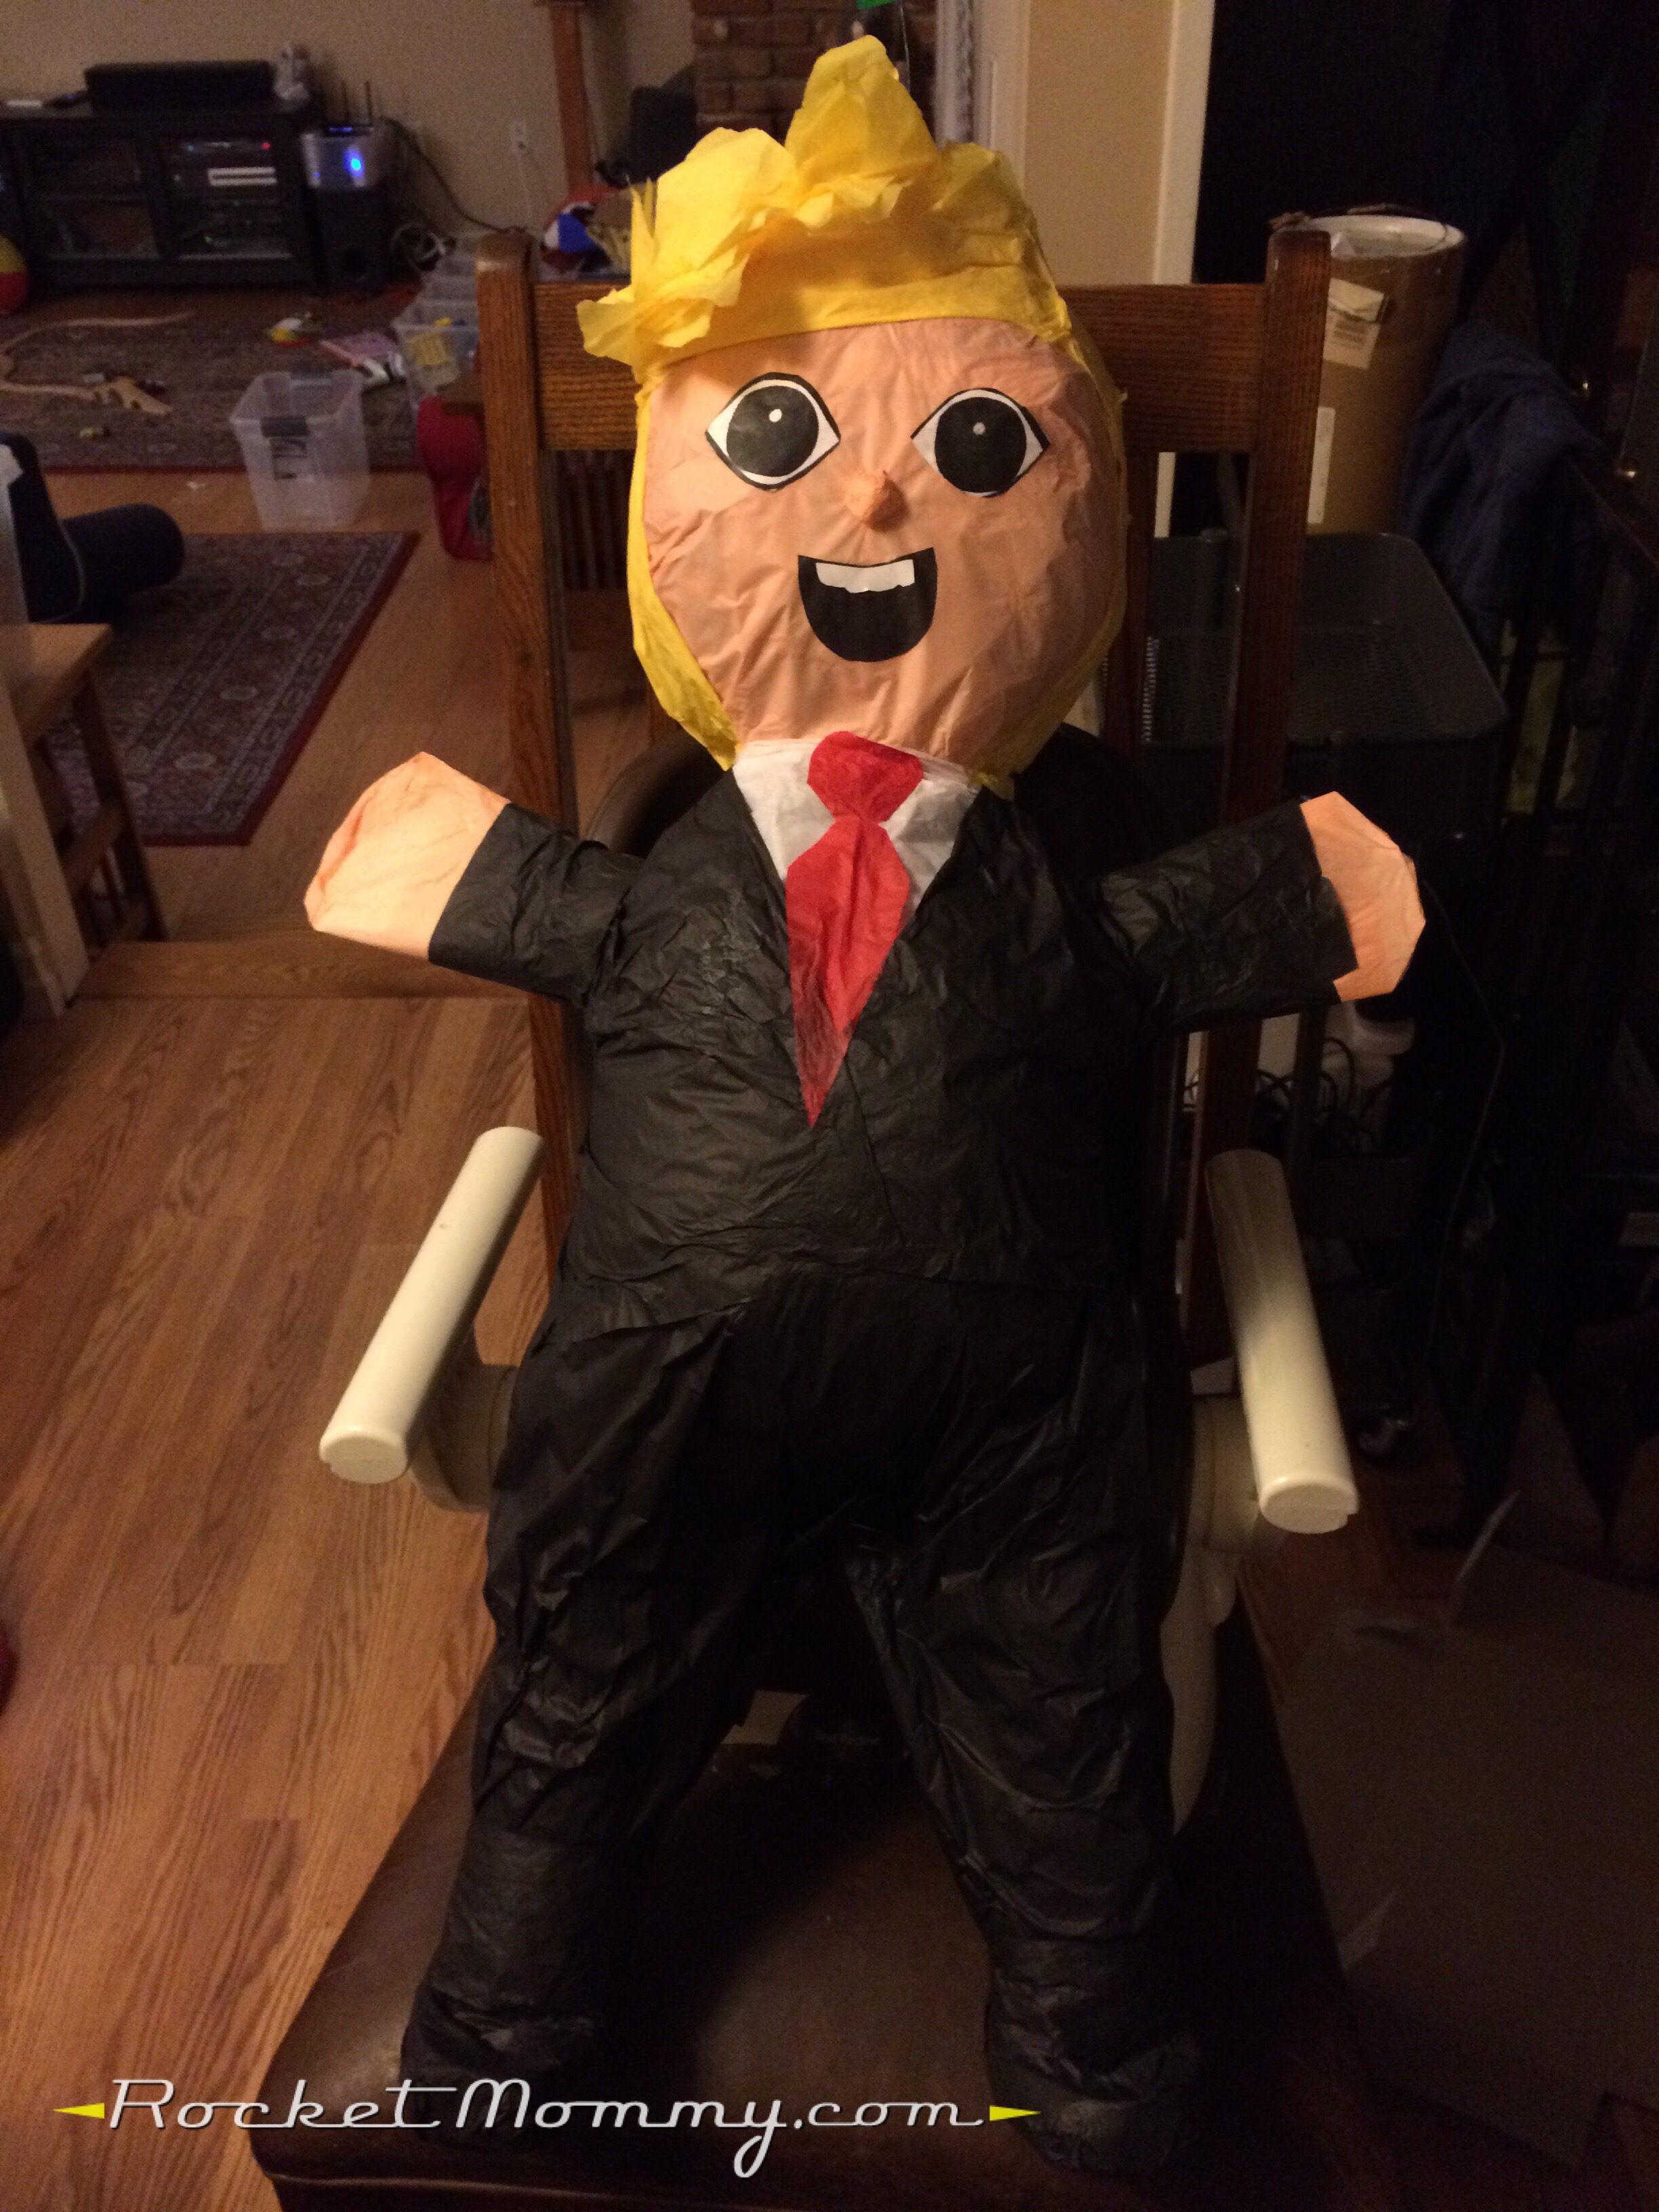
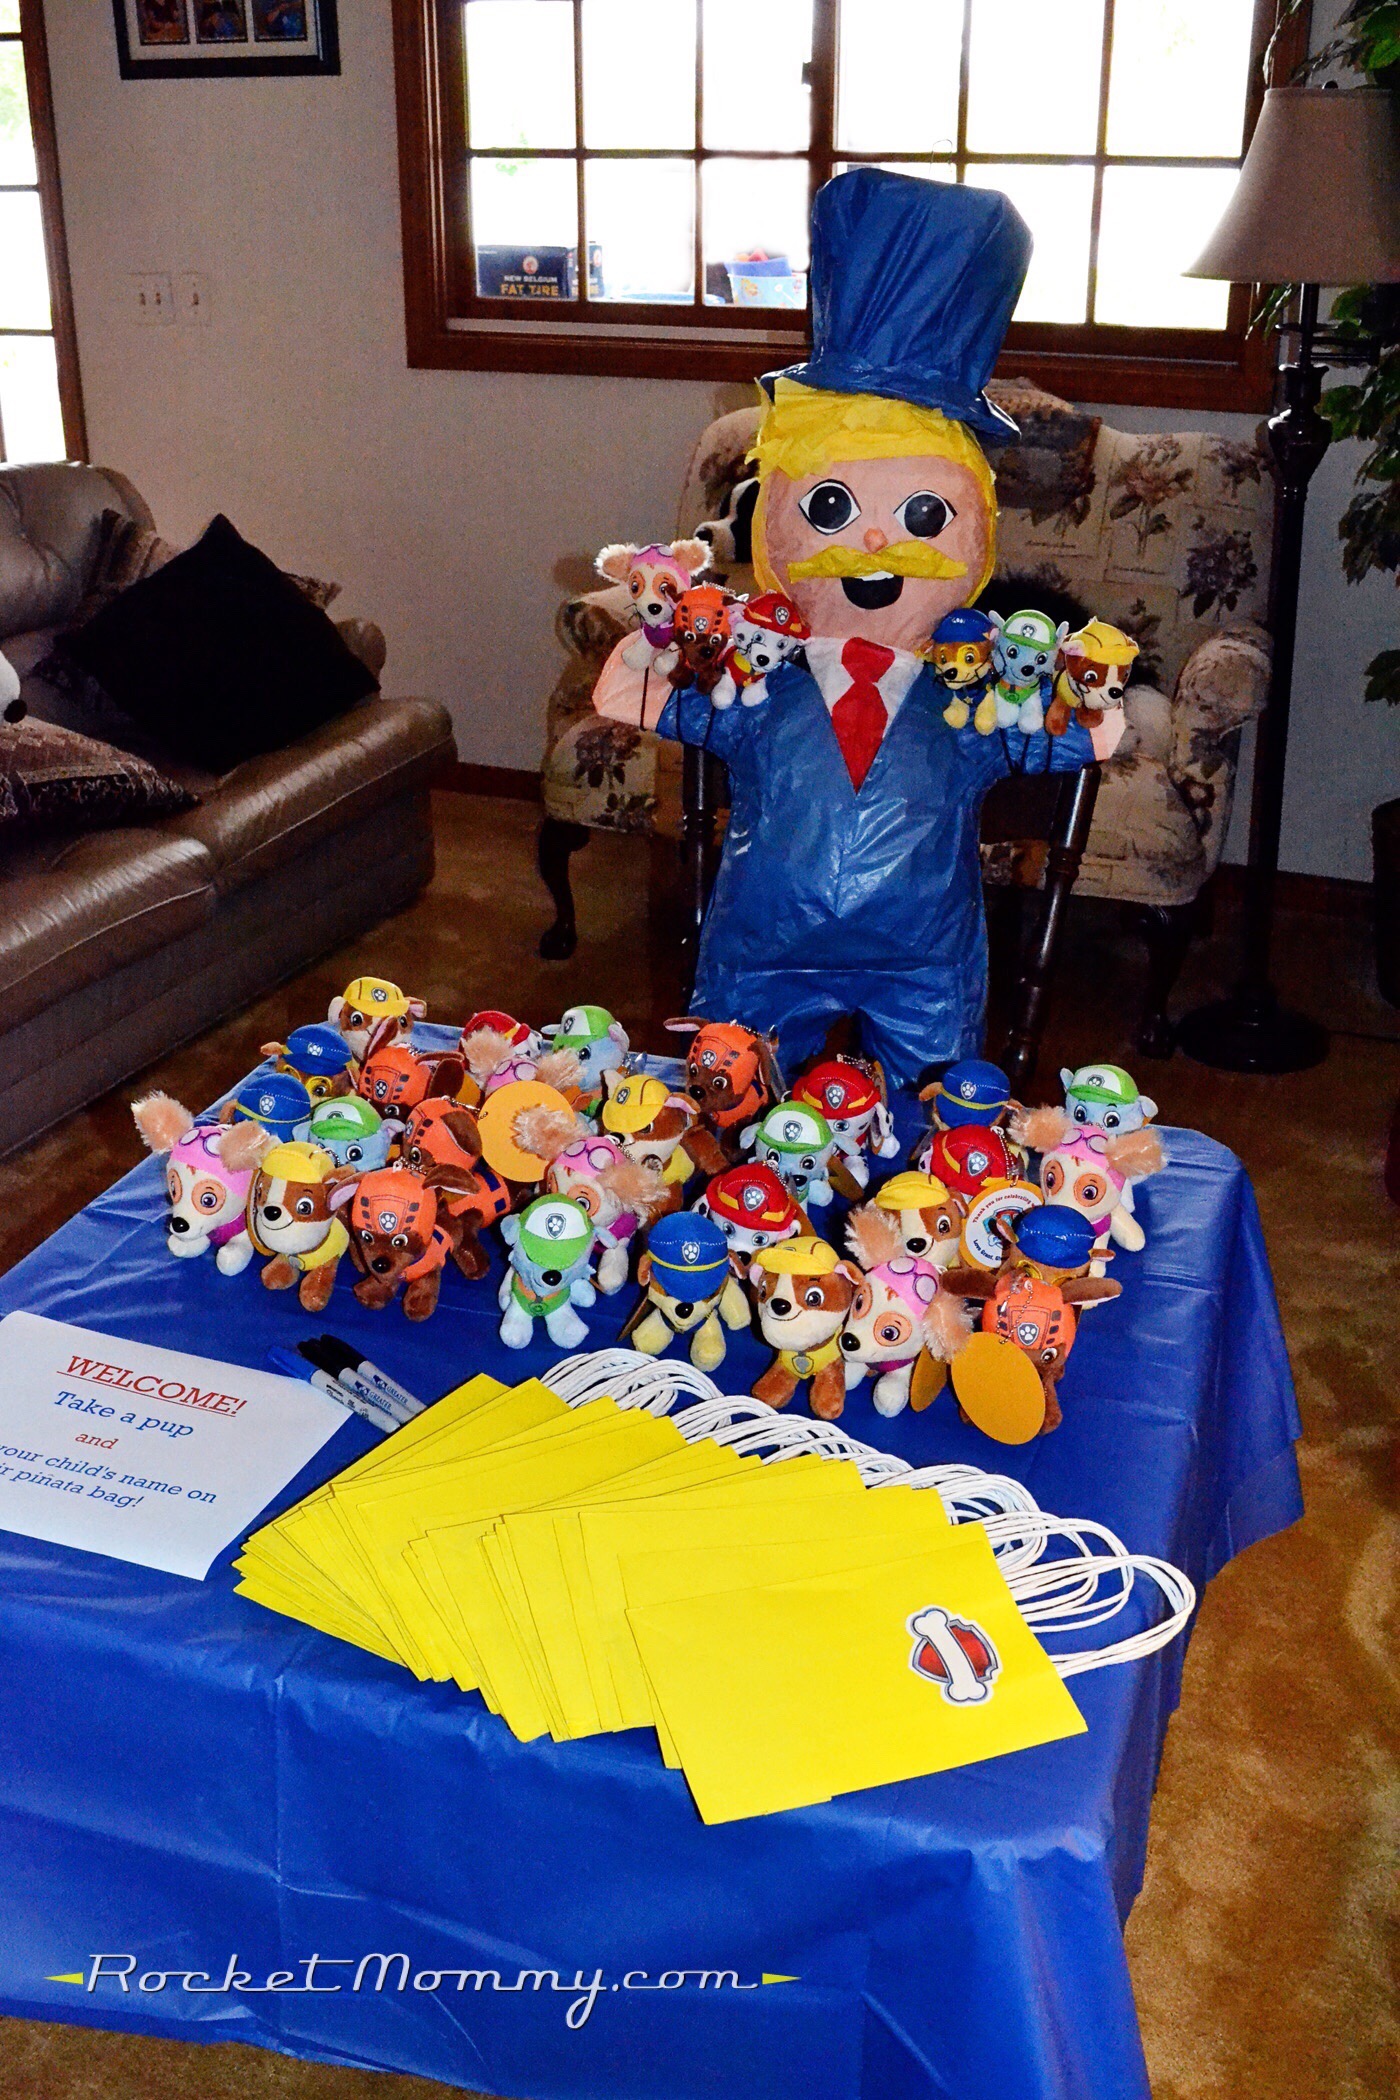
I spent a little quality time with the glue gun and a pack of assorted tissue paper from the dollar store, and then I built him a little cardboard top hat. Then I took some of the pups that I bought in bulk to use as favors, sewed their ears down a bit, added whiskers, and turned them into the Kitten Catastrophe Crew.
Ta da!
And here’s a little before-and-after shot for Pinterest:
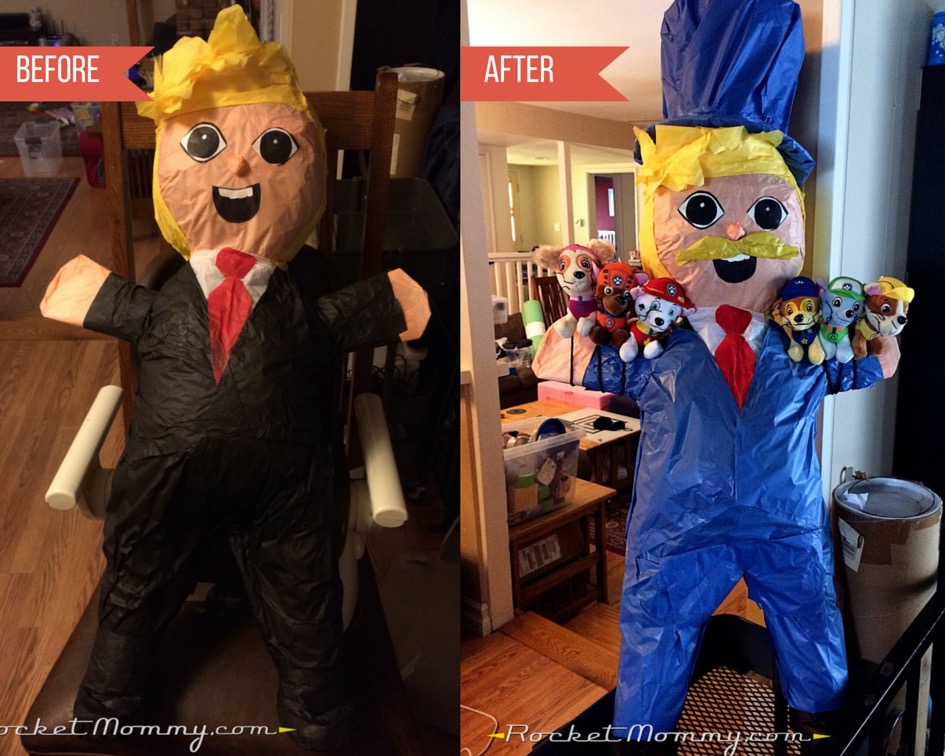
Mayor Humdinger sat out on the favor table for most of the party to serve as decor, and then he got the stuffing beat out of him on the patio. I think the parents were actually more excited than the kids once they knew the story behind him!
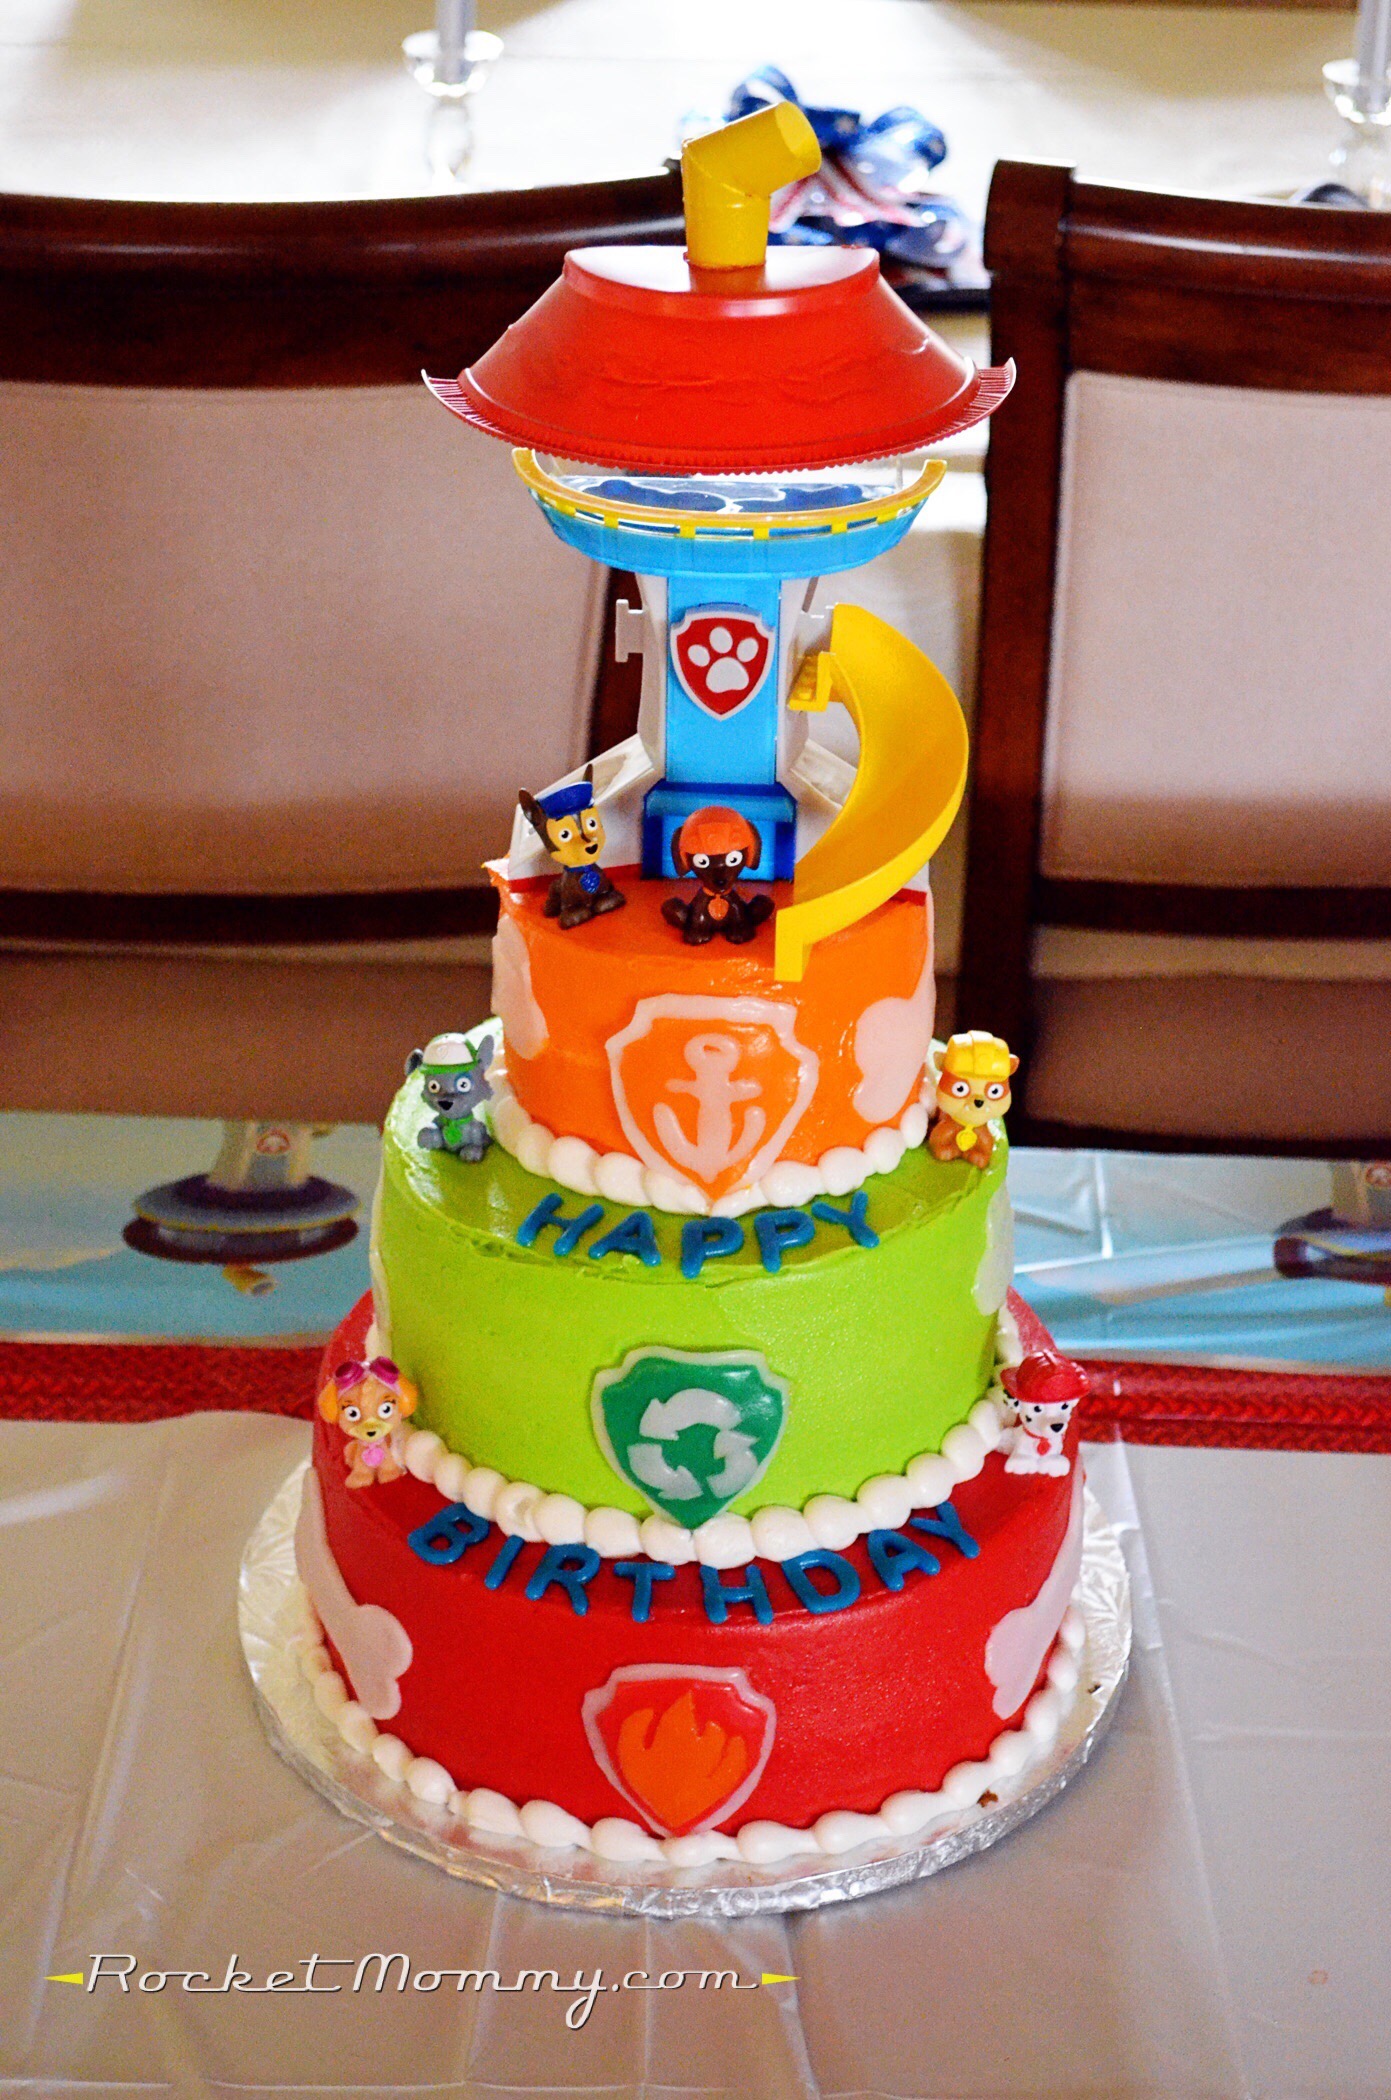
A Magnificent Paw Patrol Cake
I’m not a baker, and even if I was, I wouldn’t attempt to make my own cake to feed 60+ people. But at the same time, I needed this one to be pretty special, because G REALLY wanted a “lookout cake” like the one that’s featured on the show, and I wasn’t going to be able to make that happen. I told him that they were going to have a BIG cake, and that there would be a lookout tower on the cake. And then I realized that it was actually going to be pretty challenging to get a lookout tower small enough to function as a cake topper!
I tried constructing one out of paper plates and duct tape, and it looked pathetic, so I scrapped it. And then I discovered THIS:

It was the perfect size to go on top of a cake! The only problem is it’s missing the top portion of the tower – in this set, the tower attaches to this cardboard backdrop thing, and the top of the tower is printed on that. But that was a surprisingly easy fix! I used a red plastic bowl, a yellow plastic plate, a piece of a clear plastic cup, and some hot glue to hold it all together.
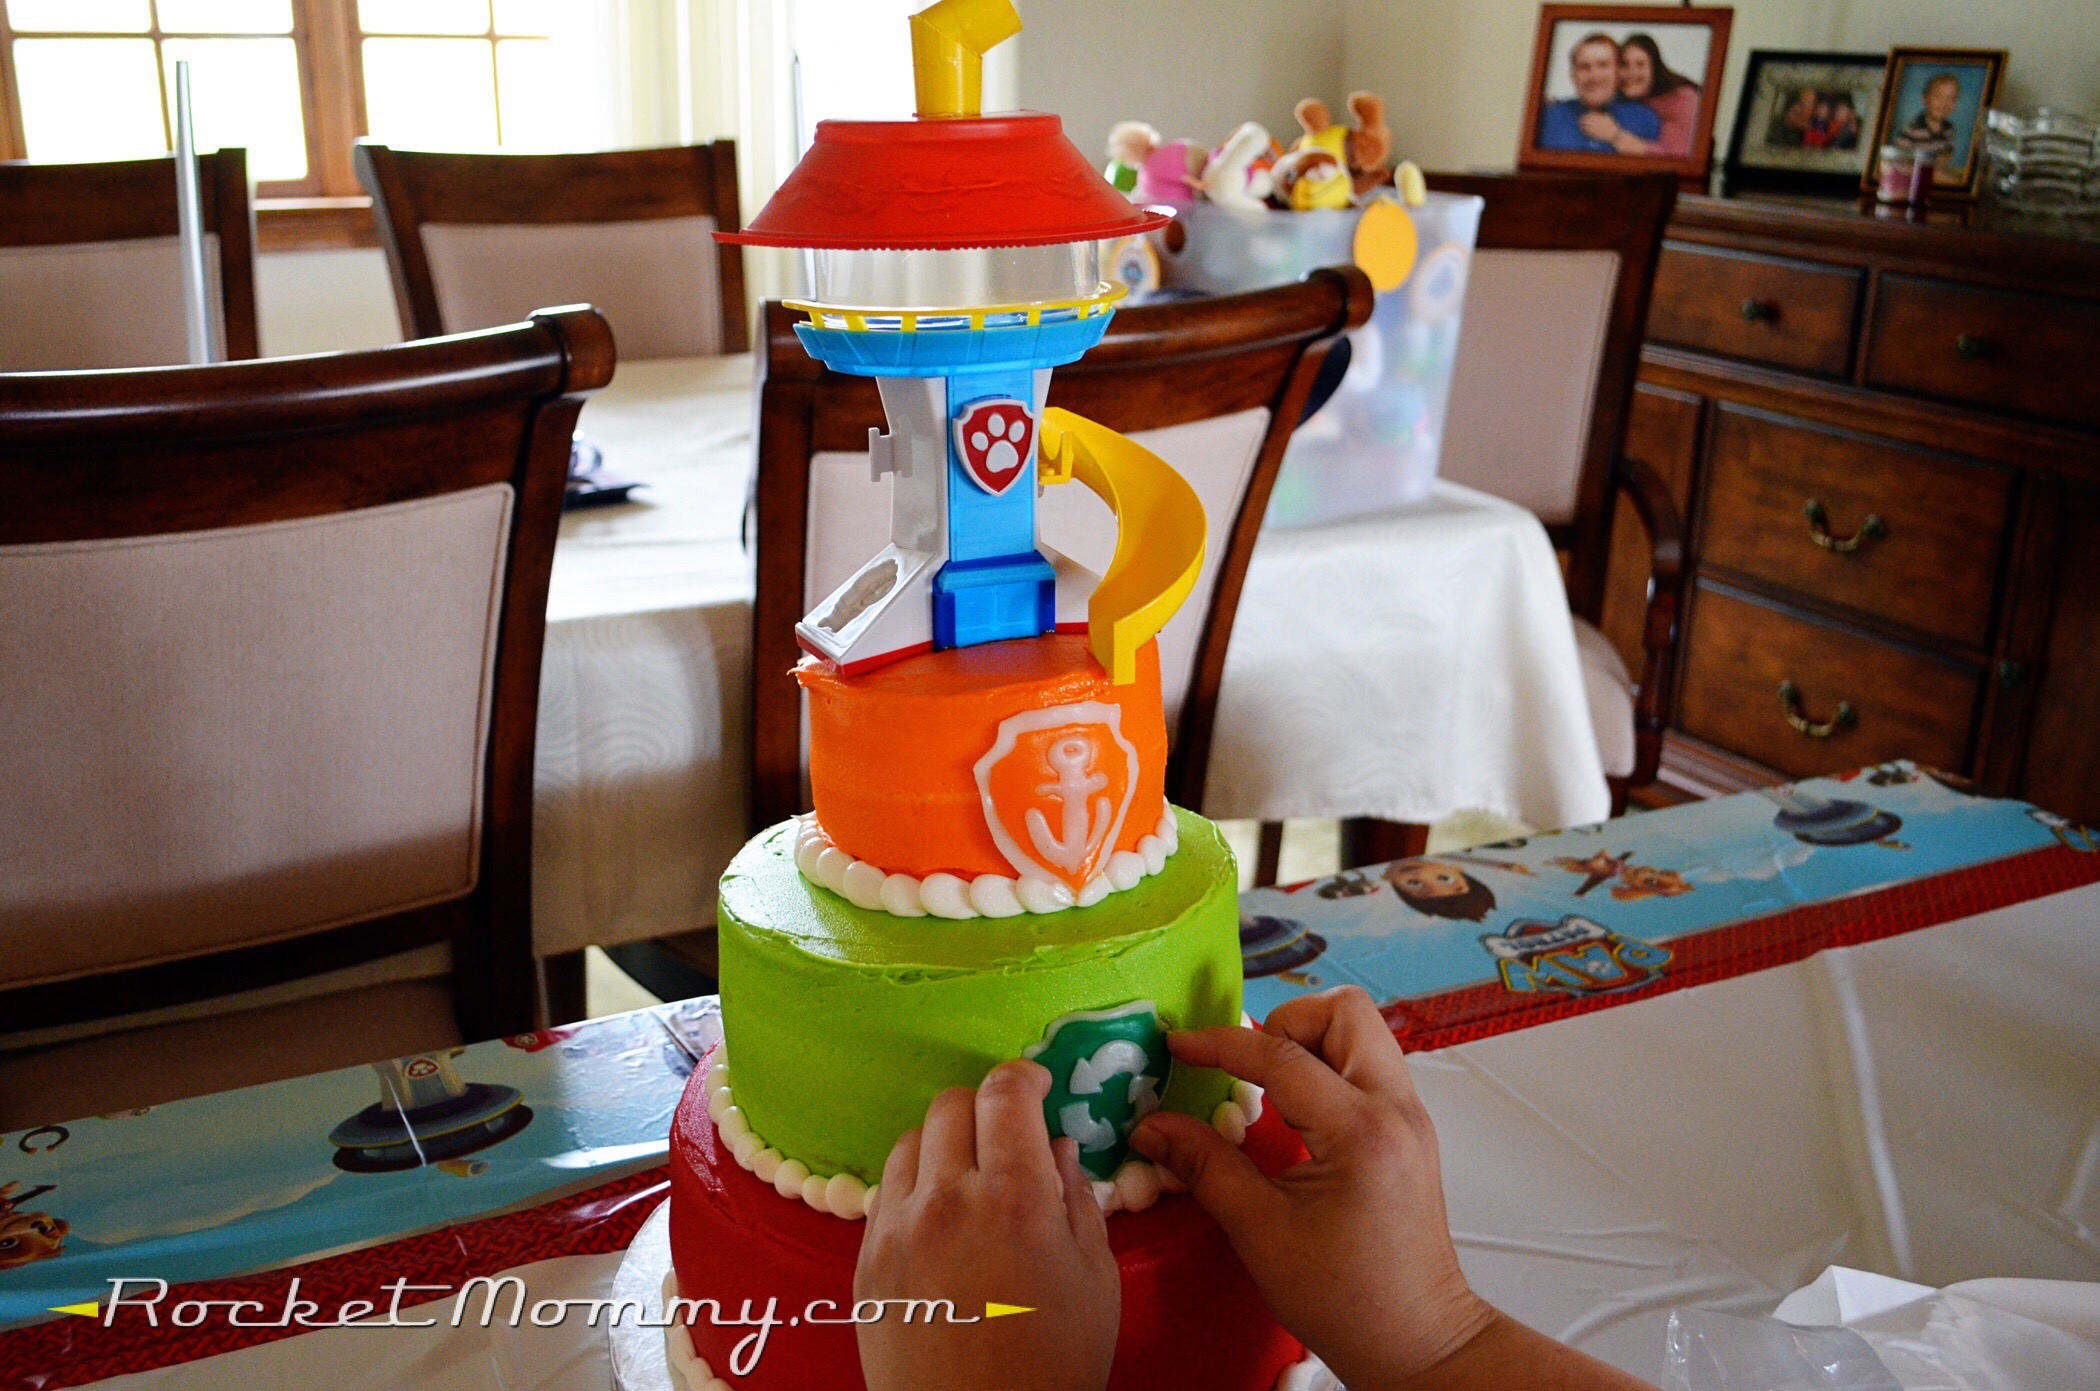
I also stole the little Lego slide from G’s firehouse set and glued it on too. The glue came off of everything just fine when it was over!
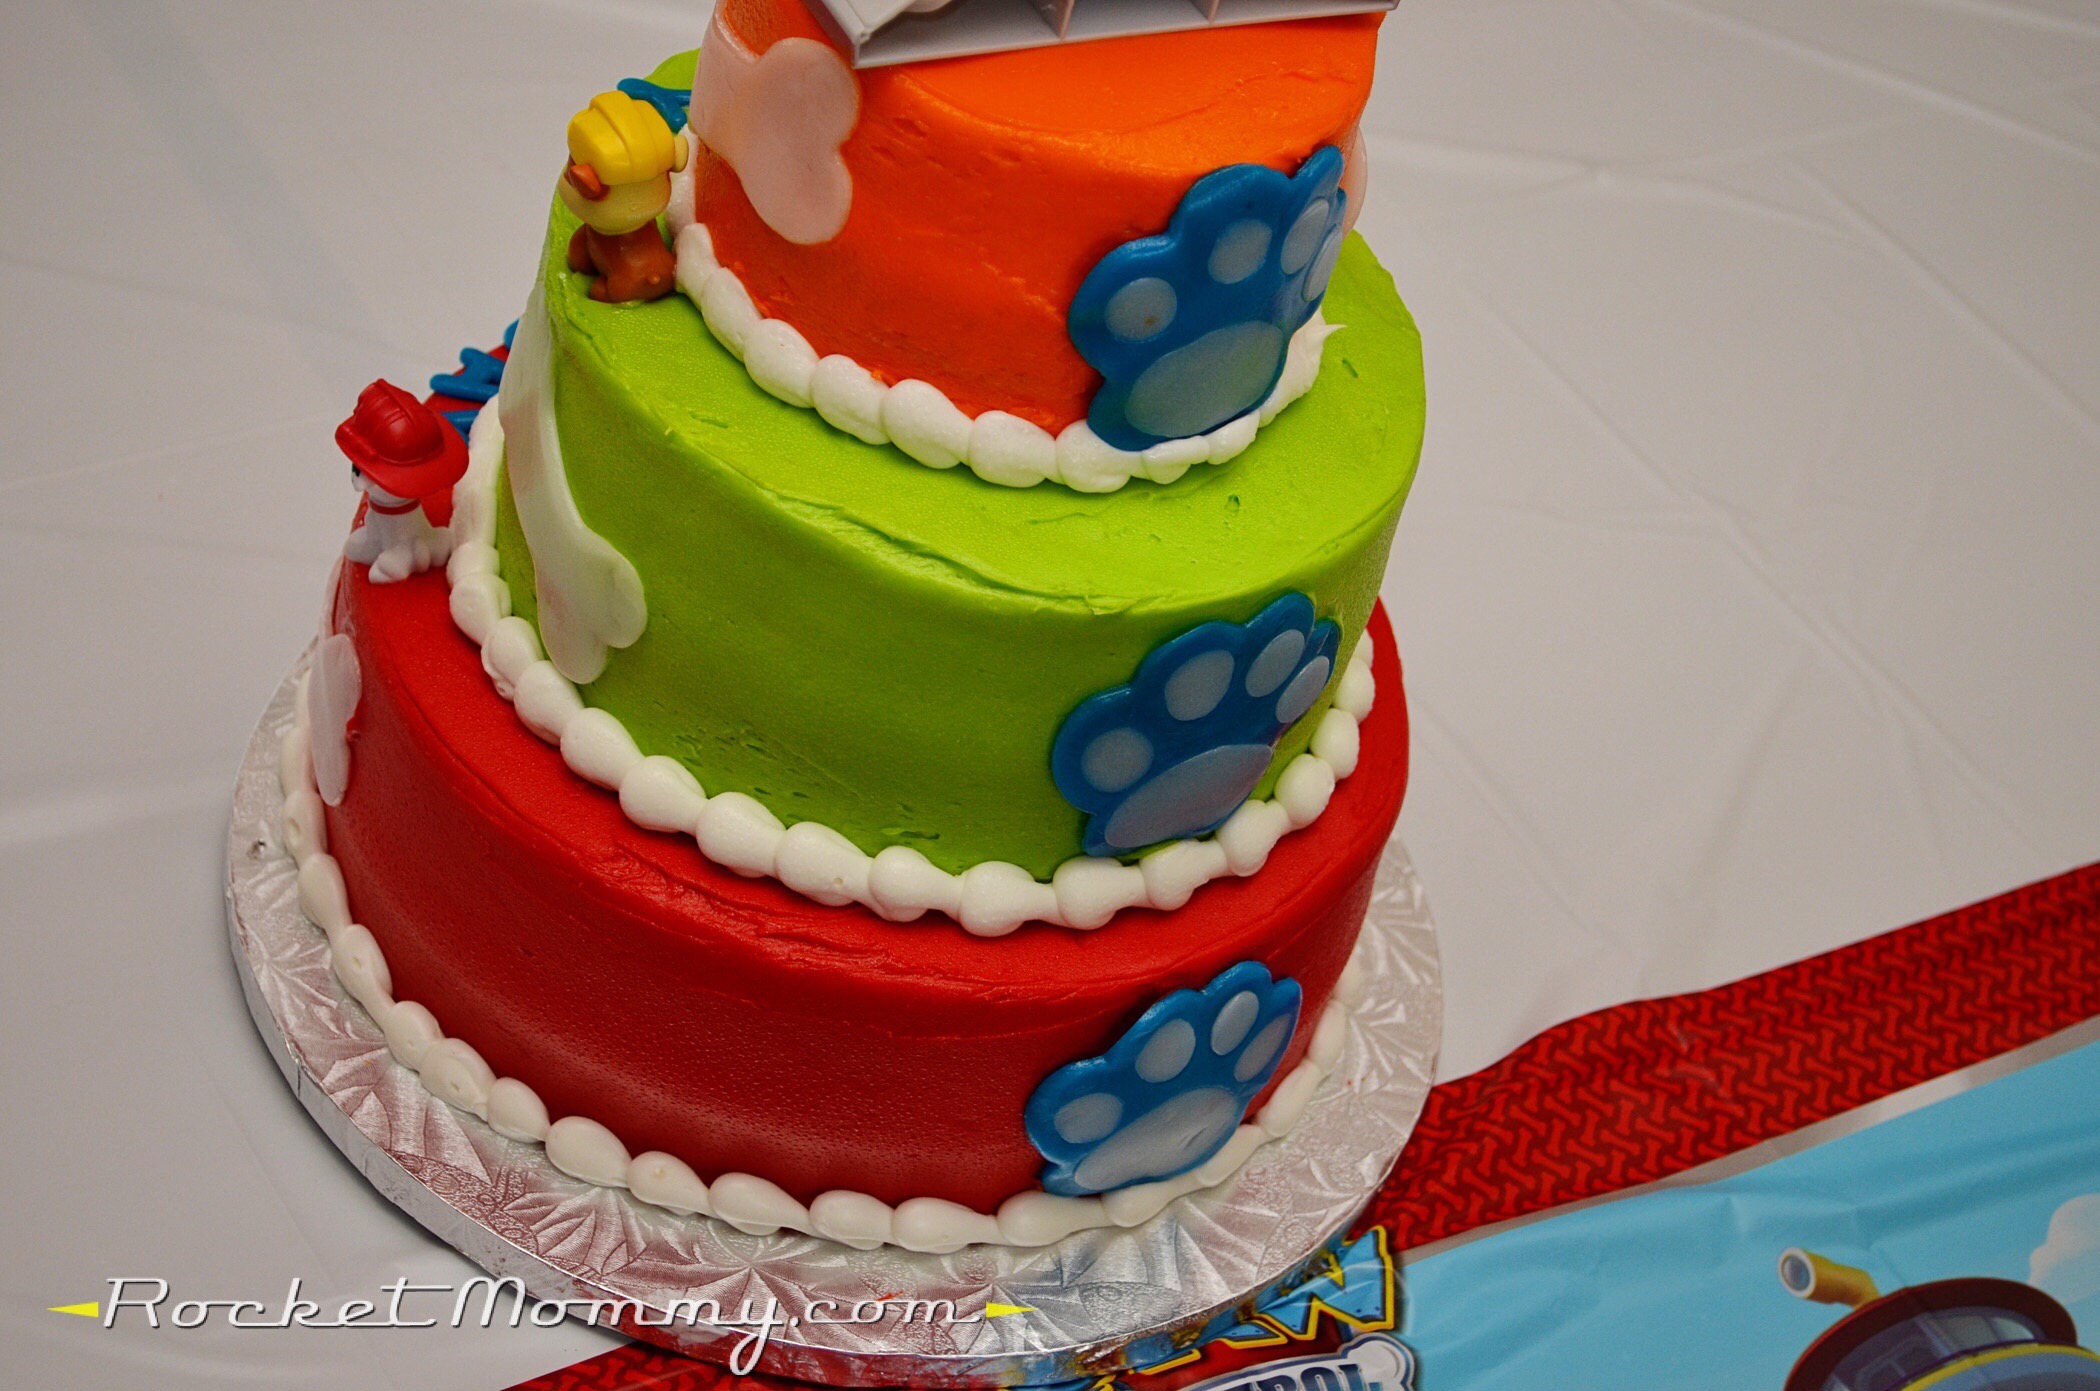
Now, the decorations. I considered buying some colored fondant and cutting out the little decorations I wanted for the cake, but in one of my late-night Pinterest searches, I found a blog post talking about using Airheads candy in place of fondant for cake decorations. What? Brilliant, right? I bought a massive box of Airheads from the warehouse club, and they had all the colors I needed (and it was cheaper than buying the packs of fondant! Woot!).
I used cookie cutters to cut out the “Happy Birthday” letters, the bones, and the paw prints, but I had to cut the badges by hand. And let me tell you, that was much harder than the cookie cutters! The Airheads are really sticky, and dragging a knife through them has a tendency to deform the shape you’re working with. It took a lot of poking and prodding and smushing, but I managed to get three badges put together – Marshall, Zuma, and Rocky.
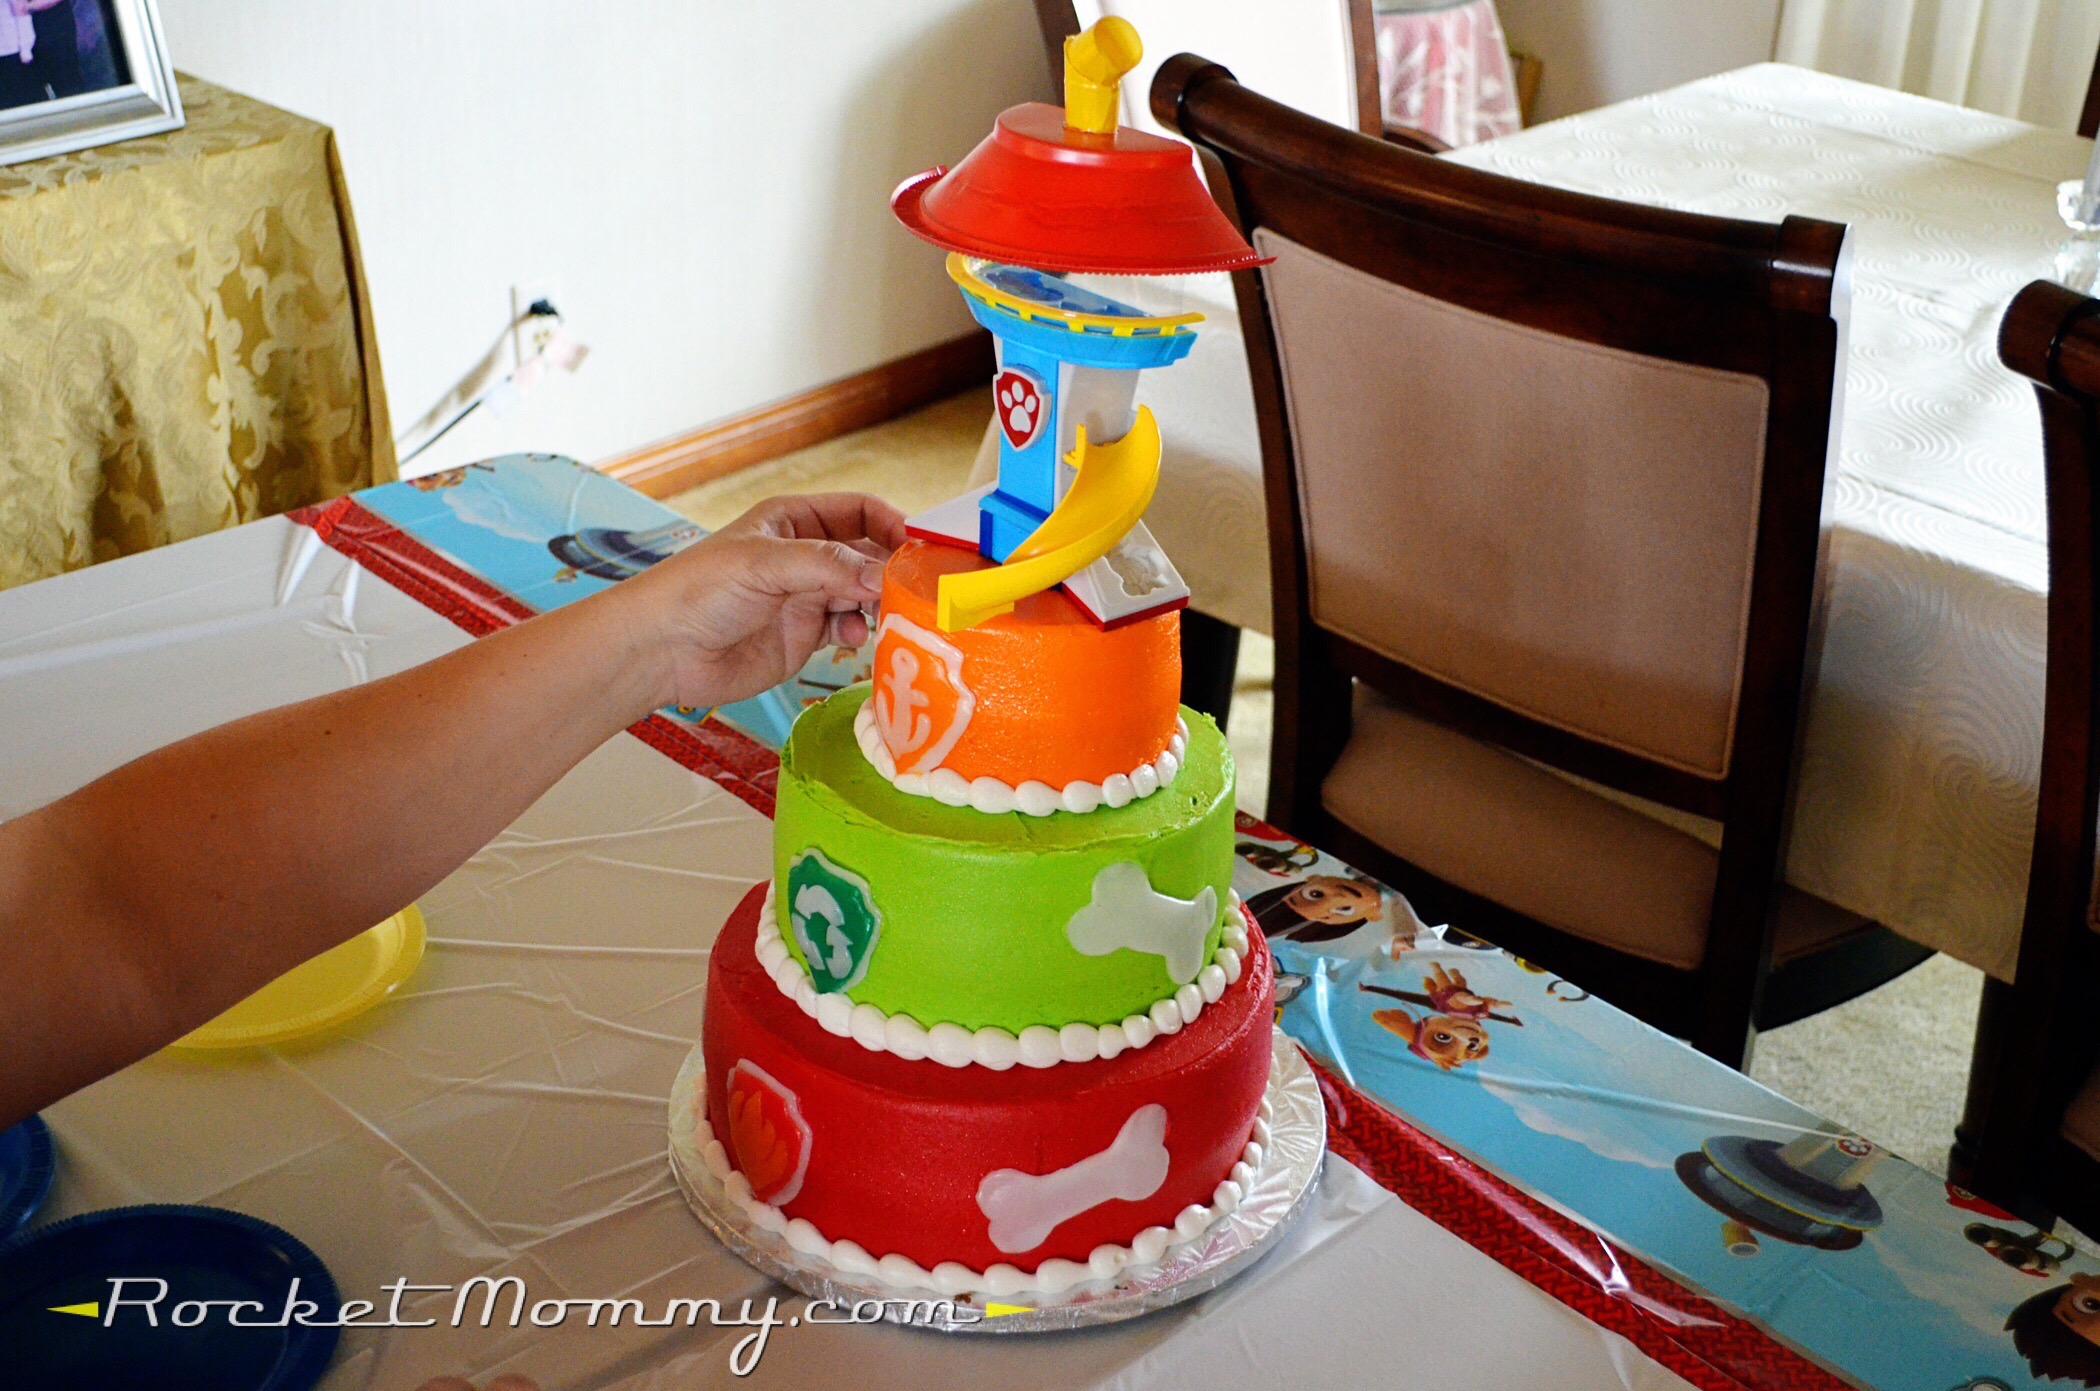
The cake itself was from Sam’s Club. They make a lovely three-tier cake for $69, and they are happy to make it plain so that you can add your own decorations to it so it looks like an expensive custom cake.
The Paw Patrol figures I added to it were from Dollar Tree. It took a ton of trips to find the entire set of six characters, but I finally got them!
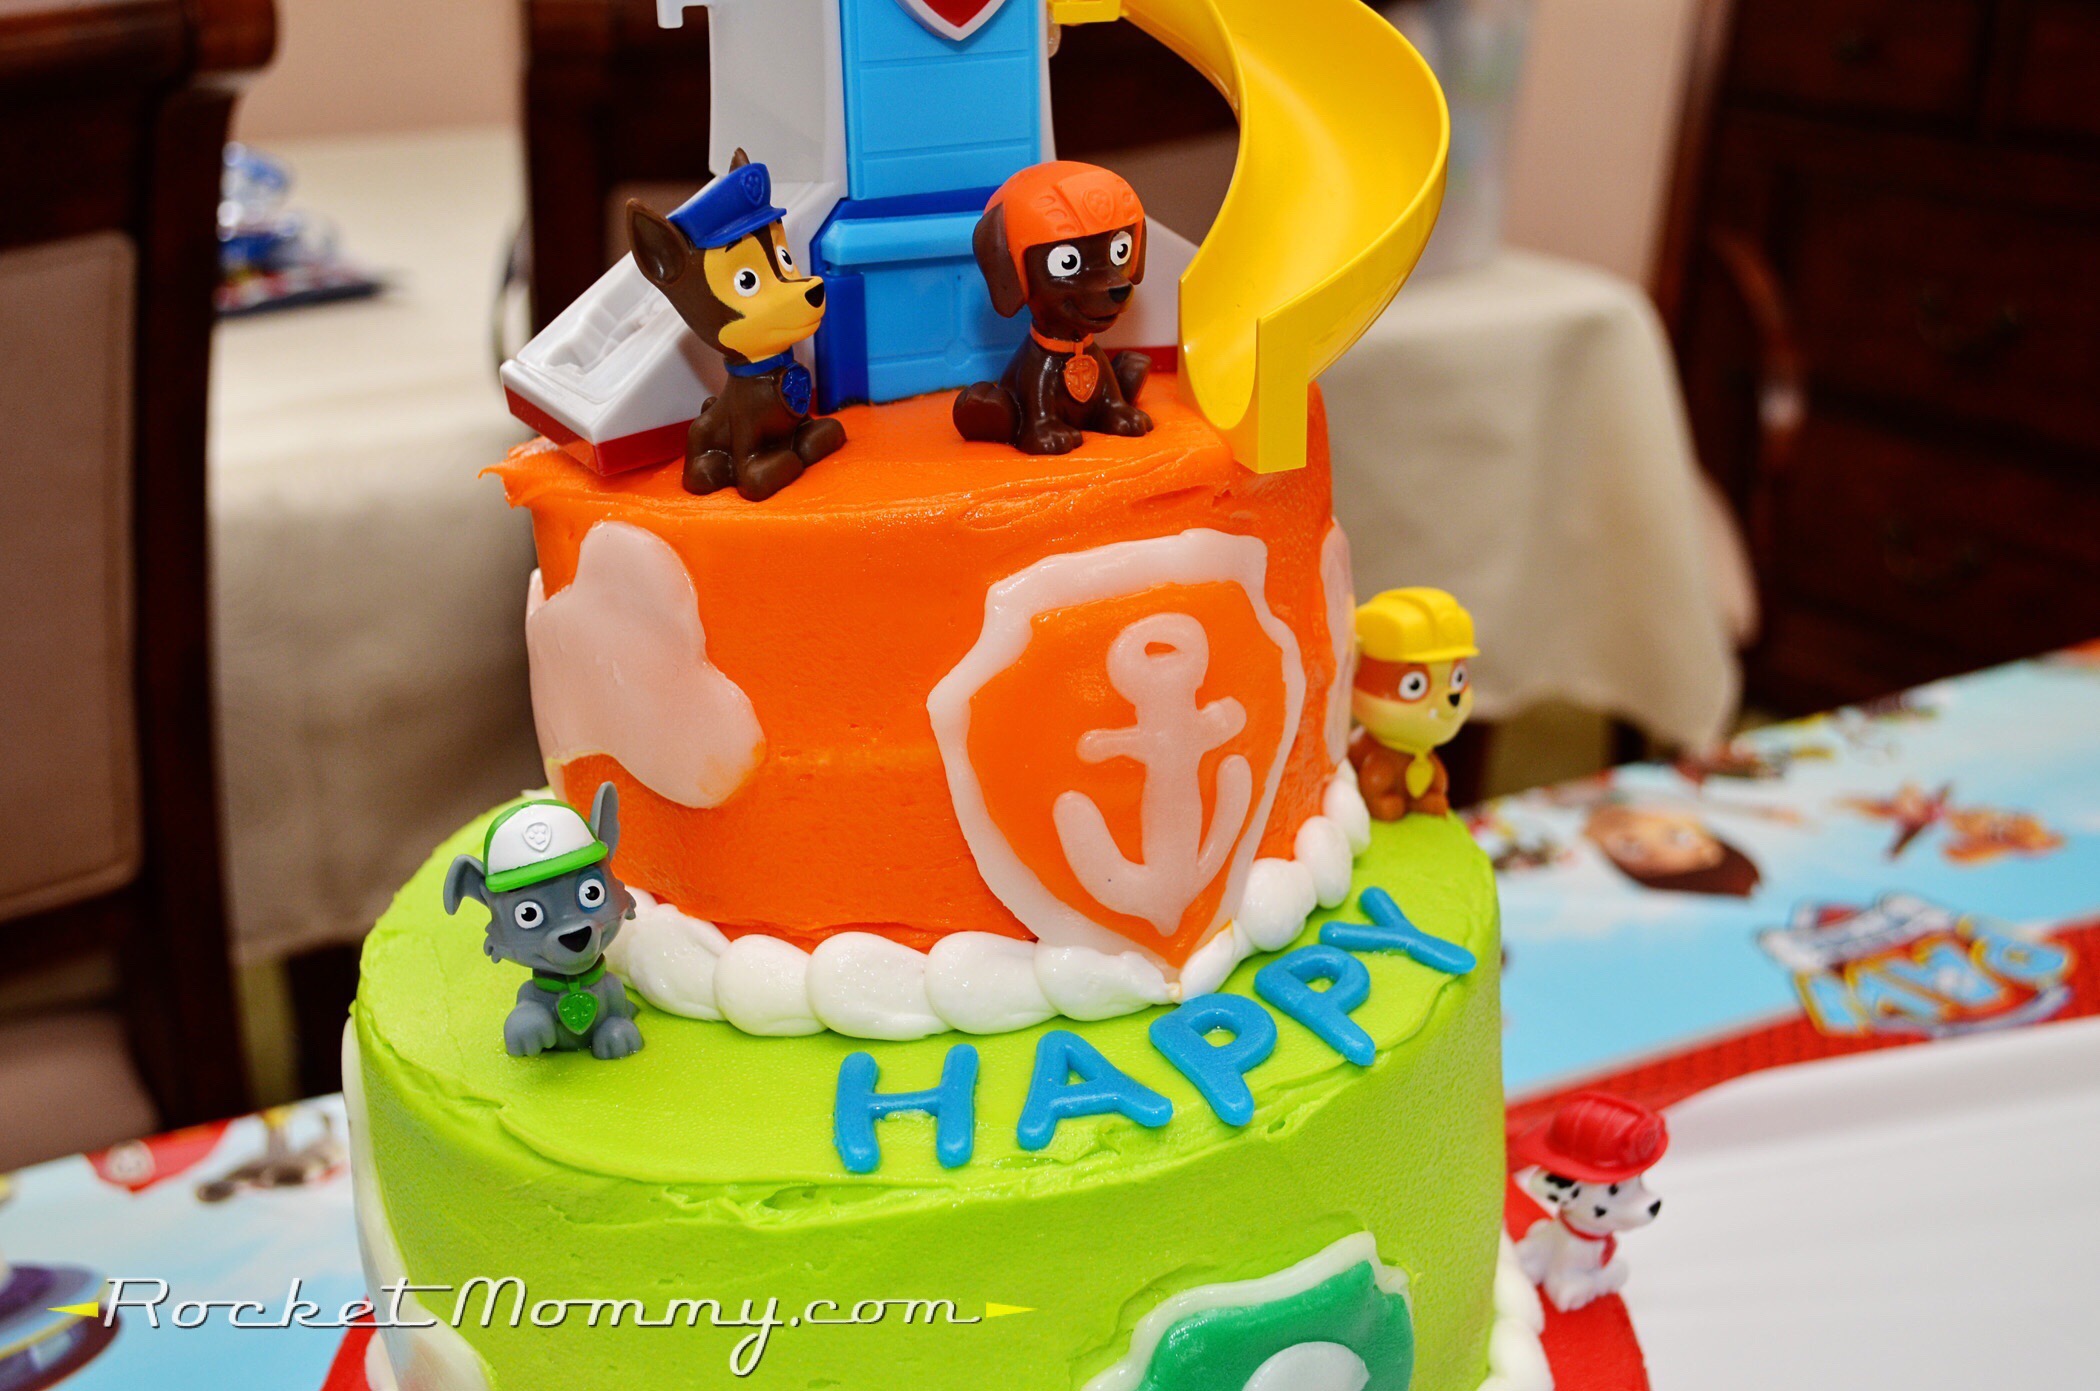
The cake ended up looking pretty much exactly how I wanted it, and the kids were all thrilled with it too!
So there you are – the major DIY elements of our big Paw Patrol birthday party! It was a lot of crazy fun, and the kids ran around and bounced and had a blast.
You have some truly amazing ideas. – Such creativity. I am really impressed.
Thank you so much!
So pawsome! (See what I did there) I’m planning my b/g twins’ 4th birthday party. Your cake came out so nice! Everything did. Really love the pinata idea.
Where’d you get the paw patrol favors? Were they expensive?
Where did you order the dogs in bulk?
Have you been looking for escort girls in Tel Aviv ?18escortgirls can cause
you to Want to pay quality young escort girls at home or hotel?
Searching for Russian escorts, Ethiopian escorts or VIP escorts?
Looking for escort services in Tel Aviv with the fantastic supply
of 18escortgirls Index can fulfill all of your fantasies discreetly.
YOU NEED FAST PROXY SERVERS ?
Check it out this Anonymous and Private Proxy Servers.
HTTP & SOCKS5 Proxy supported.
IP Authentication or Password Authentication available.
HERE: https://bit.ly/3ifZkmL
YOU NEED POTENTIAL CUSTOMERS THAT BUY FROM YOU ?
I’m talking about a better promotion method than all that exists on the market right now, even better than email marketing.
Just like you received this message from me, this is exactly how you can promote your business or product.
Do you want more details or do you want to receive a TEST ?
CHECK HERE=> https://bit.ly/Good_Promotion