
*This post contains affiliate links. Rocket Mommy will receive a small percentage of any purchases made through these links, which she will likely turn around and sink right back into more crafty DIY supplies to share with all of you*
My kids all love Big Hero 6. It was the first movie G ever saw in the theater, and we have a decent collection of different Baymax toys, both with armor and without. He has Big Hero 6 sheets on his bed and a big plush Baymax to cuddle with at night.

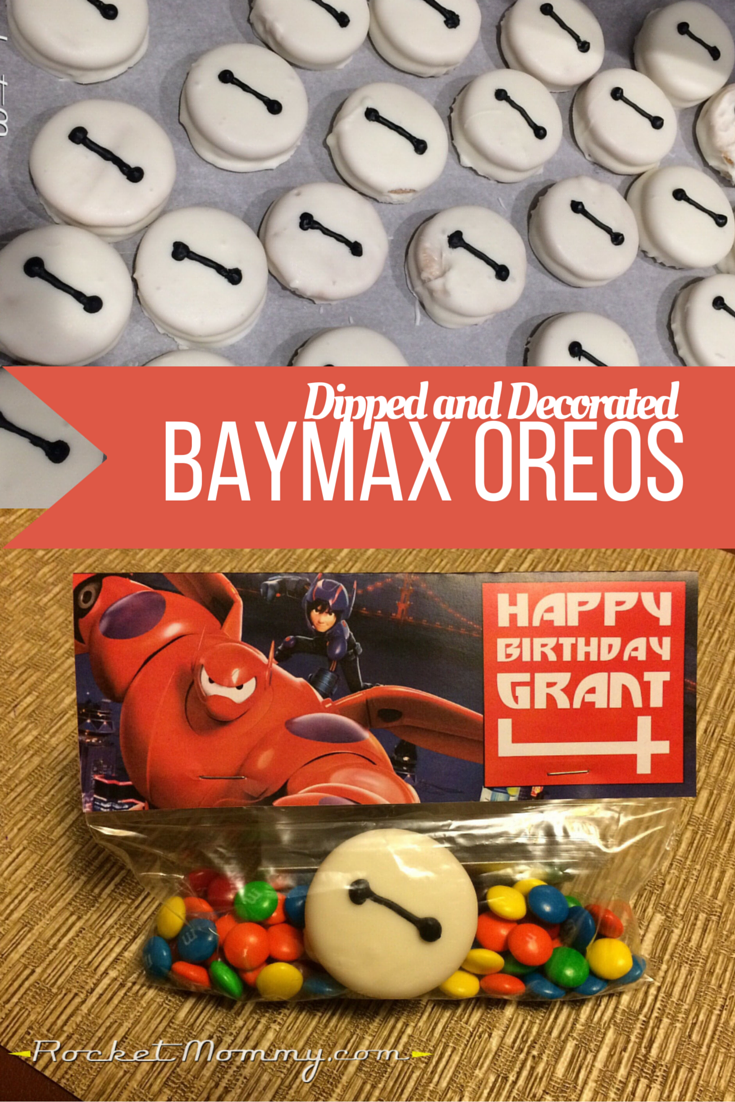
I love Baymax from a DIY perspective because he’s so easy! White circle, a couple of black dots, a line, and boom! So today and tomorrow I’m sharing two different Baymax food crafts you can put together for your little Big Hero 6 fan.
Craft #1 is a sweet treat that I put together for G’s birthday celebration at preschool.
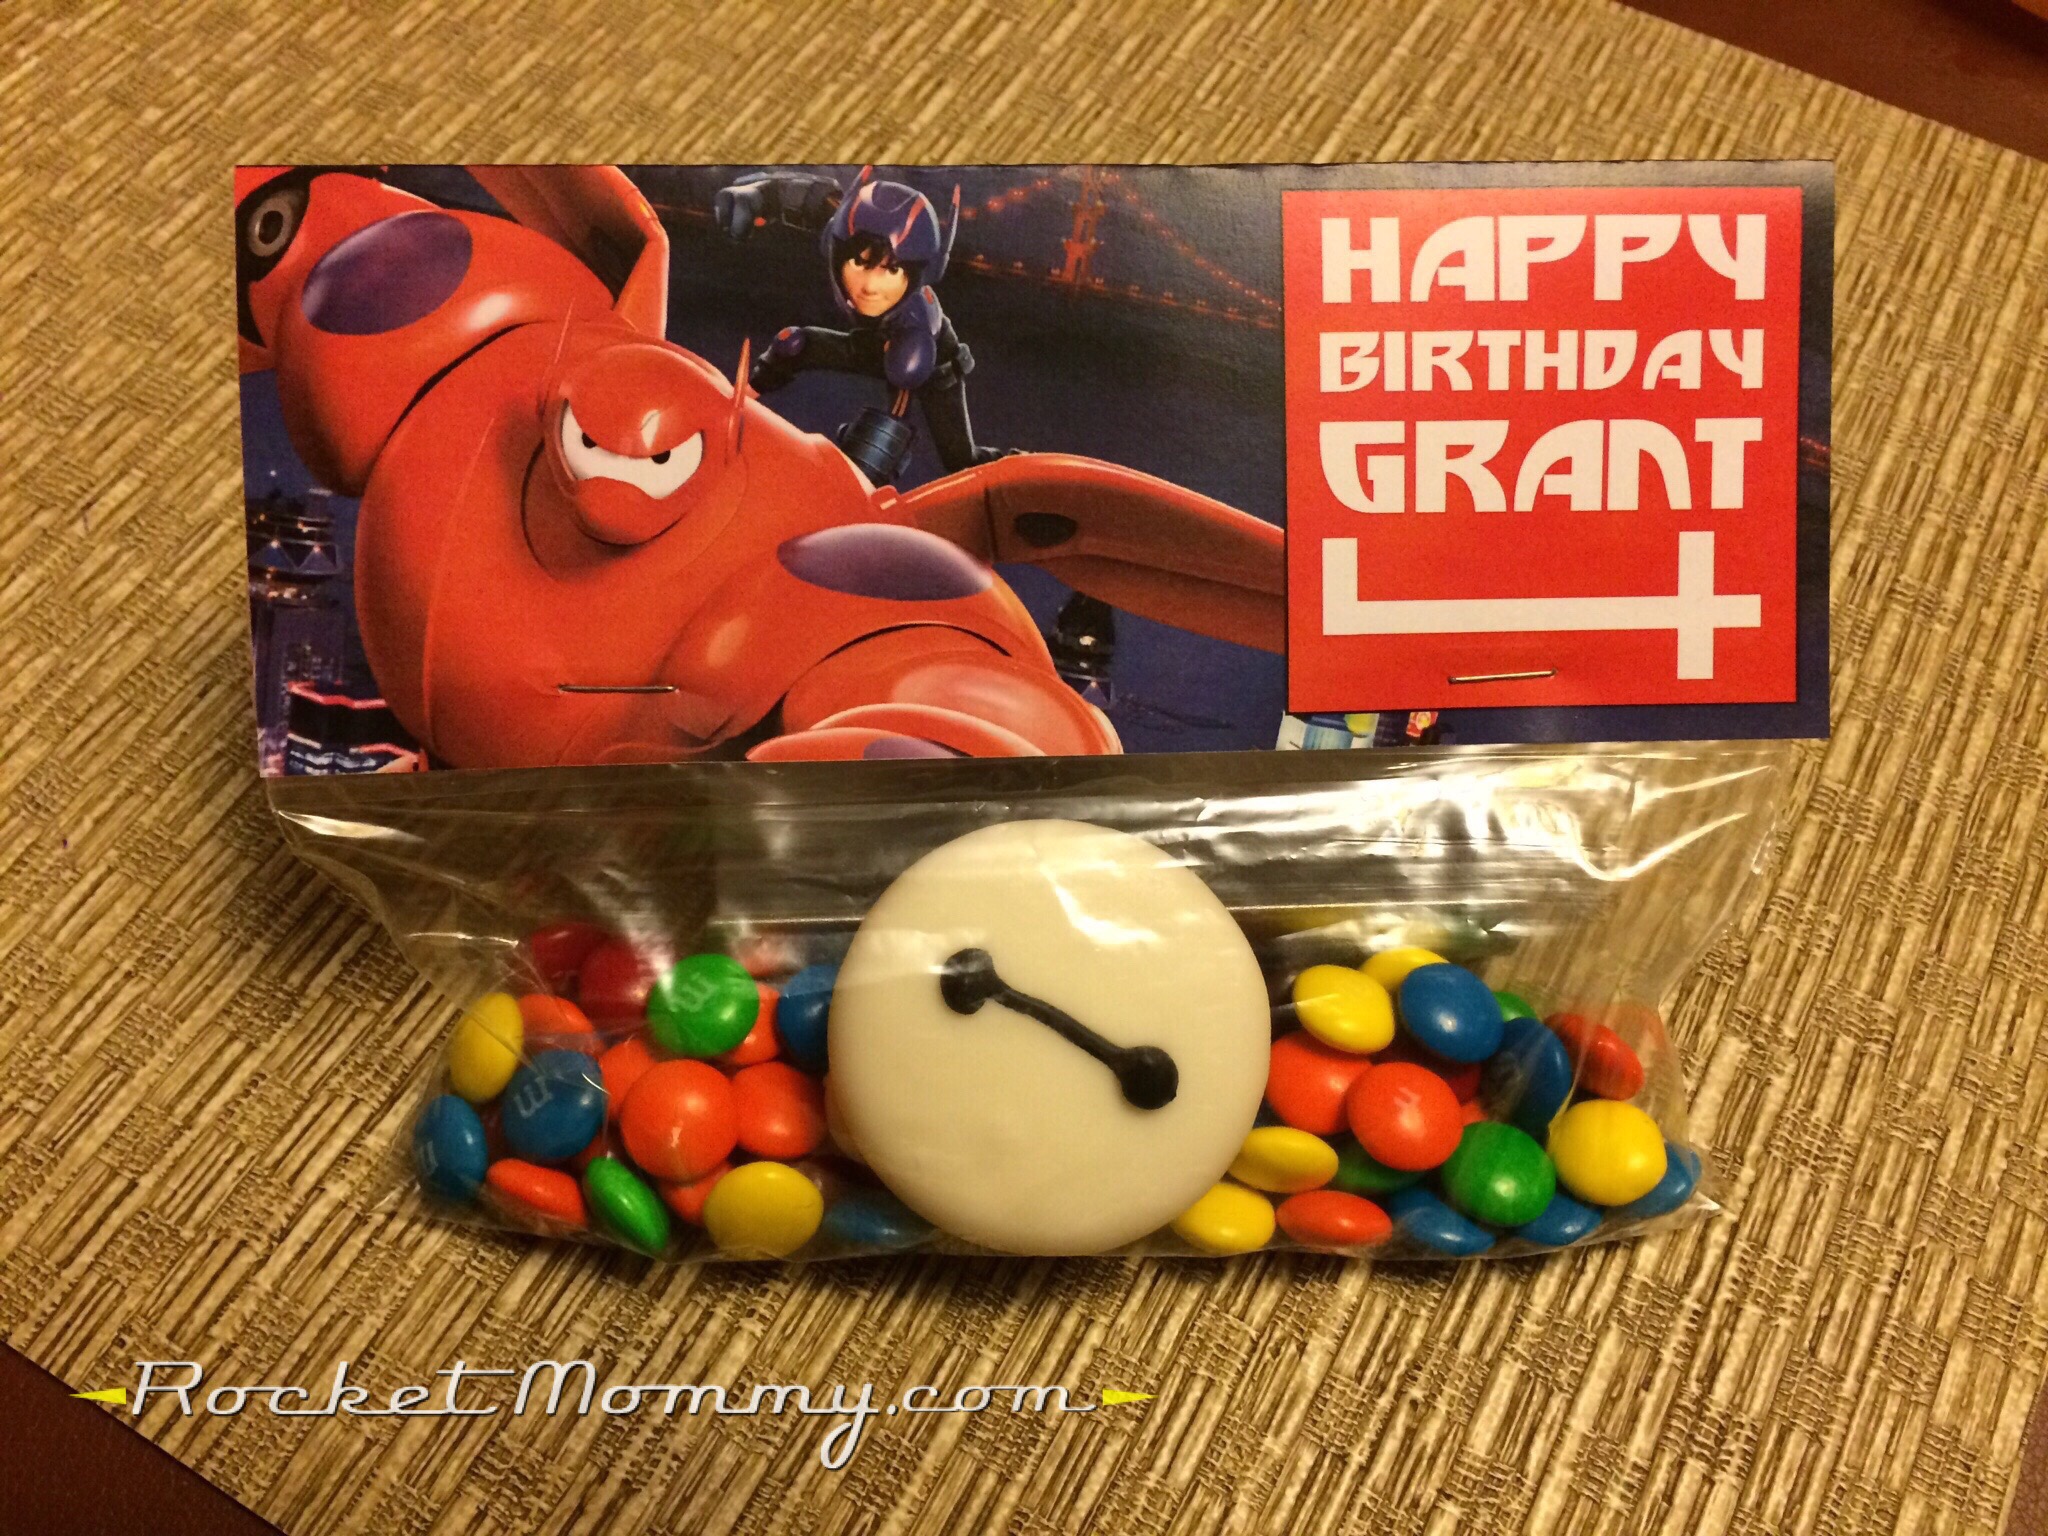
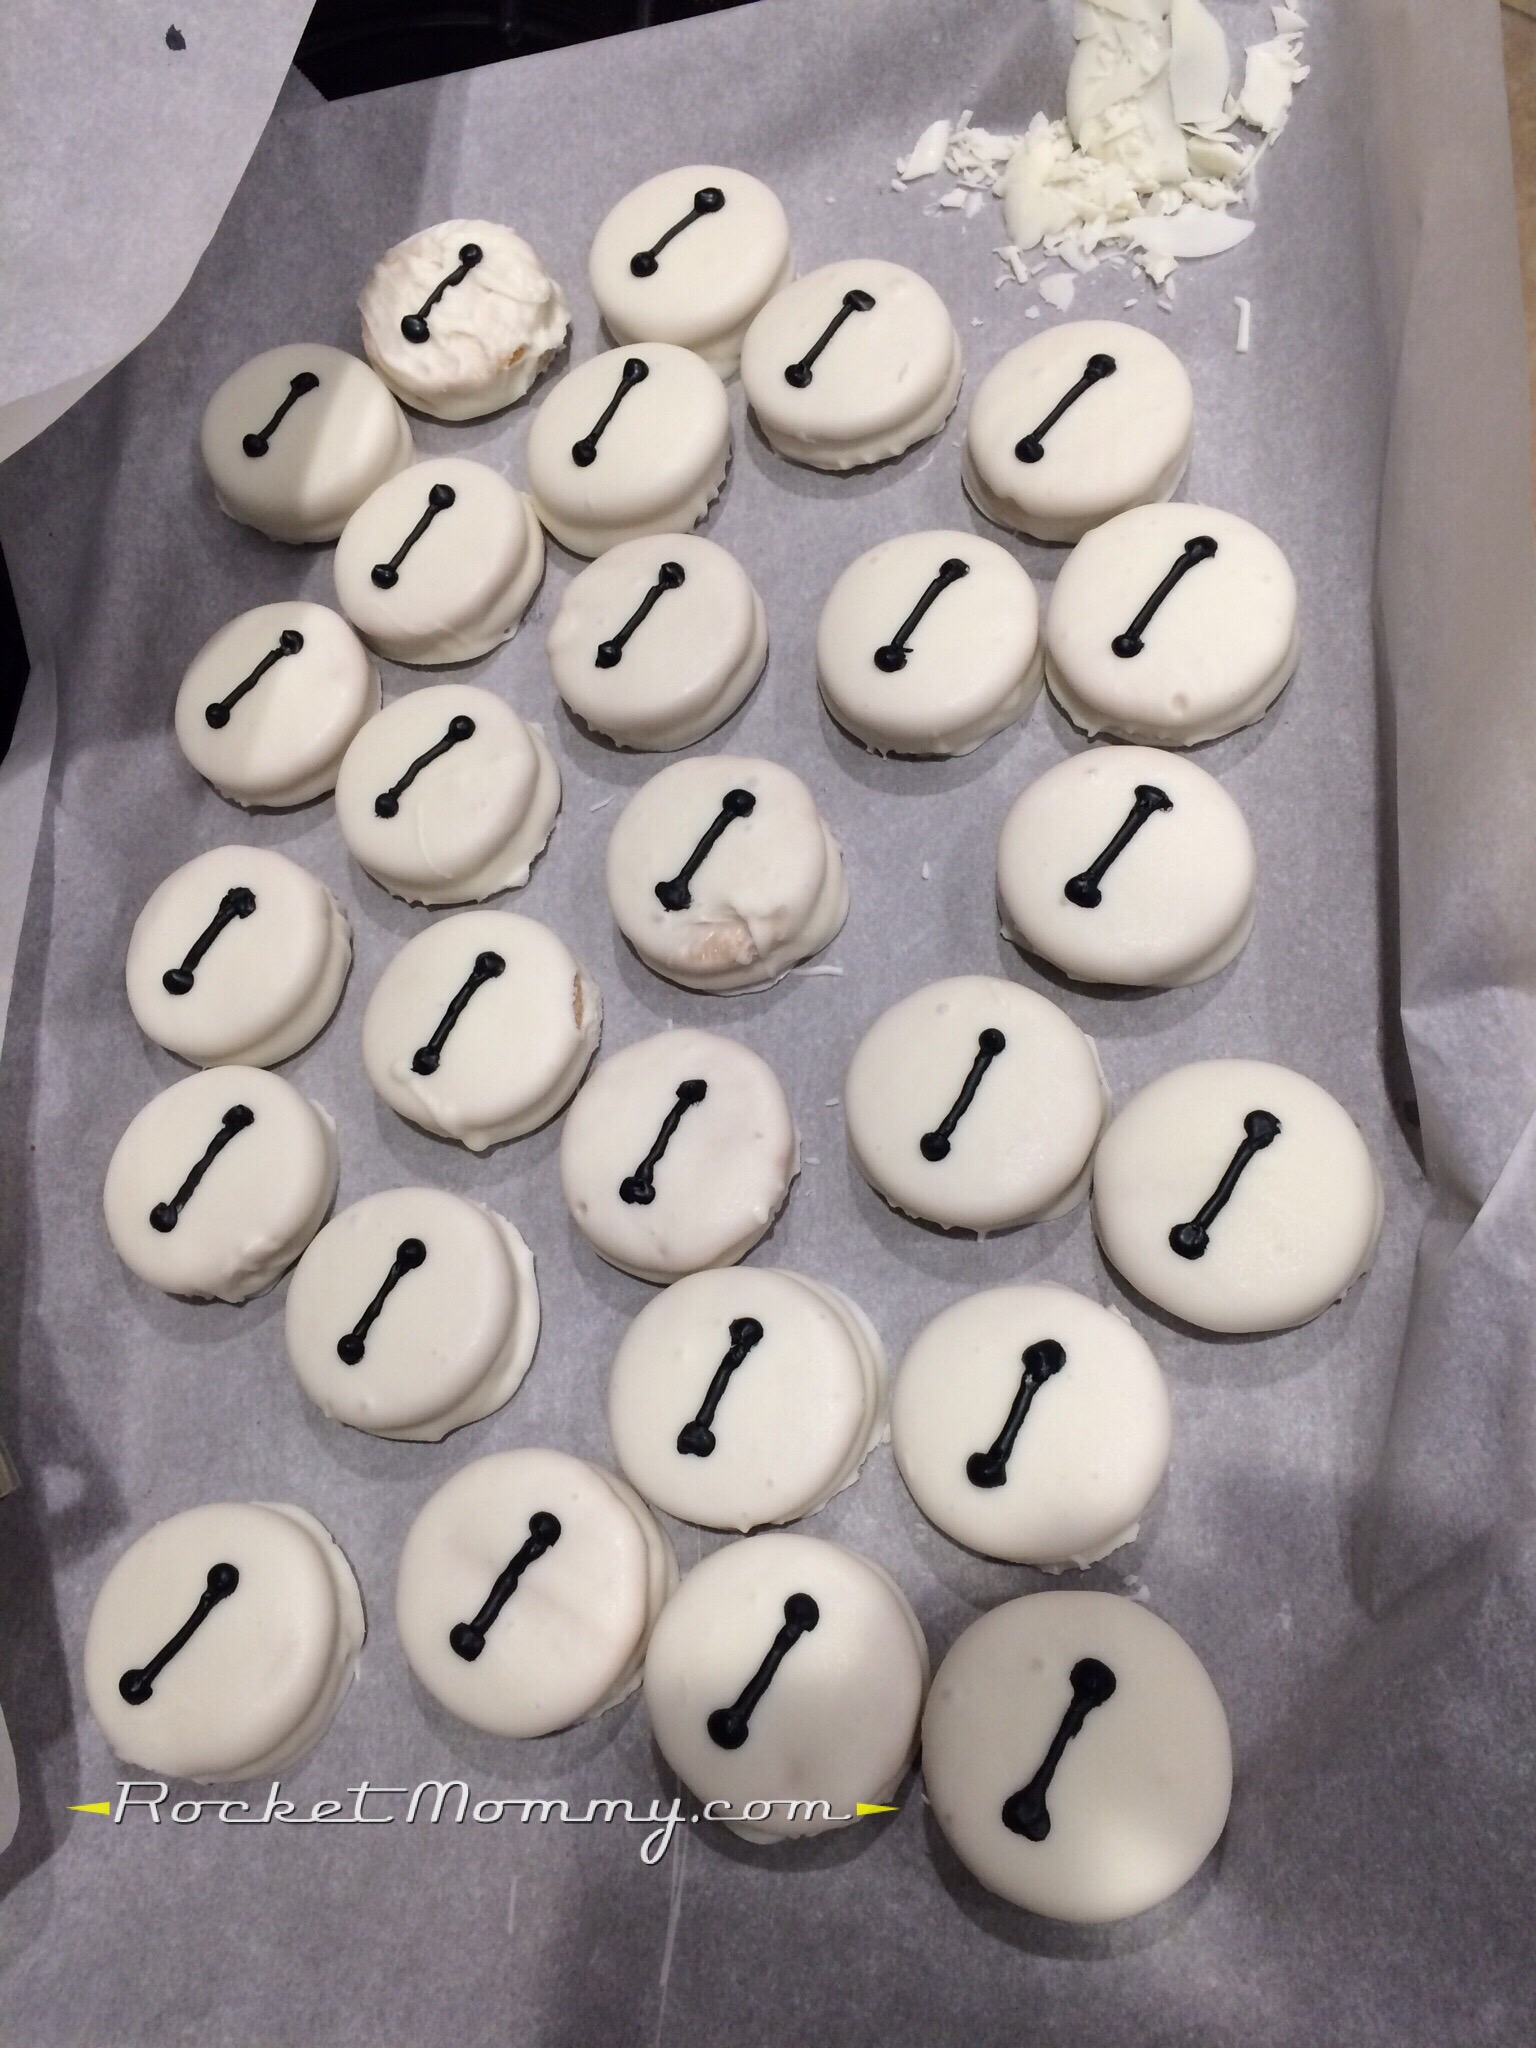
I bought a tray of white CandiQuik and a package of golden Oreos (I figured if the cookie showed through the coating it would be less obvious with the golden ones). Initially, I was going to make Oreo pops and put them on a stick first, but I tried that with one, decided right away it was going to be too much work, and just dipped the Oreos instead.
CandiQuik was surprisingly easy to work with. I’ve tried dipping things in real chocolate before and the results have always been a clumpy mess, so I was pleasantly surprised by how well it worked. It comes with the microwave-safe tray and you follow the directions on the package to melt it.
I wish I had step-by-step pictures for you, but sadly, I didn’t think to snap any until they were done. If I make dipped Oreos again, I promise I will do a photo tutorial and link it back here. But the process is simple: once your white coating is melted, you drop an Oreo in it. Then you take a fork and flip it over, letting the other side sit in the coating for a few seconds. Make sure you’ve got it all over the edges of your cookie too (if you have to flip it again, that’s fine) and then slide your fork underneath it and lift it out.
Hold it over the tray of coating and shake the fork from side to side to let the coating smooth itself out on the top. The excess will drip off into the tray. When it looks the way you want, slide it off the fork onto a piece of parchment paper. Don’t use your hands at this point! I found it was easiest to set the cookie down by one of the edges that were hanging off of the fork and then pull the fork out from under it as I set it down. You may have little bits of extra coating around the edge. It’ll be fine. Small threads and pieces of it can be broken off easily afterwards. If you’ve got a huge puddle, try and shake more of it off next time before you set it down.
They will take a while to set up, so once you have them all dipped, you can get ready to make your faces.
I did these with royal icing, which is what people generally use to decorate sugar cookies. You need, like, the world’s tiniest batch for these. This recipe is for a small batch, but you will still have quite a bit left over, so you might want to find some more things to decorate in the couple weeks following this project!
If you’re not planning to bag these up or stack them, you can also just buy a tube of black icing at the grocery store or craft store. I don’t trust those to harden up enough to keep the design intact if you’re going to touch the surface, and the royal icing will.
Also, I tried these food markers to draw the faces, thinking that would be a perfect solution. For whatever reason, I couldn’t get them to work on the Candiquik coating! I feel like I’ve seen people use these on cake pops and other stuff online, but it didn’t come out for me. However, they are a very cool tool to keep in your arsenal for other snacks, including the other Baymax snack that I’ll be sharing tomorrow!
Since I made these to give away to G’s preschool friends, I felt like I should dress them up a bit. I put them each in a Ziploc snack bag with a handful of M&Ms, then made this little topper for the bag and stapled it over the top. I did a quick a Google Images search and found a picture that I thought would work, then added the text in the corner using this Big Hero 6 font.
So that’s it for our Baymax sweet treat! Stay tuned tomorrow for a savory Baymax snack tutorial!
One thought on “Big Hero 6 – Baymax Treats and Snacks, Part 1”
Comments are closed.